
If you are at all intimidated by this process, don't be! Amazon has done a fantastic job in making Connect easy to get started with by providing a step-by-step setup process with a healthy set of defaults. They built it to be highly configurable and developer-friendly by providing Connect-specific SDKs, APIs, and a robust administrator portal that enables no-code workflows and drag-and-drop configuration.
If you are experimenting, then you will be glad to hear that Connect is covered by the AWS free tier. There is a good amount of free coverage for Connect services. You should not receive any charges by using a baseline setup, but as always, keep a close watch on usage so you can manage any incurred costs.
Creating and Configuring the Amazon Connect Instance
The first step is to create an Amazon Connect instance. Log in to your AWS account, navigate to the Amazon Connect service, and select "Create instance" from the button in the top right corner. This will bring up a setup wizard. The default settings are enough to get you started, but adjust accordingly based on your needs. Just remember to save the administrator username and password that you configure because you will be using it later to configure your instance.
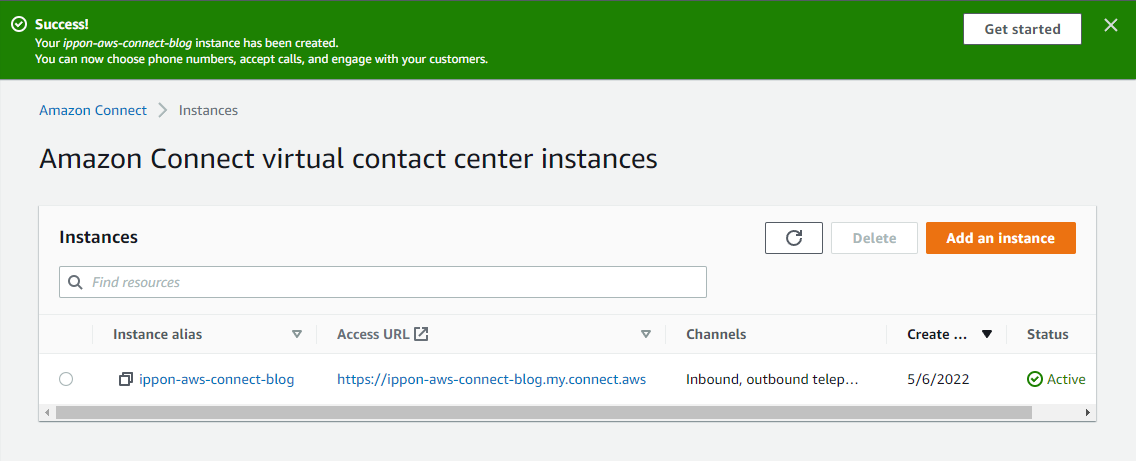
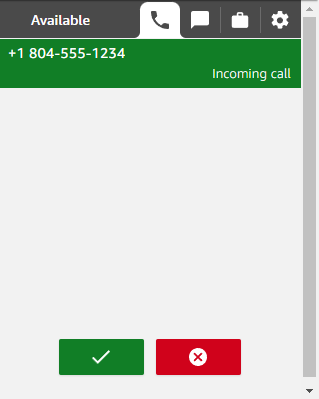
You should now have an instance created and ready with the settings that you specified through the setup process. Once the instance has launched, you can immediately preview the Contact Control Panel ("CCP", "control panel") using the following URL https://<instance_name>.my.connect.aws/ccp-v2/, replacing instance_name with your Connect instance's name.
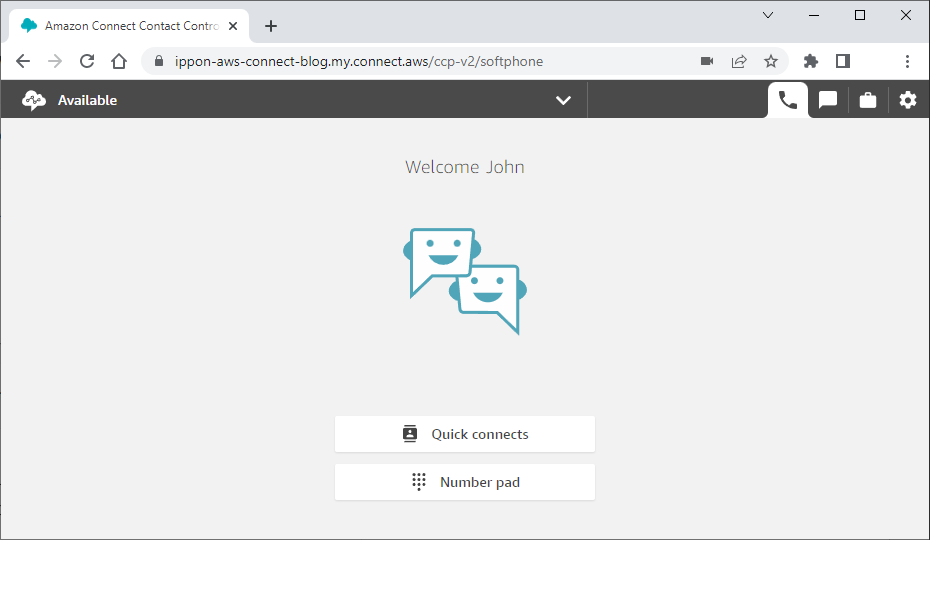
The CCP (shown above) represents the managed portion of the interface provided by AWS that allows for online voice and chat. It is the cornerstone for building a streamlined communication platform.
The CCP as a standalone UI has a couple drawbacks. For starters, it is another window that has to be juggled in addition to any existing applications in use by the agent. In addition, we lose real-time event information that we could be leveraging to aid the agent in servicing requests. The rest of this post focuses on how to integrate the CCP into a new or existing web application, thereby gaining the full benefits of the Connect platform.
Integrating the Contact Control Panel
The Amazon Connect Streams library makes it simple to integrate your web applications with Amazon Connect. It provides the functionality to directly embed the CCP to an existing (or new) web application and a robust API for hooking in to real-time events.
For demonstration purposes, I created an application using the Vue CLI then fully integrated the CCP to my newly created application. The end result is a local, runnable demo. The relevant pieces of the demo application are generic enough so that they can be repurposed to fit any web framework (React, Angular, etc.).
You can follow these steps to integrate the CCP to any web application:
-
Install the Connect Streams library using npm or yarn.
yarn add amazon-connect-streams -
Import the Connect Streams library in your application.
// import this only one time in your application // the "connect" singleton is available on the global scope import "amazon-connect-streams"; -
Create a HTML placeholder tag on your page.
<!-- Placeholder for embedding of the CCP --> <div id="ccp"></div> -
Initialize the control panel. Use your Connect instance identifier where it says
instance-idbelow./* initialize and bind to placeholder on your page */ connect.core.initCCP(document.getElementById('ccp'), { ccpUrl: 'https://instance-id.my.connect.aws/connect/ccp-v2', region: 'us-east-1', loginPopup: true, loginPopupAutoClose: true, softphone: { allowFramedSoftphone: true }, pageOptions: { enableAudioDeviceSettings: true, enablePhoneTypeSettings: true } }) -
(Optional) Hook in to Connect events.
// When an agent is logs in
connect.agent(agent => {
    // gather information about the agent
    const agentName = agent.getName()
    const agentContacts = agent.getContacts()
    const agentPermissions = agent.getPermissions()
})

// On inbound communication
connect.contact(contact => {
    // receive contact metadata
    const contactAttributes = contact.getAttributes()
})
Configuring your Amazon Connect Instance
The last step is to specify an approved origin. This is the base URL, and hence application(s), that you are giving permission to integrate with your new Connect instance. Follow the below steps to specify one or more approved origins based on your needs:
- Go to the Account overview page for your instance by clicking the
Instance aliasname from the Instances table - Select
Approved originsfrom the left-side navigation menu - Add the base URL for your web application. Examples include:
https://production-urlhttps://development-urlhttp://localhost:4200
Log in to your Connect instance using the admin credentials that you set up when first creating the instance. The first time that you log in, you will be presented a Dashboard page with a step-by-step tutorial on how to configure and tune your new Cloud Contact Center.
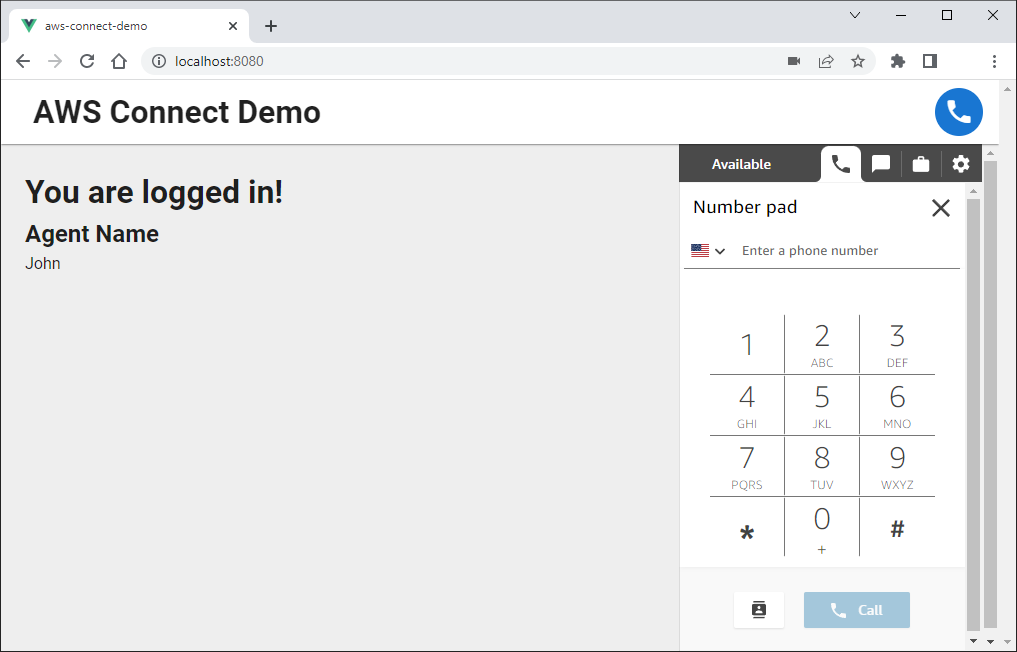
You should now be able to run your application after setting the approved origins. The image below shows a runnable demo (source available here).
Experience your new Functionality
Now that you are set up, let's do a brief run-through of the functionality that you have just unlocked.
Receive a Phone Call
In order to receive a phone call, you first need to claim a phone number:
- Log in to your Connect admin console at https://YOUR_INSTANCE_ID.my.connect.aws
- Use the admin credentials from your Connect setup (not your AWS account creds)
- On the left hand menu, navigate to Routing -> Phone Numbers
- Click "Claim a number" from the top left buttons
- Create either a toll-free or a DID (direct inward dialing) phone number
Now that you have a phone number, you are ready to receive inbound calls. Go to your application and set yourself as available in the CCP, then call your freshly-claimed number from another phone (e.g. your cellphone). You should see it come through as an inbound call in the CCP!
Receive a Chat
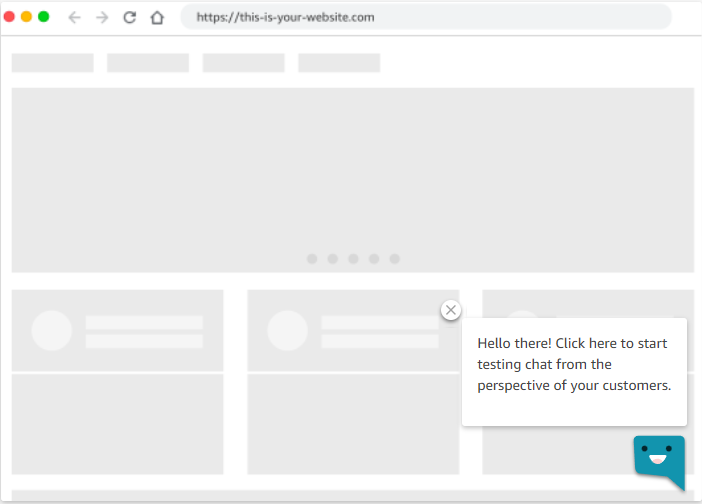
AWS provides a test simulation page for receiving inbound chats. This is great for our testing purposes. However, if you want to engage customers through your website, you can do so by embedding AWS' chat widget directly to your public website.
The first step to receiving a chat is to mark yourself as available on the CCP. By doing so, you are ready to receive inbound communication.
Next, visit https://YOUR_INSTANCE_ID.my.connect.aws/test-chat. This page will load a simulation to initiate a chat with an agent. Simply click the chat widget (shown below) and you will receive the inbound request on the CCP.
Receive Contact Events
One of the benefits of embedding the CCP to an application is being able to leverage the Amazon Connect Streams library. One example of this is simply reading information about the inbound contact. This is demonstrated below:
// On inbound communication
// https://github.com/amazon-connect/amazon-connect-streams/blob/master/Documentation.md#connectcontact
connect.contact(contact => {

    // is it a chat or a call?
    // ex. "chat"
    contactType = contact.getType();

    // if its an active session, how long as it been open?
    // ex. 120
    contactDuration = contact.getContactDuration();

    // is the call unanswered, answered, ended (pending close)
    // ex. { "type": "ended", "timestamp": "2022-05-17T13:23:33.462Z" }
    contactStatus = contact.getStatus();

    // which queue did this come from? i.e. was it a high-priority contact?
    // ex. { "queueARN": "arn:aws:connect:us-east-1:xxxxxxxxxxxx:instance/463534cd-1ba4-44f0-acdf-dfec3bd69104/queue/12dd58f7-9772-4e6b-bcc4-cb05b8fdd28c", "name": "BasicQueue", "queueId": "arn:aws:connect:us-east-1:xxxxxxxxxxxx:instance/463534cd-1ba4-44f0-acdf-dfec3bd69104/queue/12dd58f7-9772-4e6b-bcc4-cb05b8fdd28c" }
    contactQueue = contact.getQueue();

    // get capability information. ex. are file transfers enabled on the client's device?
    // ex. { "attachmentsEnabled": false, "messagingMarkdownEnabled": false, "multiPartyConferenceEnabled": null }
    contactFeatures = contact.getContactFeatures();
})
Wrapping Up
This is just a fraction of what is possible with Amazon Connect. By going all in with Connect, you now have full control over how to customize your agent and customer workflows by leveraging all that Connect has to offer. Explore your channels of communication, set yours hours of operations, create queues to route contacts, utilize contact flows (IVR) to build your customers' experience, and much more.
At Ippon, we have extensive knowledge when it comes to agent servicing platforms and a track record that proves it. If you need expertise or guidance in this area, don't hesitate to reach out to us as your trusted partner.

Comments