

End-to-end (e2e) testing is one of the most overlooked, underappreciated aspects of software delivery. A well written e2e suite gives you the confidence to develop and deploy quickly. A badly written e2e suite results in deliverables of unknown quality, leads to frustration, and inevitably project delays. As Michael Feathres wrote in his book, Working Effectively with Legacy Code:
To me, legacy code is simply code without tests. I’ve gotten some grief for this definition… I have no problem defining legacy code as code without tests. It is a good working definition, and it points to a solution.
The problem I have found with e2e testing suites, is that they are generally very difficult to setup and maintain. Particularly in the JavaScript space there are a bunch of existing frameworks and libraries available, but I feel that every time I try and do something I spend the majority of my time fumbling with different versions and configuration incompatibilities. It's like trying to tape a bunch of cats together.
Enter Gauge, a new lightweight Open Source Testing Framework. It provides an opinionated CLI tool to allow you to rapidly develop tests, without having to worry about the underlying plumbing. Install gauge, select a language, start writing tests. A promise too good to be true?
Gauge Overview
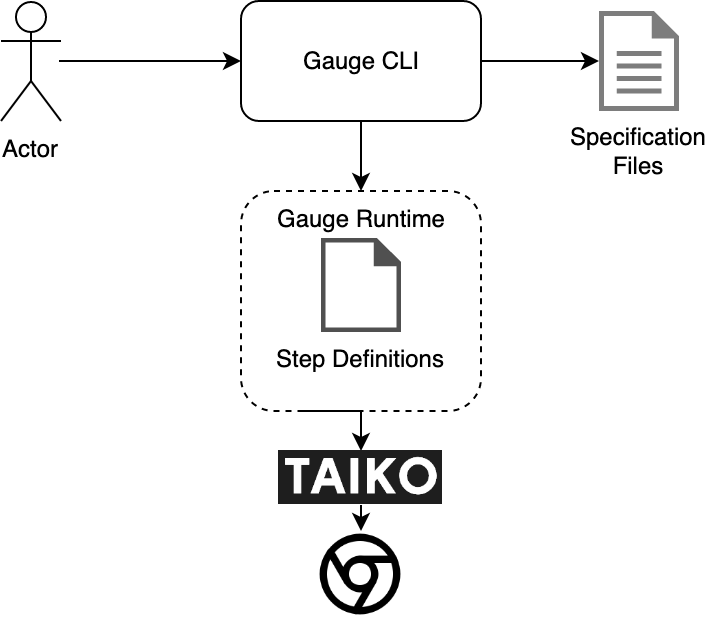
There are a number of parts that makeup Gauge, and it is important to understand how each of them interact.
Specification Files
Gauge uses a Markdown based format for its specification files. It is similar to the Gherkin syntax used by Cucumber, but offers the flexibility of being able to have steps littered throughout more complex explanations. There is a fairly standard Scenario > Step structure, similar to Gherkin, and it supports familiar tagging and table syntaxes. Anything that you expect in Gherkin should be available in Gauge.
There are however, a couple of very powerful other features.
- Concepts Steps: Allow you to combine re-usable logical groups of steps into a single unit. Think of having a "Login with user "bob" function, where you define the login as a Concept which you can reuse across different scenarios.
- Special Parameters: It natively allows you to externalize large text In Files, or pass in large tables via CSV. No more enormous specification files.
- VS Code Integration: The integration is second to none, with step auto-complete and the ability to handle execution from within VS Code.
Gauge Runner
Gauge itself is written in Go, but allows you to define your step definitions in a variety of other languages. There is official Gauge support for Java, C#, Ruby, JavaScript, Go and Python. The Java and JavaScript runners seem to be the most feature rich, and we will be looking at the JS runner because it supports Taiko.
Step Definitions
The step definitions provide the glue for the execution of your tests, similar to how they work for Cucumber. However, there are a couple of additional features that I would like to call out:
- Filtering Hooks: Allow you to trigger filters based on tags associated with a scenario. So for example, you might setup a test differently if it is a production test instead of a local test.
- Data Stores: Gauge provides a mechanism to store and retrieve data between step definitions. This is important, because Gauge allows your tests to be run in parallel.
Gauge CLI
The CLI is the heart of Gauge. It allows you to execute your specs as required, initialize your project, and interact with your test suite. The power is in its simplicity; you have one utility that you need to remember and that is it.
Taiko
Taiko is a Node library for interacting with Chrome, which on the surface sounds very similar to Selenium. Despite the similarities, its main difference is its smart selector system. The aim with this is that you treat the webpage itself as a black-box, and you interact with it like a user would.
Let us take a login scenario as an example, where a user needs to enter their username and password before proceeding. Using a traditional Selenium approach, you would use some kind of selector, generally a CSS selector, to identify the input boxes, and then write in the values as required. With Taiko, you state that you want to write a value into a field, and you select it by its onscreen label; this might even be a label above the actual element. Taiko then works out which element you require based on the action you are performing, and the data you have provided. You effectively are able to use the presentation of the page to interact with it, instead of having to worry about the underlying structure. If a developer inadvertently renames an element, or restructures some of the HTML, as long as the presentation is the same/similar, your tests will still function. I am sure there are scenarios where this won't work effectively, so there are fallback options.
Another amazing feature of Taiko is the Interactive Recorder, with is a RPL interactive shell which allows you to interact with your browser dynamically. This allows you to verify the Taiko commands you would like to use, and will also generate the code for you when you are done.
Example
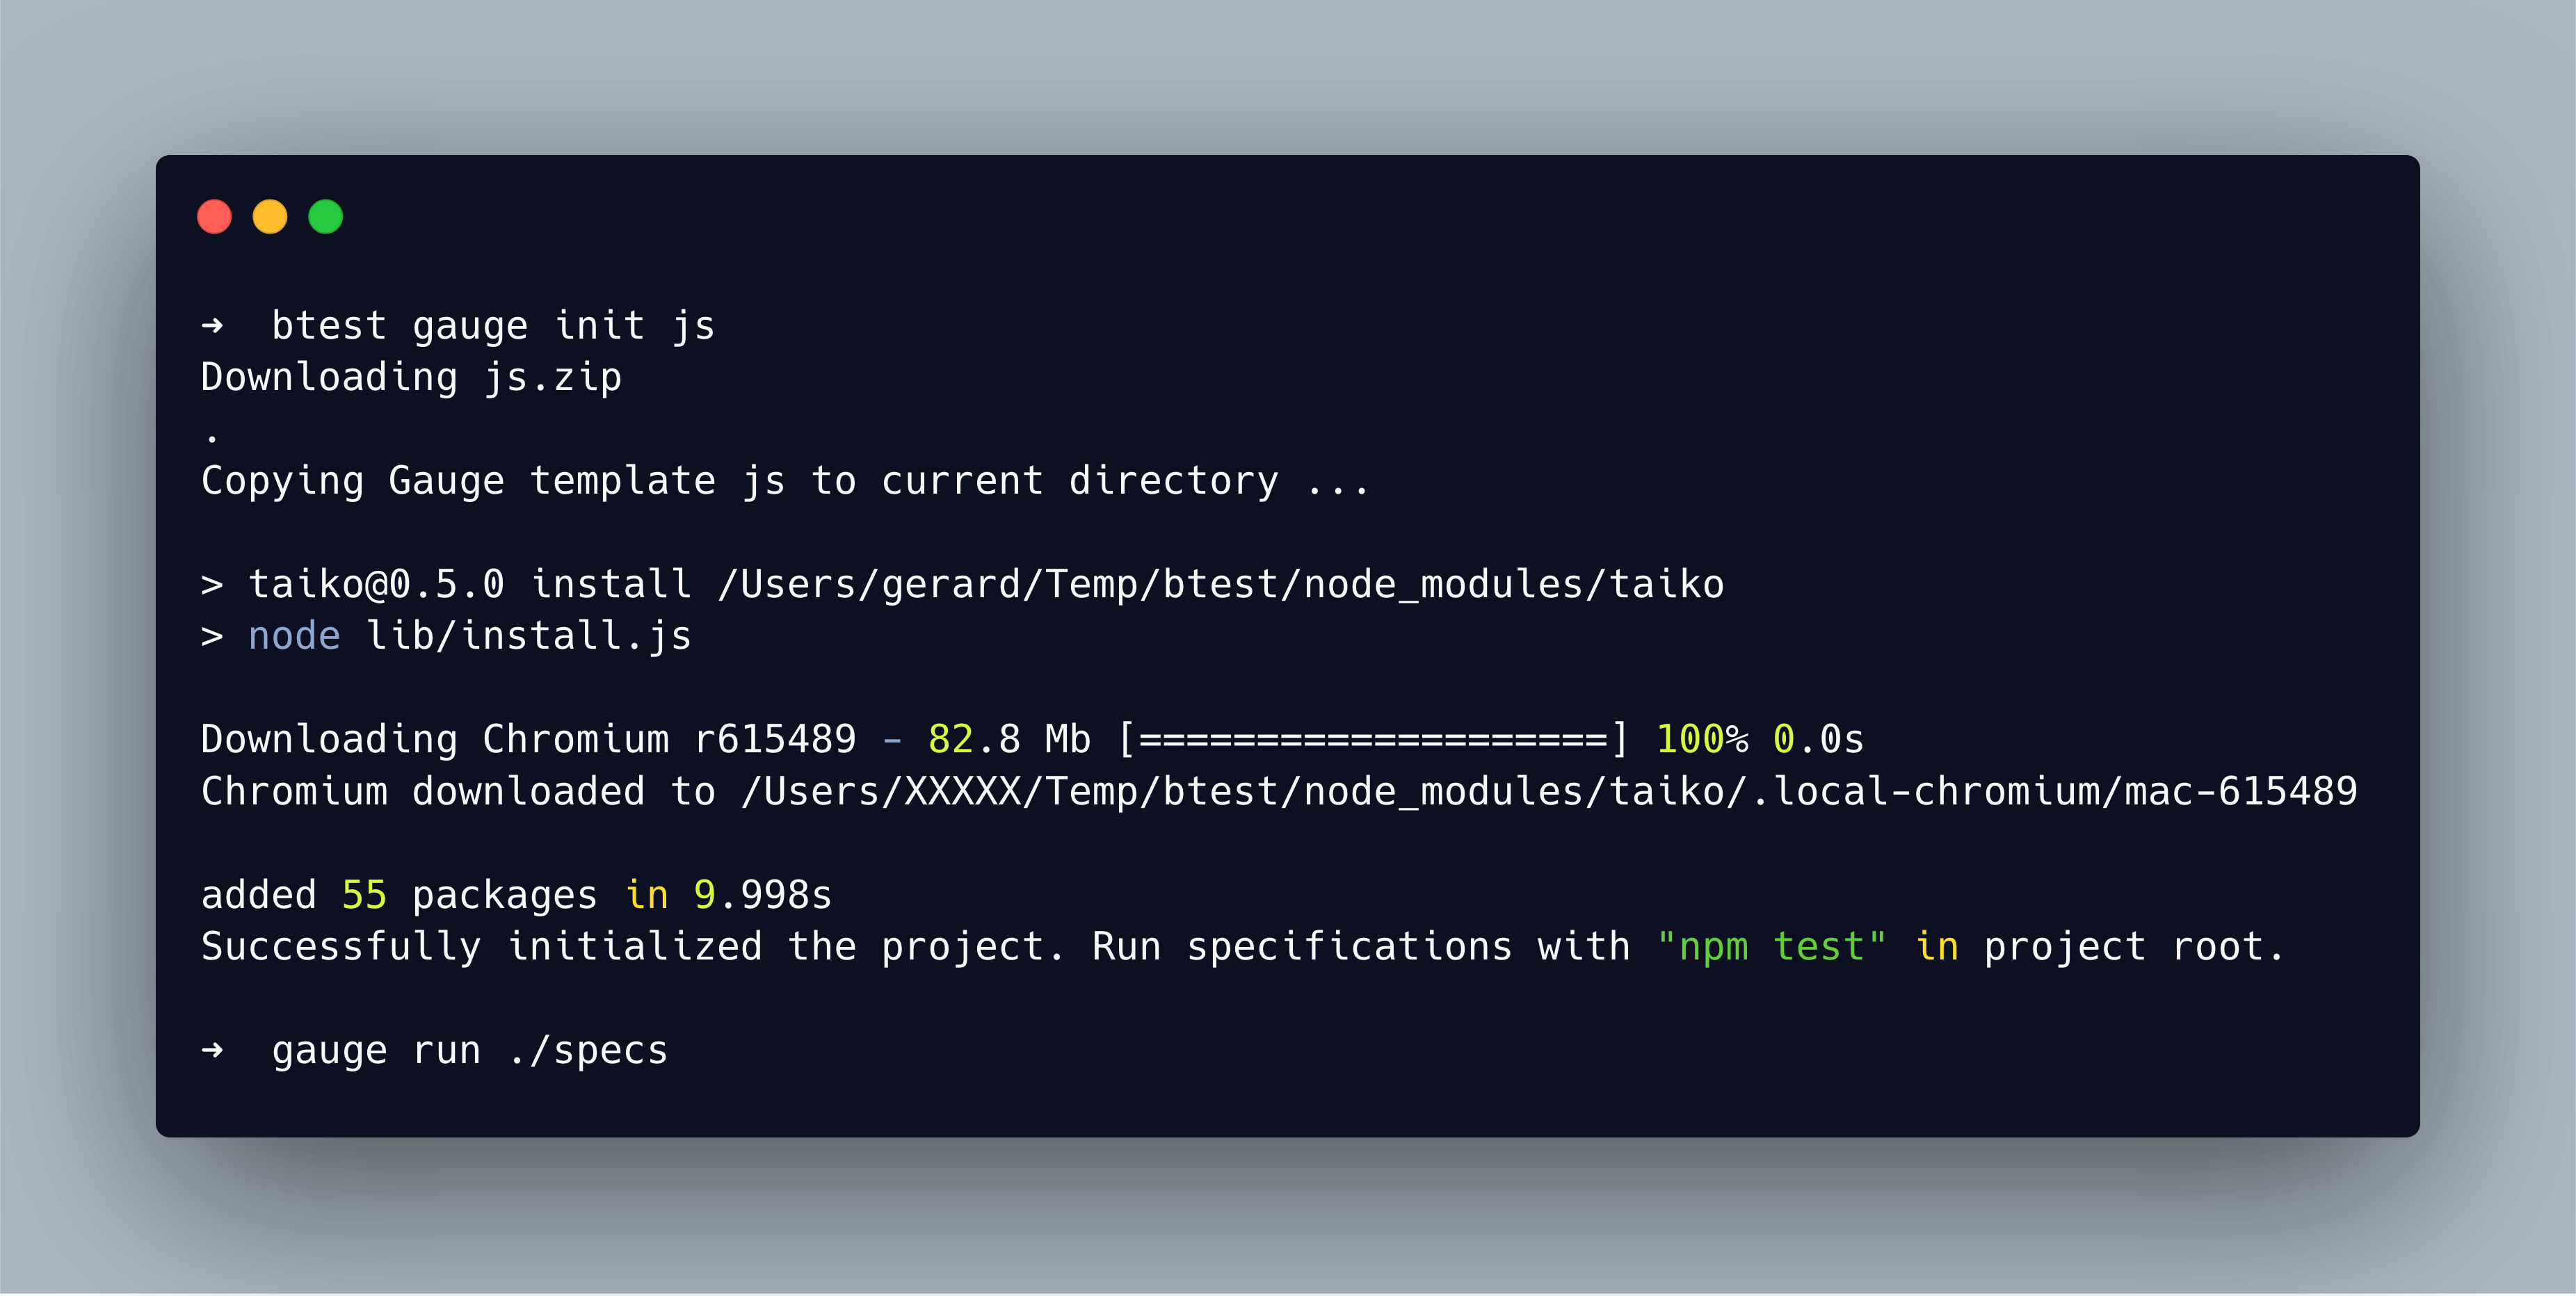
You will first need to install Gauge. There are plenty of package options available; for example on MacOS you can use brew. Once installed, all you need to do is run the following to initialise your Taiko based project.
gauge init js
And then running it is as simple as:
gauge run ./specs
You're already cooking with gas. Now, say we want to have a test that goes to the Jhipster page and clicks the Sponsors link. You can use the Taiko RPL to generate the step definition for you. See below for an example of interacting with Taiko.
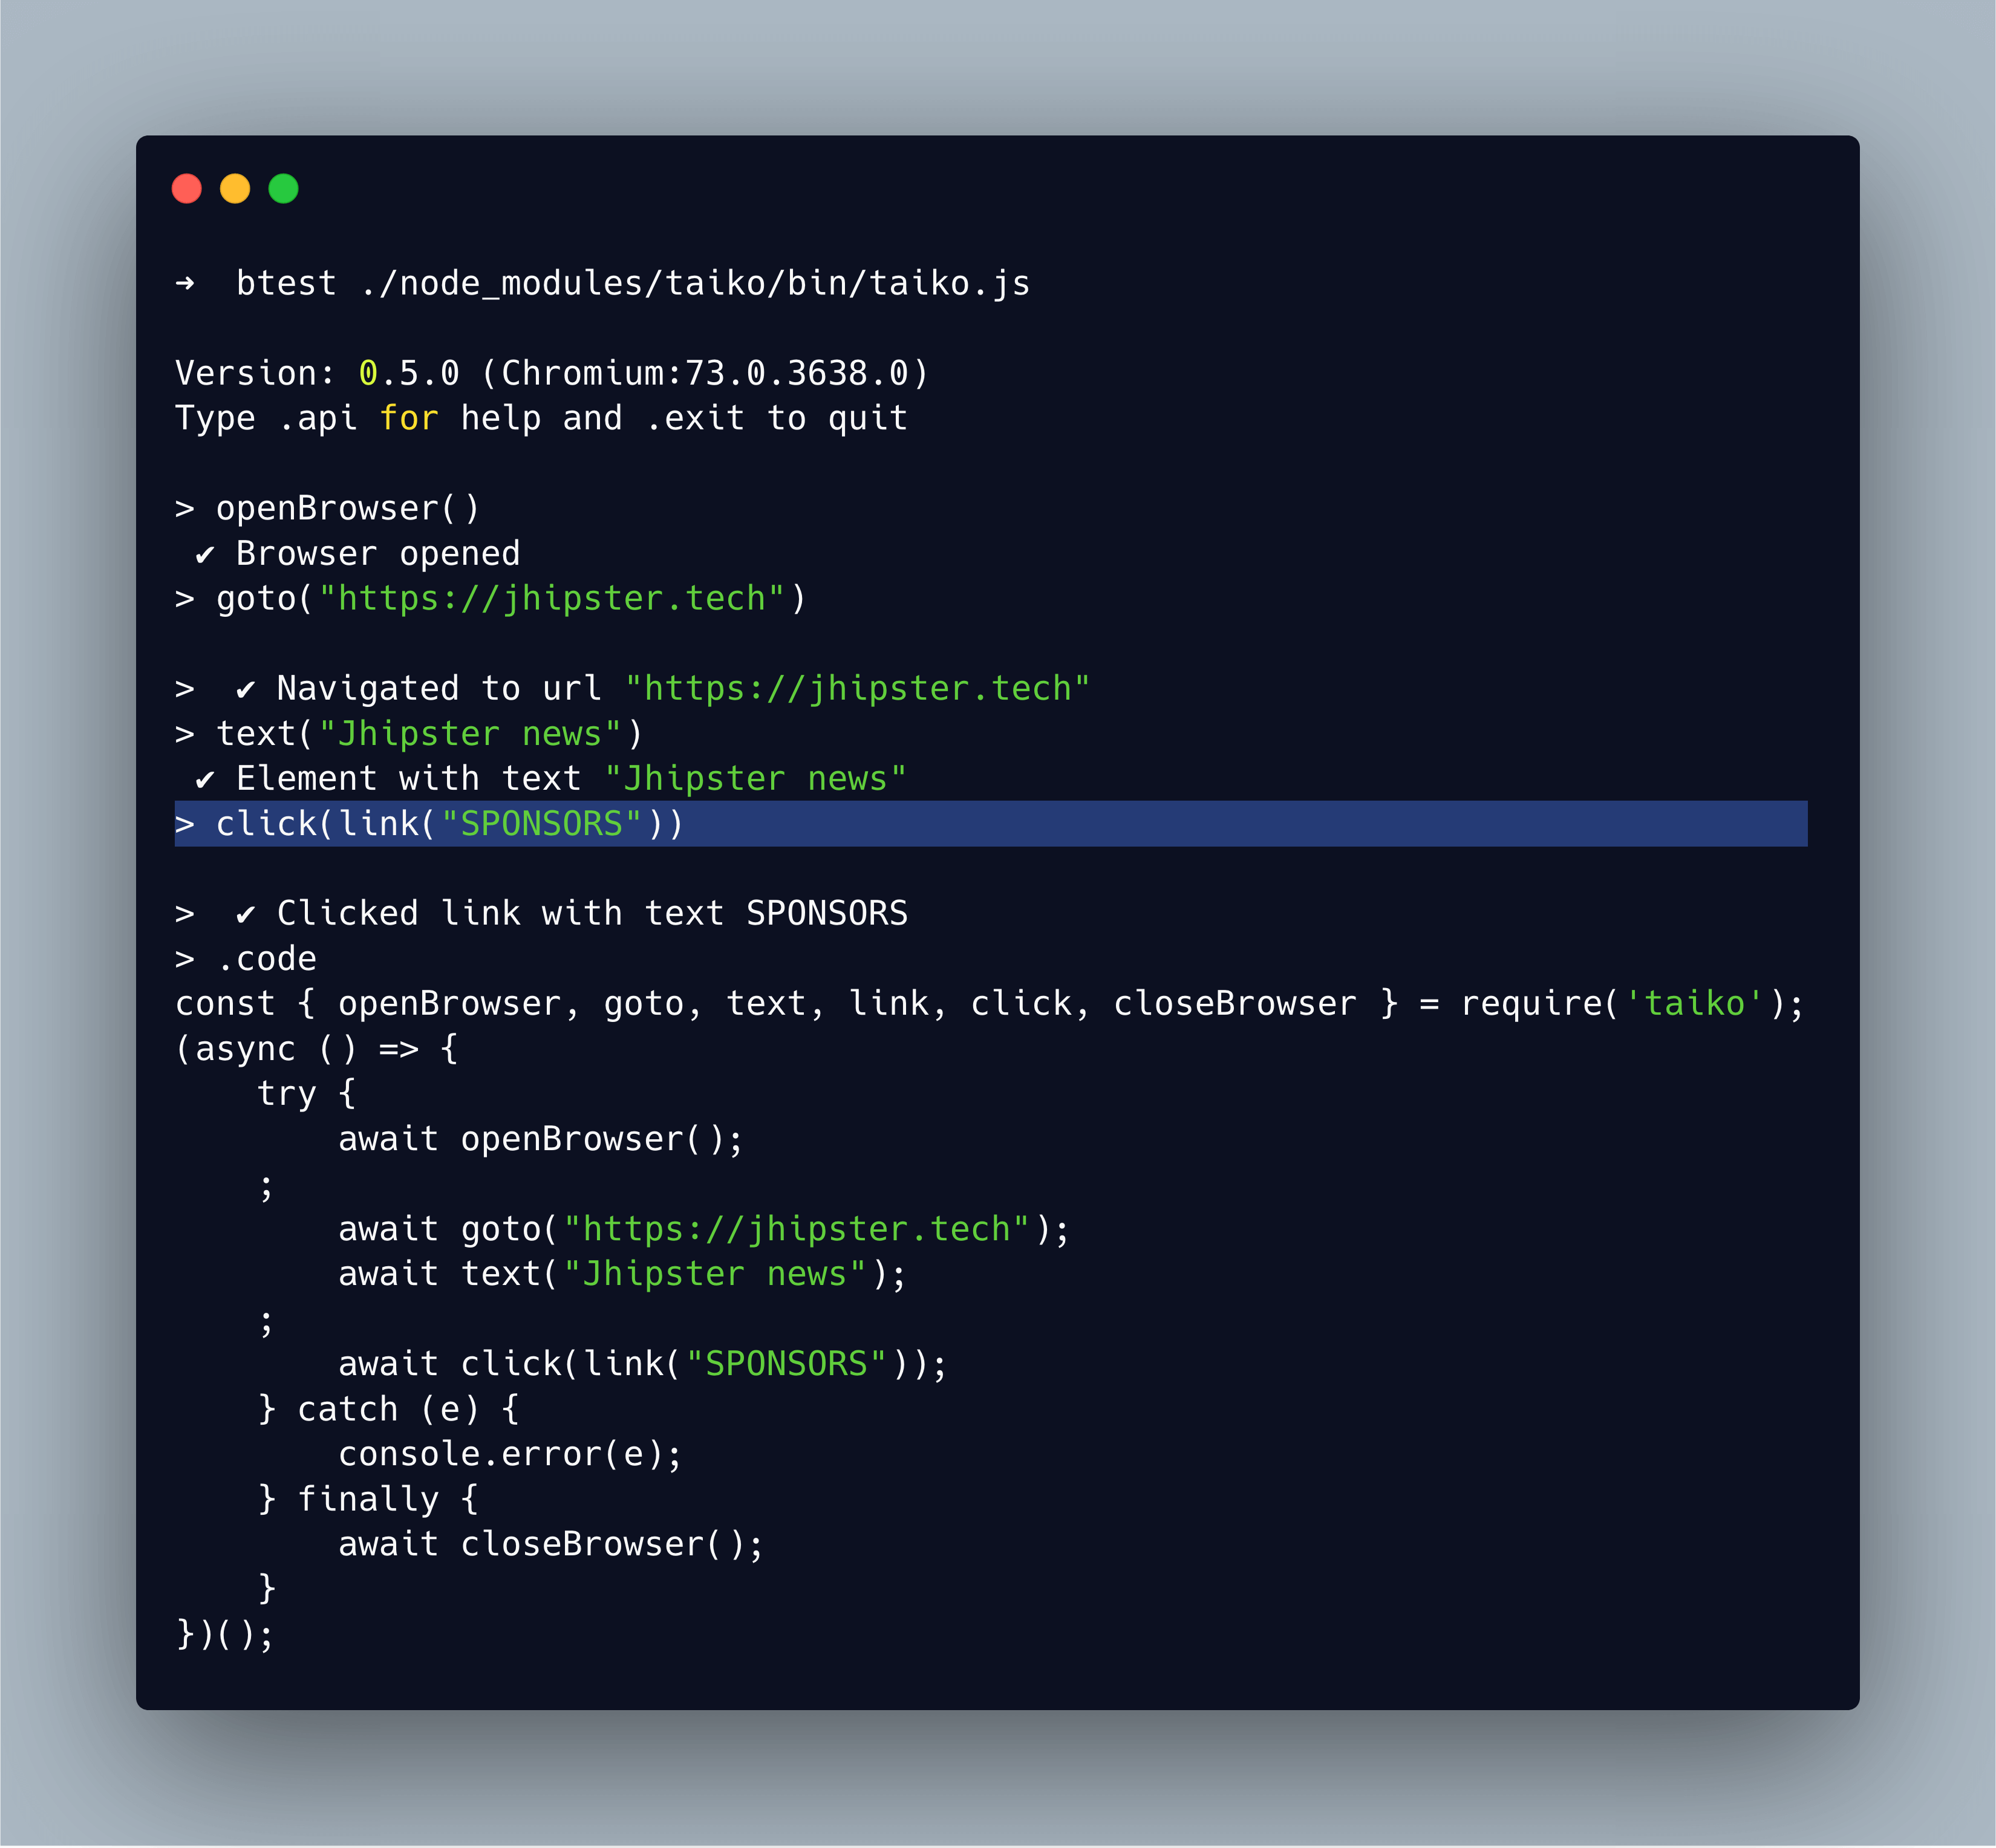
The code generated by the .code command can then be inserted into a step definition, or multiple step definitions. It is generally better to have generic step definitions, and then use detailed definitions for things that really require them. You can also always use Concepts to bundle up complex interactions into single steps, another useful feature of Gauge.
If we massage the above generated code into the following step definitions, we can make it generic.
const {
    openBrowser, write, closeBrowser, goto, press, text, contains
} = require('taiko');
const assert = require("assert");
const headless = process.env.headless_chrome.toLowerCase() === 'true';
beforeSuite(async () => {
    await openBrowser({
        headless: headless
    })
});

afterSuite(async () => {
    await closeBrowser();
});

step("Goto <url>", async (url) => {
    await goto(url);
});

step("Page contains <textToCheck>", async (textToCheck) => {
    await text(textToCheck);
})

step("Click link <linkText>", async (linkText) => {
    await click(link(linkText));
})
Then, the specification file can look like this:
# Fun with Gauge
## Go to JHipster
* Goto "https://jhipster.tech"
* Page contains "Jhipster news"
* Click link "SPONSORS"
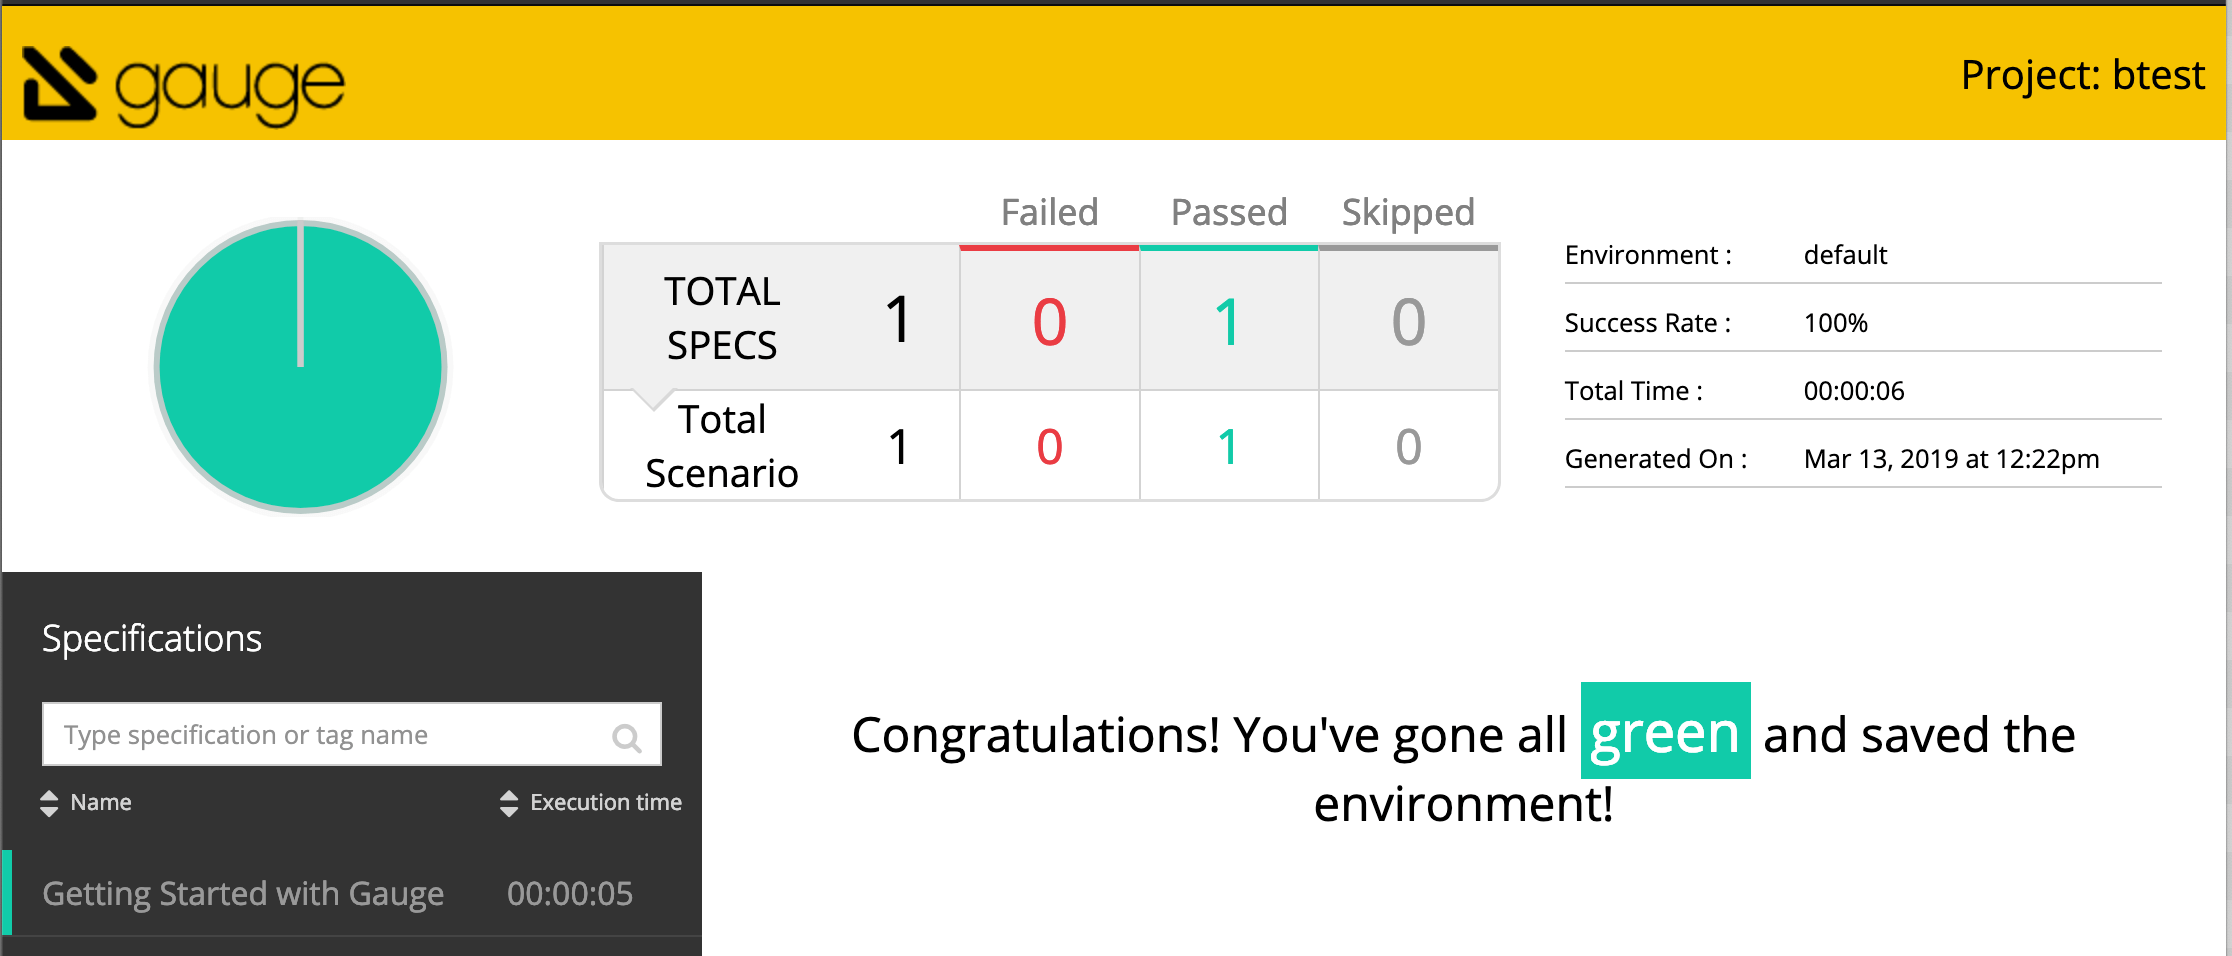
Running it again via gauge run ./specs will have the test navigate to the website and interact with the defined elements. It also generates a pretty report for you so you can see what is up.
Final Thoughts
Gauge for me fills a gap in the market when it comes to fast, maintainable testing. It takes the lessons learned around Cucumber and Selenium, and removes the obvious pain points around them. It seems obvious that e2e testing would move in this direction, and I am excited to see where it is going to develop in the future. Go get Gauge, and start testing.

Comments