

Rather than continue to stand on the side lines watching blockchain tech evolve, I thought I would venture into this new ambiguous world. There’s a lot of material to cover when exploring blockchain technology so I decided to focus on the blockchain itself.
My goal is simple: create a private multi-node blockchain using the Ethereum blockchain.
Here are my steps. Steps 1–6 focus on getting the private network up and running. Steps 7 & 8 are used to test the private network.
- Install go-ethereum aka geth
- Build the node directories locally
- Create accounts
- Write the “genesis block”
- Start gethon each node
- Connect the nodes
- Exchange some ether
- Start the miner
Preface
This post is designed to get you up and running with blockchain quickly while exposing you to some of the underlying tech. There are easier ways to create a blockchain private network, but they often obscure a lot of the implementation and build work. Ethereum is one of the more popular implementations of blockchain. Therefore, there are quite a bit of resources and development tools to support the Ethereum development community.
Some things to keep in mind while starting out with blockchain:
- Blockchain ≠ bitcoin
- Blockchain is designed to be decentralized however, it does not have to be. An entire blockchain can exist on a single machine
- Ethereum is just one implementation of blockchain; there are several others
Step 1, Installing geth
There are several client tool implementations available for the Ethereum network. In fact, if you go to the Ethereum website you’ll find a whole list of them, go-ethereum being the most popular. Geth is the tool you will use to interface with an instance running the Ethereum blockchain allowing you to interact with the Ethereum network.
To install it on a Mac use the following commands
brew update
brew upgrade
brew tap ethereum/ethereum
brew install ethereum
See the wiki for instructions on installing it on Windows or Linux.
Step 2, Node Directory
The real public Ethereum network is made up of thousands of nodes all over the world creating a decentralized network. In a private network, each node is explicitly defined and only selected entities are permitted to interact with the blockchain. There are many different applications and uses for public vs private network some of which are described here. For my purpose I chose to start small and create all my nodes locally on one machine.
Create 3 new directories, each representing a single node in your private network…
$ mkdir node01 node02 node03
Each directory or node will contain its own accounts, keystore, node key, etc.
Step 3, Create Ethereum Accounts
I want to start off my private network with some preloaded Ethereum accounts. Before I can preload the accounts, I must have the accounts created already. Select node02 as the node to create preloaded accounts. Then use the following command to add an 3 accounts to node02:
$ geth --datadir "/path_to_your_node02_directory/" account new
Create an account on node02.
The --datadir flag is very important as it specifies which directory to use for the databases and keystores. Failing to specify the --datadir will result in the account(s) being created in the incorrect directory. Make sure you record the account addresses for use in the genesis file.
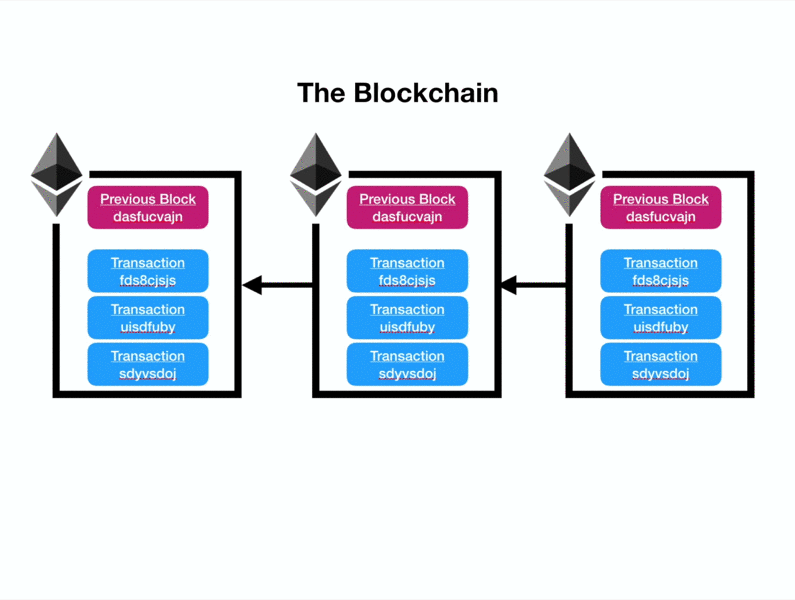
Step 4, Write the Genesis File
The genesis file is a simple JSON files used to describe the very first block on the blockchain. Each node in your network must be initialized using the same genesis block.
Create a file named custom_genesis_file.json and save it somewhere easily accessible outside of one of your node directories. Copy the contents shown below making sure to replace the addresses with those of the accounts created in Step 3 and paste them into custom_genesis_file.json:
{
    "config": {
        "chainId": 15,
        "homesteadBlock": 0,
        "eip155Block": 0,
        "eip158Block": 0
    },
    "difficulty": "400000",
    "gasLimit": "2100000",
    "alloc": {
        "[Account #1 Address]": { "balance": "1000000000000000000" },
        "[Account #2 Address]": { "balance": "2000000000000000000" },
	"[Account #3 Address]": { "balance": "3000000000000000000" }
    }
}
There are several different configurations you can adjust in the genesis file. The config parameter describes the chain itself. For now, I’ll focus on 3: alloc, gasLimit, and difficulty.
The difficulty parameter determines how challenging it is for a miner to discover a valid block. The higher the value the more challenging and therefore, the longer it will take to mine a block.
The gasLimit refers to the maximum amount of gas that can be spent on a transaction. Ethereum gas is a mechanism to power transactions and smart contracts that run on the blockchain.
To preallocate funds, use the addresses from the new accounts created in Step 3. You can set the balance to your desired amount in Wei (1 Wei = 10^-18 ETH).
"alloc": {
  "[YOUR ACCOUNT ADDRESS]": { "balance": "[PREALLOCATED AMOUNT]" }
Find a conversion chart of Ethereum denominations here.
Step 5, Start the Nodes
Before we can start the nodes you must initialize each node using the genesis file created in the previous step.
$ geth --datadir "/path_to_your/node_directory/" init /path_to/custom_genesis_file.json`
You will need to do this for each node directory you created in Step 2. Pay careful attention to the path you use. If the directory is incorrectly initialized, the node will not be able to connect to the private network you have created.
Start each node using the following command…
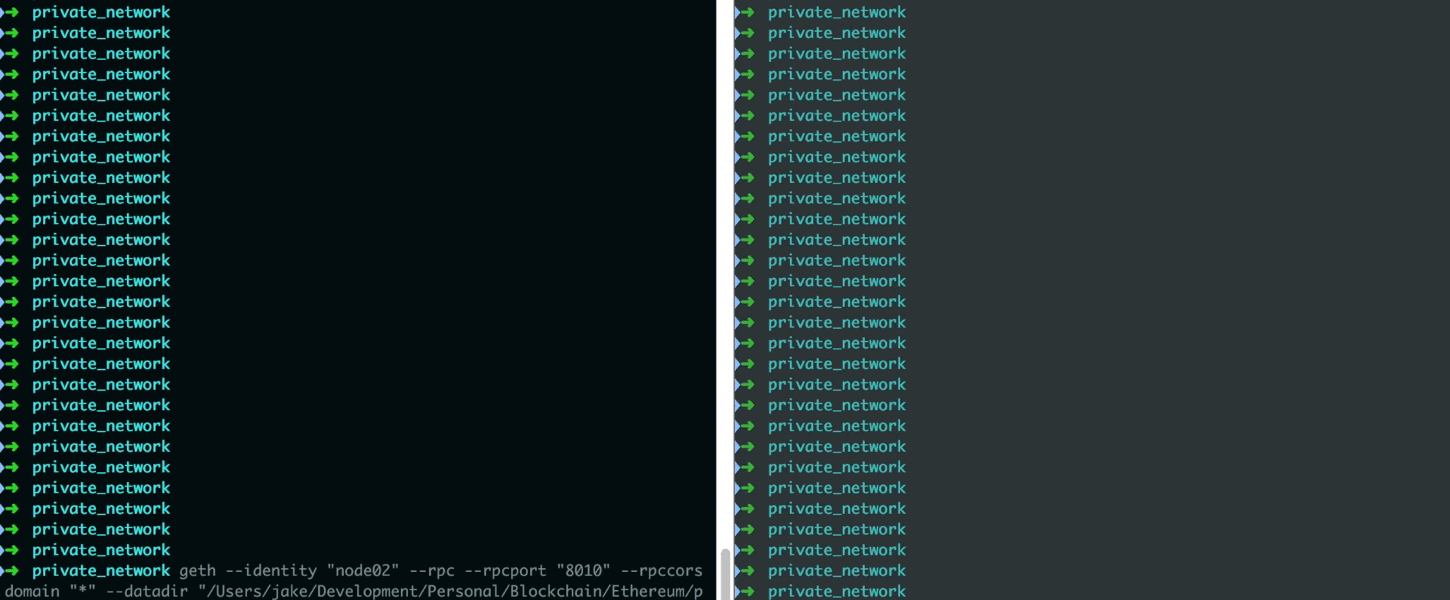
$ geth --identity "name_of_your_node" --rpc --rpcport "8000" --rpccorsdomain "*" --datadir "/path_to_your/node_directory/" --port "30303" --nodiscover --rpcapi "db,eth,net,web3,personal,miner,admin" --networkid 1900 --nat "any"
Starting the nodes.
There are several geth options used in this command. I’ll highlight a couple that are particularly important in this example. To find out more information about all the options see the Geth Command Line Options or use the command geth -h.
--identity: Customize the name of your node so it is easily identifiable--rpc: Enable the HTTP-RPC server--rpcport: HTTP-RPC server listening port (default: 8545). Each node will need to have a different value--datadir: Data directory for the databases and keystore. This should be different for each node--port: Network listening port (default: 30303). Each node will need to have a different value--nodiscover: Disables the peer discovery mechanism (manual peer addition). Without this option enabled, the node will always be looking for other peers to connect to--rpcapi: API’s offered over the HTTP-RPC interface. Not all those shown in the example are needed. In fact, you should be cautious of what APIs you make available here--networkid: Network identifier (integer, 1=Frontier, 2=Morden (disused), 3=Ropsten, 4=Rinkeby) (default: 1). Each node in the network must use the same value--nat: NAT port mapping mechanism (any|none|upnp|pmp|extip: ) (default: “any”)
In order to interact with the instance of Ethereum running (i.e. the node) you will need to open up a geth console in another terminal window using the command…
geth attach [HTTP ENDPOINT OR IPC ENDPOINT]
The HTTP ENDPOINT and IPC ENDPOINT are provided after starting an instance. The console will enable you to use the Javascript API to interact with the node you have attached to.
Step 6, Connecting the Nodes
After starting each node, they can now be connected to the admin node. node01 will serve as the admin node. Open up a console for that node using geth attach and enter admin.nodeInfo. This will output several characteristics about the node. Copy the enode address beginning with the open quote ".
enode: "enode://26f7b8f0e11839cf6f3b560ee2d2d88f642cf5e0da8aa665c53319f3ca52ed316392cd61b9ca0505348eed769122f4c550107e1aefafdee316dfc843c5f9692e@[::]:30303?discport=0",
Now add node02 and node03 to this designated admin node. You will need to open a geth console for node02 and node03 separately. Add the nodes to the admin using the following command…
admin.addPeer("enode://26f7b8f0e11839cf6f3b560ee2d2d88f642cf5e0da8aa665c53319f3ca52ed316392cd61b9ca0505348eed769122f4c550107e1aefafdee316dfc843c5f9692e@[::]:30303?discport=0")
Once you have added each remaining node, you can verify by entering the command net.peerCount into the console of the admin node. The value should reflect the number of nodes you connected to the admin node (i.e. 2).
> net.peerCount
2
Step 7, Exchange Some Ether
Open up a geth console in node02 and enter the command eth.accounts. You should see a list containing the 3 accounts you created in Step 3.
Verify the accounts contain the amount designated in the genesis file…
> eth.getBalance(eth.accounts[0])
Now lets send some Ether from one account to another…
> eth.sendTransaction({from:eth.accounts[0], to:eth.accounts[1], value:100000})
You should receive an error message indicating that you need to unlock your account. Enter the following command to unlock the first account…
> personal.unlockAccount(eth.accounts[0])
You will be prompted to enter the password you gave this account when it was first created. Now use the eth.sendTransaction previously attempted to transfer Ether. If you run the eth.getBalance command again, you will notice that no Ether has actually moved from one account to another. This is because no miner is running to verify the transactions on the block.
Step 8, Start a Miner
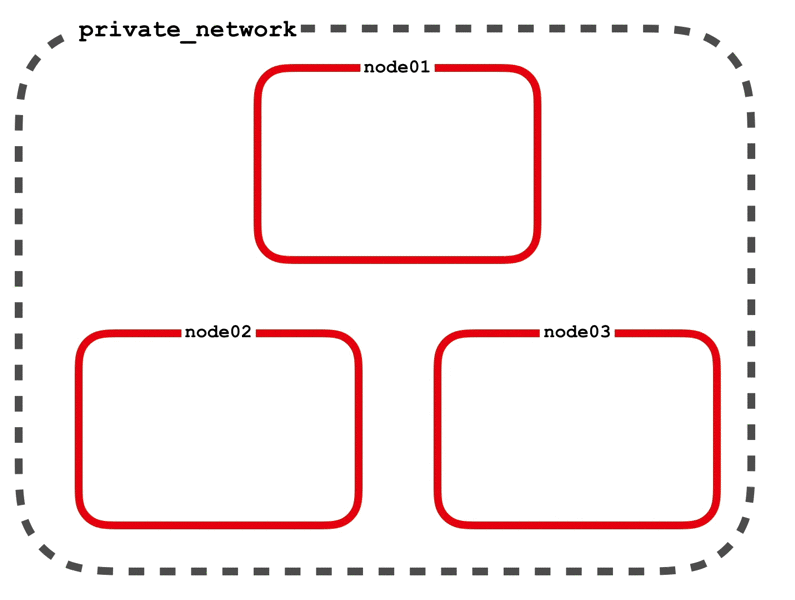
First thing you must do is set the etherbase for the node that you are working in. The etherbase account is the account designated to receive the rewards earned from mining the blockchain. Open a geth console on node02 and run the command miner.setEtherbase(eth.accounts[0]).
Shown above is a depiction of the private network, each node containing a copy of the blockchain, with node02 running the miner.
To start the miner on this node, simply run miner.start(). If your geth instance for this node you will see messages indicating that mining has been started and new blocks are being mined regularly.
Shown above is a depiction of starting the miner on the second node.
You can now check the accounts that your transferred Ether to/from and verify that funds have in fact moved between accounts. Likewise, you run eth.getBalance on the etherbase account for your miner node to verify that Ether mining rewards are deposited into the account.
Conclusion
When I first dove into blockchain I found it challenging to identify what I should focus on first (i.e. blockchain admin, cryptocurrencies, smart contracts, etc.). Since it's all rooted from the same underlying technology I thought I would start with creating a simple private blockchain. This way I could observe the basic operations that occur on a blockchain and begin to understand how the blockchain itself works. It's important to note that a private blockchain essentially removes one of the most enticing pieces of this technology, decentralization. Although it does have other viable applications, I found private blockchain was a great way to explore the technology.
Explore some more…
- Can you create an account on another node?
- Can you transfer ether from an account on one node to an account on another node?
- What happens if you transfer ether and no
mineris running?


Comments