

Introduction
I have been working at a client the past few months that has adopted a desire for a consistent JHipster microservice architecture. We have more than ten microservices that are supported by multiple teams. Developers support multiple services and we needed a uniform approach to deploy quality code quickly to the cloud. We set up Jenkins to support building and testing any branch of all services while maintaining the ability to deploy releases alongside feature development. As Jenkins grew, we decided to maintain our Jenkins related code through source control.
In order for us to satisfy our requirements, we used a couple of the advanced Jenkins tools.
This is the first of a two part series where the target audience is anyone interested in streamlining the process to onboard new micro services.
Source Code
The source code is available below
- Jenkins Shared Library (
microservice-pipelines)
Series Overview
Part 1
We will set up a Freestyle project (seedJob) that will be a job that creates jobs. We will use the Jenkins Job DSL API to set up the foundation for supporting onboarding any number of services.
Part 2
We will introduce the use of Shared Libraries. In order to maintain support for both of these posts in the same repository, we will take advantage of the version specifier option associated with the @Library annotation feature of Shared Libraries. This allows us to configure our JHipster microservices to build from specific branches (or tags) in our Shared Library. Finally, we will update our seedJob to build a pipelineJob and multibranchPipelineJob when onboarding a microservice that will be provided in part 2 of this series.
Part 1 Goals
- Set up a Jenkins Freestyle Job called
seedJobto create and configure other jobs using the Jenkins Job DSL API. - Store the
seedJobconfiguration in github. - Run the
seedJobto create a Freestyle Job calledpoc-micro.
Prerequisites
- Docker installed
- If you do not have docker installed yet, proceed to Docker's Getting Started guide first.
- Maven ready Jenkins running in a Docker container
- Pull the Jenkins image:
docker pull kcrane121/maven-jenkins:blog.- This image is based on the Jenkins Official Repository.
- Start the Jenkins container:
docker run -p 8080:8080 -p 50000:50000 kcrane121/maven-jenkins:blog. - Open a browser and navigate to
http://localhost:8080/and follow the instructions to complete the set up.
Set up Tips:- The first time you set this up, you will need to provide a password that was given to you after running
docker run -p 8080:8080 -p 50000:50000 kcrane121/maven-jenkins:blog.- The generated admin password can also be found at
/var/jenkins_home/secrets/initialAdminPasswordin the docker container.
- The generated admin password can also be found at
- Select
Install Suggested Pluginsduring the setup process.
- The first time you set this up, you will need to provide a password that was given to you after running
- Pull the Jenkins image:
- Familiarity with Jenkins Pipeline.
Goal 1
Now that the prerequisites are out of the way, the first thing we are going to do is set up a Freestyle project (seedJob) in Jenkins. This job will be used to generate other jobs you want to onboard into Jenkins.
Install the Job DSL plugin
Navigate to http://localhost:8080/ in your browser and login to Jenkins with the credentials you set up (or the default admin ones provided to you during the initial set up). We need to configure Jenkins to use the Jenkins Job DSL API. This provides us the functionality to configure how we want our new jobs built.
- Navigate to
Dashboard>Manage Jenkins>Manage Plugins> selectAvailabletab > search forJob DSLand install.
Creating the Freestyle Project seedJob
We will set up our seedJob the same way any other job is created.
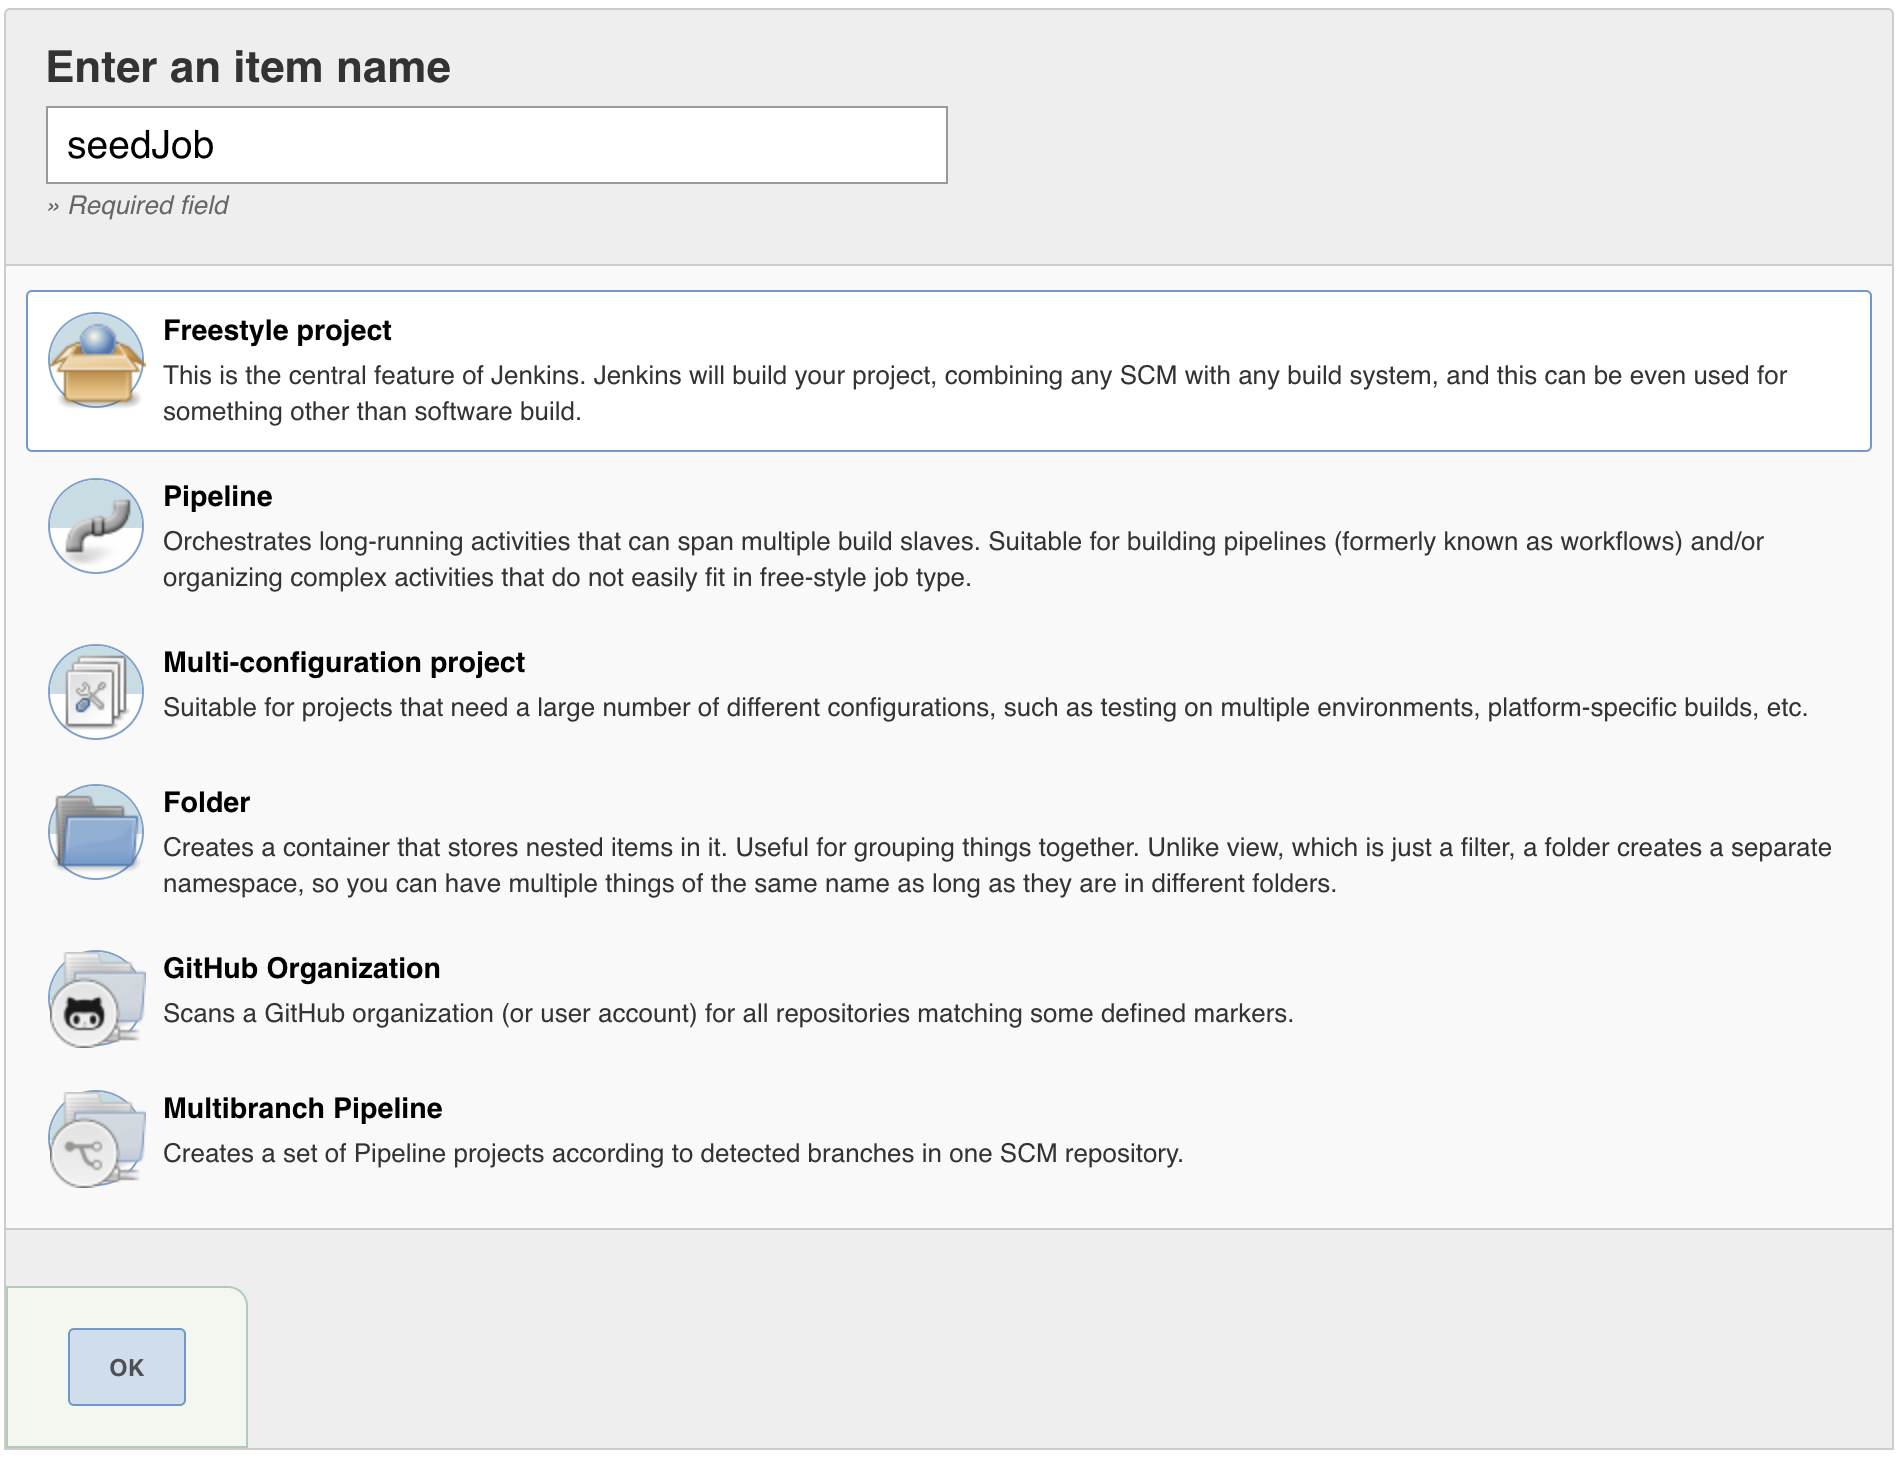
- On the left hand side of the page, select
New Item - In the text box for
Enter an item name, enterseedJob> select theFreestyle project> selectOK.
Configure seedJob to use microservice-pipelines github repository
In this first part of a two part set of blog posts, we are going to do a little preparation work in this blog to set us up for faster implementation of a Jenkins Shared library in part 2 of this series. We are going to store the code for our seedJob in a github repository called microservice-pipelines. Since we are using the microservice-pipelines repository to load seed.groovy, we need to configure seedJob to use this repository.
- Navigate to
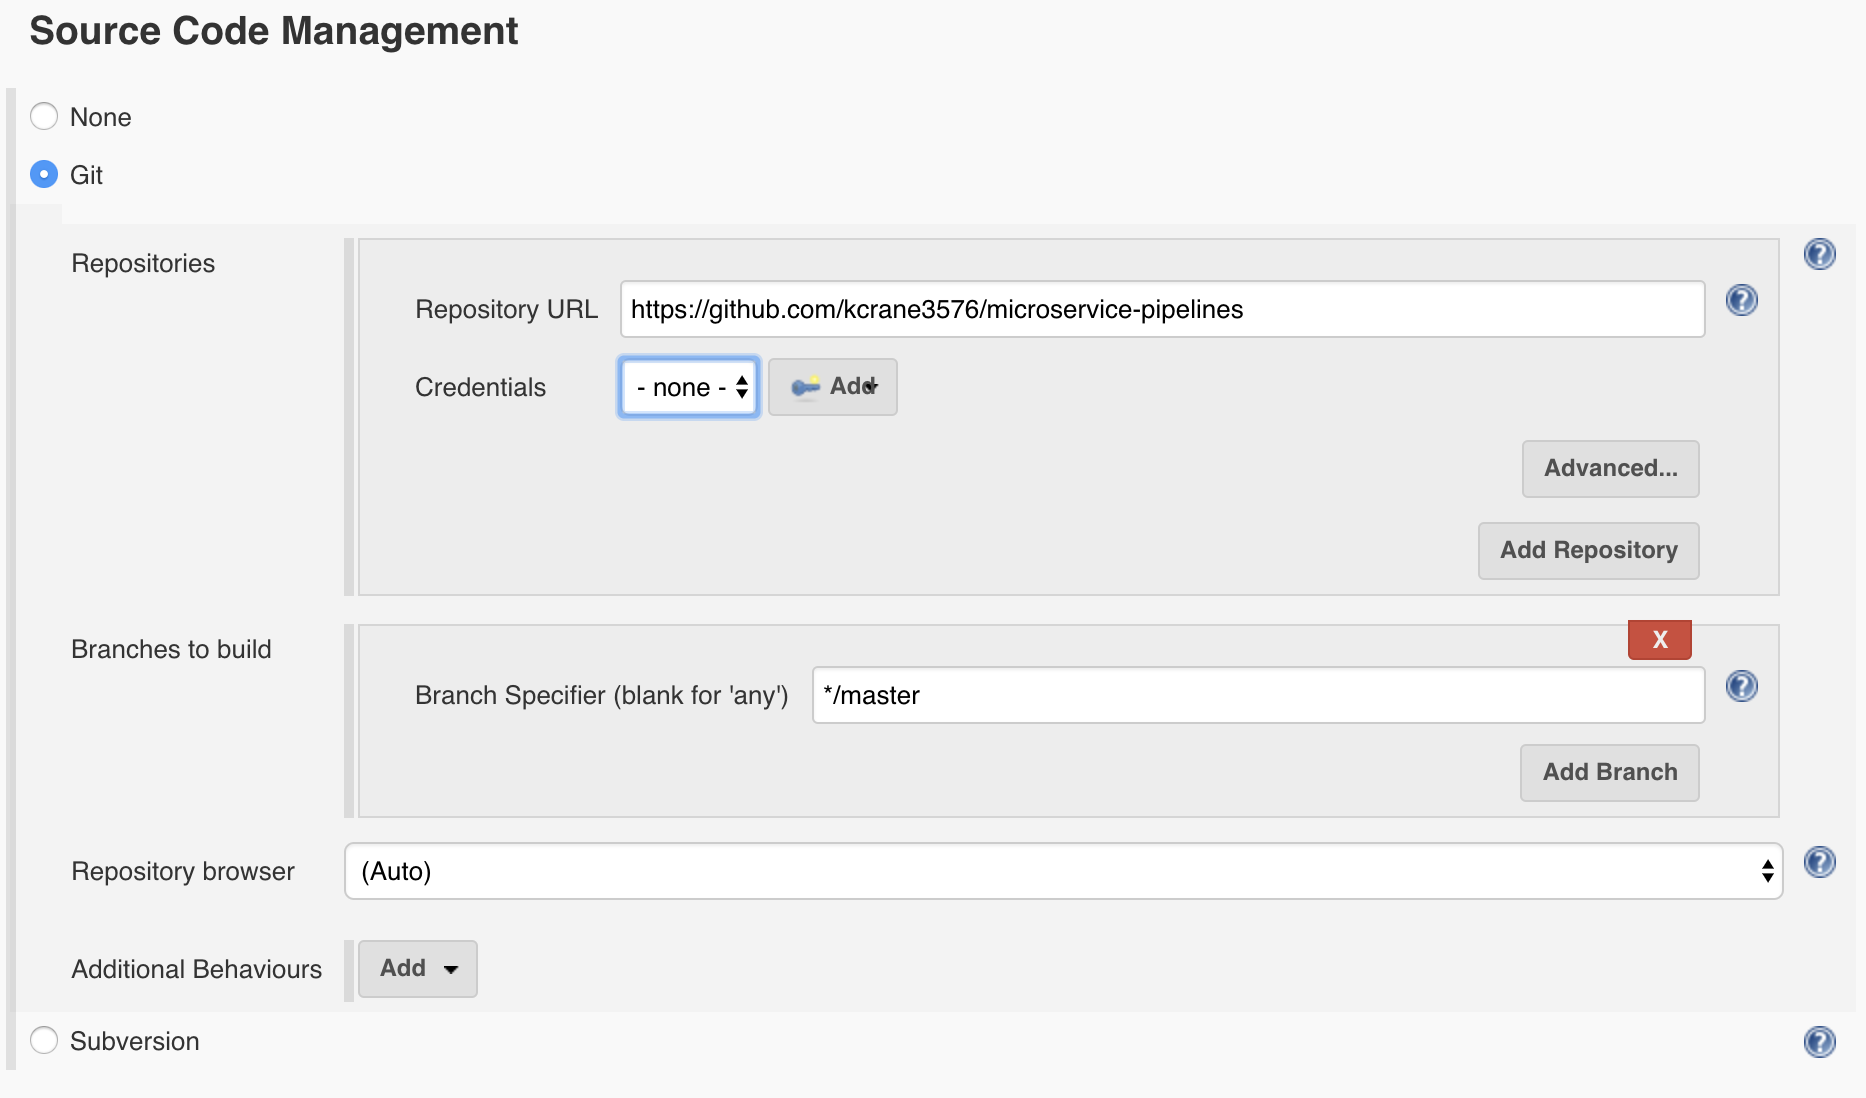
Dashboard> selectseedJob> selectConfigure. - Scroll to the
Source Code Managementsection > selectGit. - In the
Repository URLfield, enterhttps://github.com/kcrane3576/microservice-pipelines.- Leave everything else as the default configuration.
Configure seedJob to use the seed.groovy file we will store in github
Now that we have configured Jenkins to use our microservice-pipelines repository, we need to set up seedJob to load seed.groovy from our microservice-pipelines repository. This is necessary for us to start using the Jenkins Job DSL API functionality.
- Note: This is not a requirement. Directly inside of the
seedJob, you could add a groovy script to do the same thing we are doing in ourmicroservice-pipelinesrepository (without the benefit of version control).
Since we will be using our microservice-pipelines repository, we will need to add some additional configuration to the seedJob to get this working.
- Navigate to
Dashboard> selectseedJob> selectConfigure. - Scroll to the
Buildsection > selectAdd Build step> SelectProcess Job DSLs. - Select
Look on Filesystem. - In the
DSL Scriptsinput field, enterdsl/seed.groovy(this is the path to theseed.groovyfile we will be setting up later).- Leave everything else as the default configuration.

Configure seedJob to use the microservice name as the job name
We will give our job the name of the microservice we plan to build (poc-micro). In order to do this we will need to add a String parameter to the seedJob that will be used inside of seed.groovy.
- Navigate to
Dashboard> selectseedJob> selectConfigure. - Select
This project is parameterized> selectAdd Parameter> selectString Parameter. - Enter
jobNameinNamefield. - In the
Descriptionfield, enterThe name of your repo (e.g. poc-micro).

Goal 2
We are using the microservice-pipelines github repository. This repository will be used to store our seed code. In Part 2 of this series, we will include our Shared Library code in this repository.
- Inside of the
microservice-pipelinesrepository, we have created a directorydslwithseed.groovyinside. - Below are the contents of
seed.groovy.- We create a simple Freestyle Job and use the
String ParamnamedjobNamefromseedJobto name our Freestyle job.
- We create a simple Freestyle Job and use the
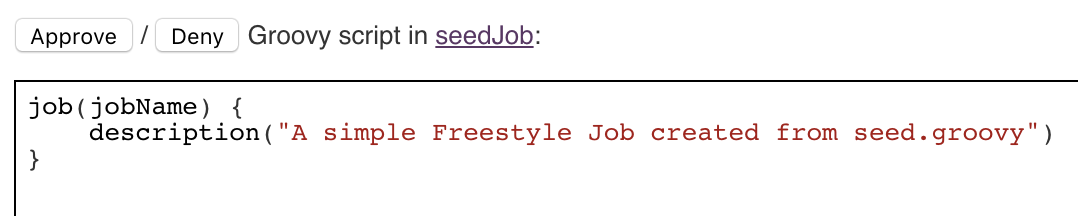
job(jobName) {
    description("A simple Freestyle Job created from seed.groovy")
}
Goal 3
Now that we have our seedJob setup to read in seed.groovy from our github microservice-pipelines repository, we are ready to trigger our seedJob to create a Freestyle job with jobName.
Running the seedJob
- Navigate to
Dashboard> selectseedJob> selectBuild Now. - Under
Build History, select the top red circle. - This will take you to the
Console Output.- The job failed.
- Due to Script Security, this will happen every time you change
seed.groovy. The Script Security Plugin is integrated with theJob DSLplugin and the Script Security Plugin is set up with a set of scripts that are pre approved for use. Since this is a new script, it will require an admin approval to use.

Approving our seed.groovy script
- We need to tell Jenkins it is ok to use this script.
- Navigate to
Dashboard>Manage Jenkins>In-process Script Approval. - Select
Approvefor theseed.groovyscript.
- Navigate to
Rerunning the seedJob
Now that we have approved seed.groovy, we are ready for our seedJob to run (and succeed).
- Navigate to
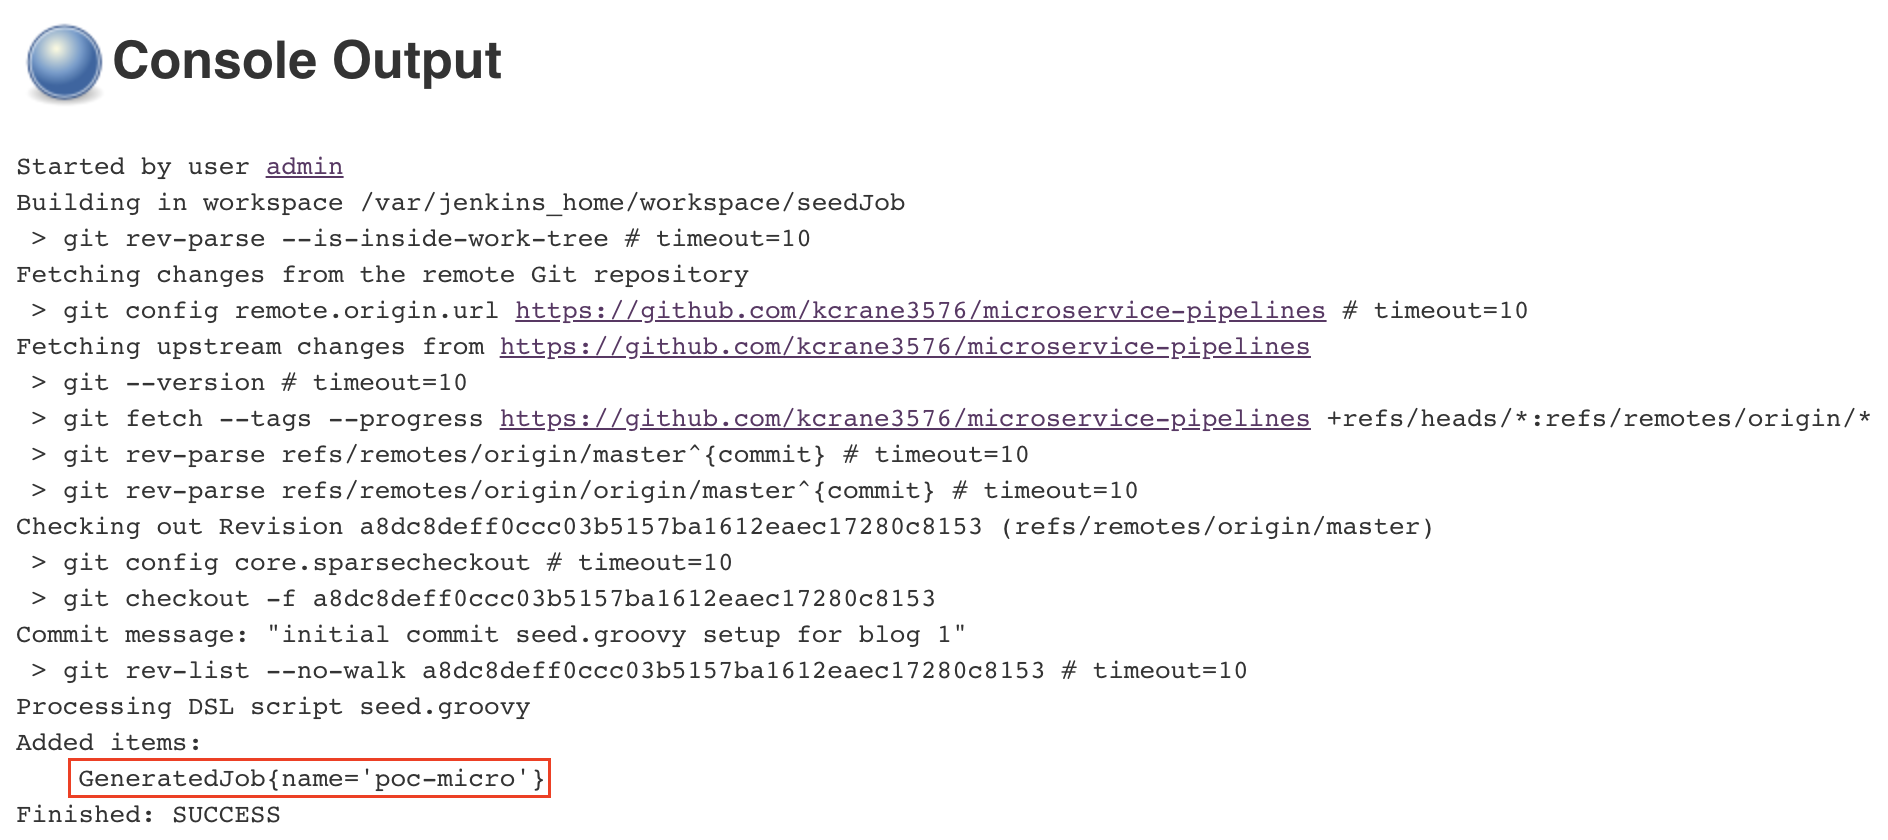
Dashboard> selectseedJob> selectBuild Now. - Under
Build History, select the top blue circle. - Inside of
Console Output, you will seeGeneratedJob{name='freestyle'}.- Jenkins has created a new job called
poc-microfromseed.groovy.
- Jenkins has created a new job called
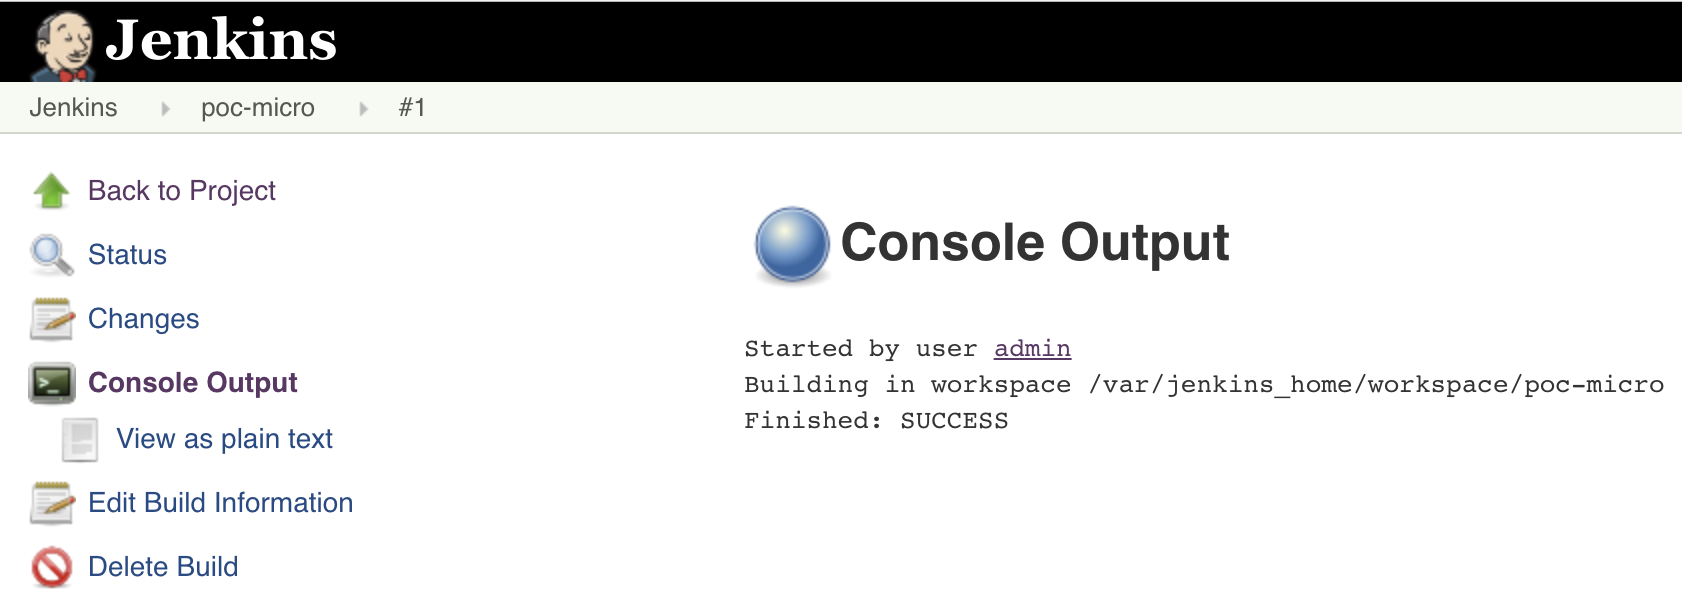
Verify creation of and runpoc-micro job
- Navigate to
Dashboardand confirmpoc-microjob was created. - Select
poc-micro> selectBuild Now. - Under
Build History, select the top blue circle. - Inside of
Console Output, you will see a successful execution of thepoc-microjob.
Conclusion
In this first part of a two part series, we set up the minimum configuration requirements to use seed jobs. Our seedJob onboards a very simple Freestyle Job (poc-micro) from our microservice-pipelines repository. The benefit of microservice-pipelines is that we are now maintaining all of our pipeline configurations in source control. Using seed jobs allows us to onboard/re-onboard services quickly and easily (history is maintained for re-onboarded jobs). At my current client this was extremely helpful because it allowed us to remain agile while adjusting job requirements across all services as requirements changed.
In our next post, we will reconfigure seed.groovy to build a regular Pipeline job and a Multibranch Pipeline job. Additionally, we will configure the use of Jenkins Shared Library to share and reuse pipeline code between jobs.


Comments