


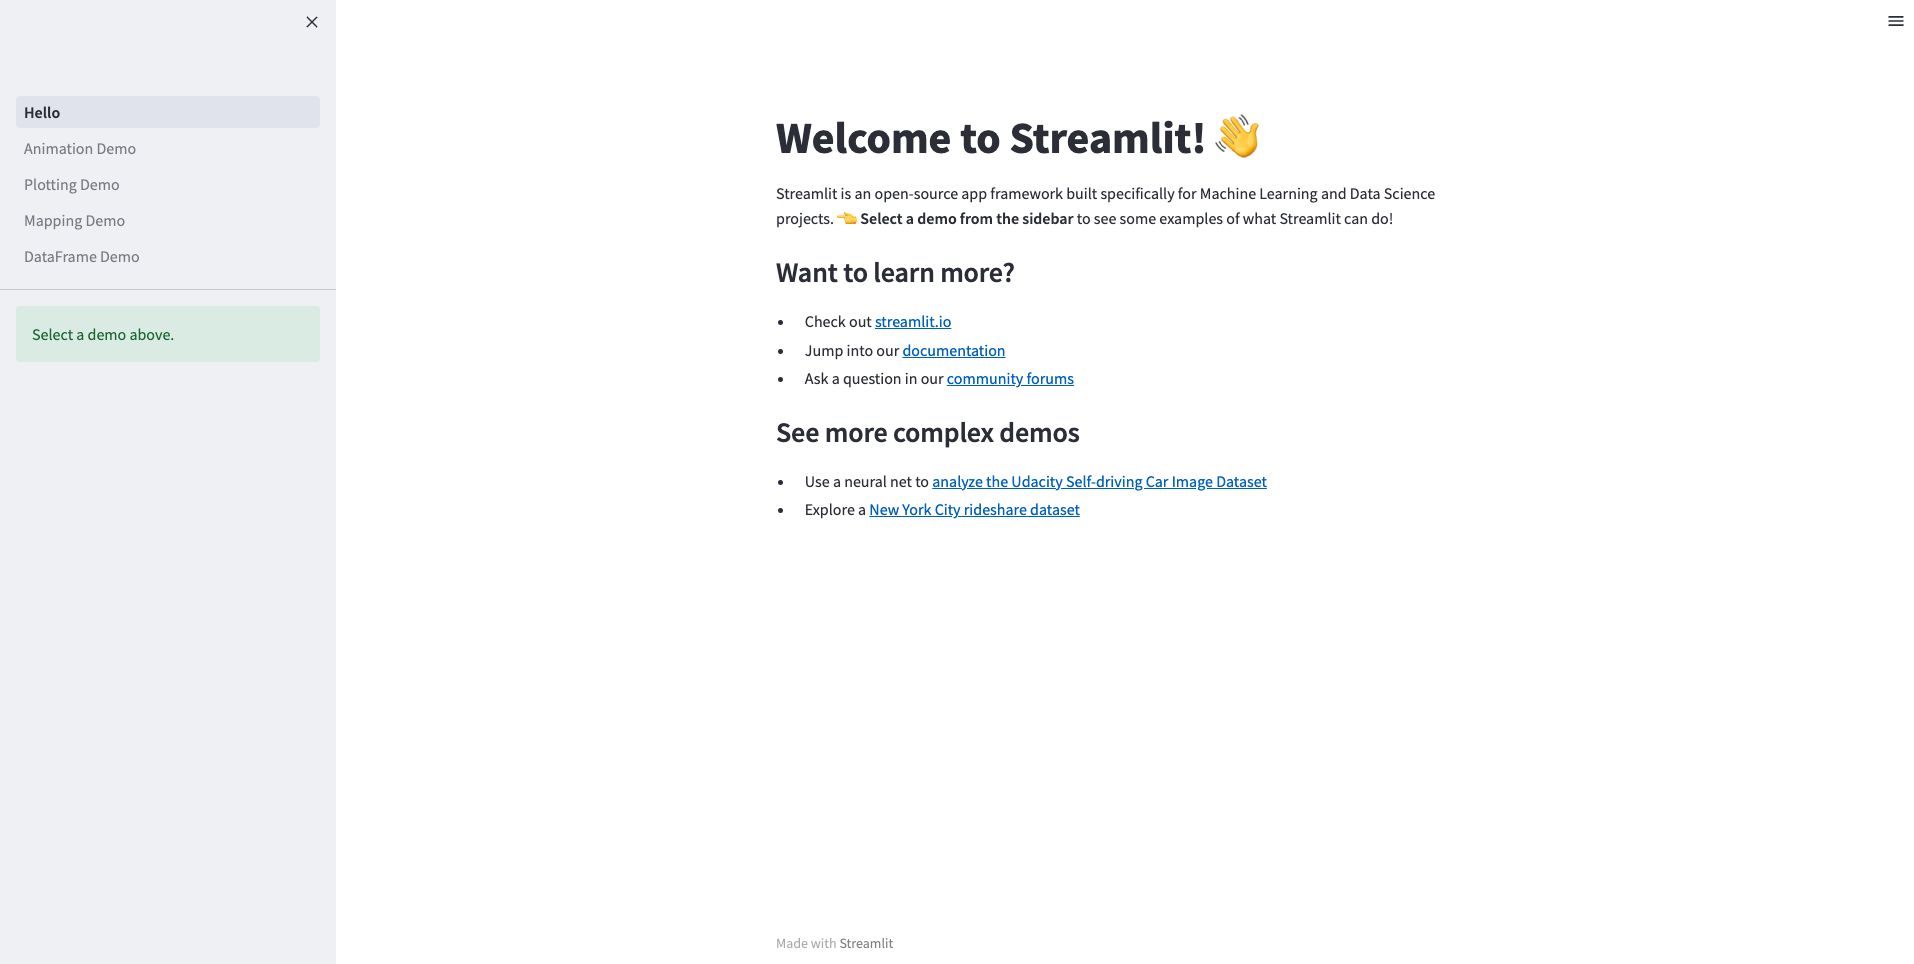
The core of the application that we're building is on Streamlit. Streamlit is an open-source Python library which make it easy to share web applications in minutes.
Prerequisites
I started by installing Streamlit locally. As per the Installation instructions for MacOS/Linux, I created a python virtual environment, pip installed streamlit and tested that the installation worked by running streamlit hello.
You'll also need a Snowflake environment and ChatGPT credentials, which I go over obtaining in a little bit.
Creating the Skeleton of Our Streamlit App
As we can see, it's relatively easy to create our first streamlit application. But I wanted to explore how to display and interact with data in an application. So I created a Python file and imported Pandas and Streamlit and ran my application using streamlit run my_app.py. Below is the code I ran:
import streamlit as st
import pandas as pd
df = pd.DataFrame({
  'first column': [1, 2, 3, 4],
  'second column': [10, 20, 30, 40]
})

df
Lo and behold, I saw the tabular output of my dataframe on my screen. This is because anytime Streamlit sees a variable or literal on a line by itself, it automatically writes the value to the app using the streamlit function st.write().
Now that we've done a bit of exploration into Streamlit, we can start to formulate the solution to the scenario we're trying to solve.
Our Scenario and a Solution for it
If I'm a non-technical business user intending to make data driven decisions, how can I interact with an application using natural language and get the insights I'm looking for?
Step One: Getting and capturing user inputs
Streamlit has a text_input widget which you can use to capture the values that a user inputs into your application.
import streamlit as st

title = st.text_input('Movie title', 'Life of Brian')
st.write('The current movie title is', title)
This did exactly what I needed to. Now a user can put in whatever natural language text they want and my application can record and use my user input. This leads to the next part of our scenario.
Step Two: The Data
We're building a data driven application and have no data to interact with - which seems like an oversight, I know. This is where Snowflake comes in. Snowflake is a single-platform, fully managed solution for integrating and analyzing your data. We're going to use Snowflake to hold the datasets we are going to use for analysis.
Out dataset of choice is Snowflake's Tasty Bytes data. Tasty Bytes is a Snowflake curated sample set of data depicting a global food truck network with localized menu options in 15 countries, 30 major cities and over 15 core brands. I setup Tasty Bytes in my Snowflake Account by following this tutorial.
Now that we've got our data ready to go, we can work on programmatically connecting to Snowflake and pulling the data into our Streamlit Application. To do so, we can import the Snowflake Python Connector and configure our connection parameters.
import snowflake.connector

con = snowflake.connector.connect(
  user=os.getenv("SNOWFLAKE_USER"),
  password=os.getenv("SNOWFLAKE_PASSWORD"),
  account=os.getenv("SNOWFLAKE_ACCOUNT"),
  role="SYSADMIN",
  warehouse="PK_DEV_WH",
  session_parameters={
      "QUERY_TAG": "pk_dev_streamlit_test",
  },
)

cursor = con.cursor()
cursor.execute("SELECT * FROM PK_STREAMLIT_DB.RAW_CUSTOMER.CUSTOMER_LOYALTY LIMIT 10")
df = cursor.fetch_pandas_all()

df
I have all of my connection parameters for Snowflake in the environment variables. You can then use the connection to create the cursor and use the cursor to execute a query. To start, I began by grabbing 10 rows from the CUSTOMER_LOYALTY table. As you can see in my sample query, I provide the fully qualified path for the Snowflake table using the format [database].[schema].[table_name].
At the end of this, when you refresh your application you should see the first 10 rows from the customer_loyalty table.
I would suggest enabling Streamlit's Always Rerun option, as it allows your application to refresh whenever you save it!
Step Three: Sending User Input to ChatGPT
As we saw in Step One, we can quite easily capture user input using Streamlit's built-in functions. But what if we want to submit our user input? We can do so using a form in streamlit.
with st.form(key="my_form"):
    text_input = st.text_input(label="Enter Input")
    submit_button = st.form_submit_button(label="Submit")

if submit_button:
    st.write("Text Input: ")
    st.write(text_input)
As you can see here, we can put in input and easily capture the state of a button click as well.
Putting the entirety of Steps 1-3 together, we thus have:
import streamlit as st
import snowflake.connector

with st.form(key="my_form"):
    text_input = st.text_input(label="Enter Question")
    submit_button = st.form_submit_button(label="Submit")

if submit_button:
    st.write("Text Input: ")
    st.write(text_input)

    con = snowflake.connector.connect(
        user=os.getenv("SNOWFLAKE_USER"),
        password=os.getenv("SNOWFLAKE_PASSWORD"),
        account=os.getenv("SNOWFLAKE_ACCOUNT"),
        role="SYSADMIN",
        warehouse="PK_DEV_WH",
        session_parameters={
            "QUERY_TAG": "pk_dev_streamlit_test",
        },
    )
How do we submit our captured input to ChatGPT? I started by signing up for an account with ChatGPT.
-
Signup for an OpenAI Account here.
-
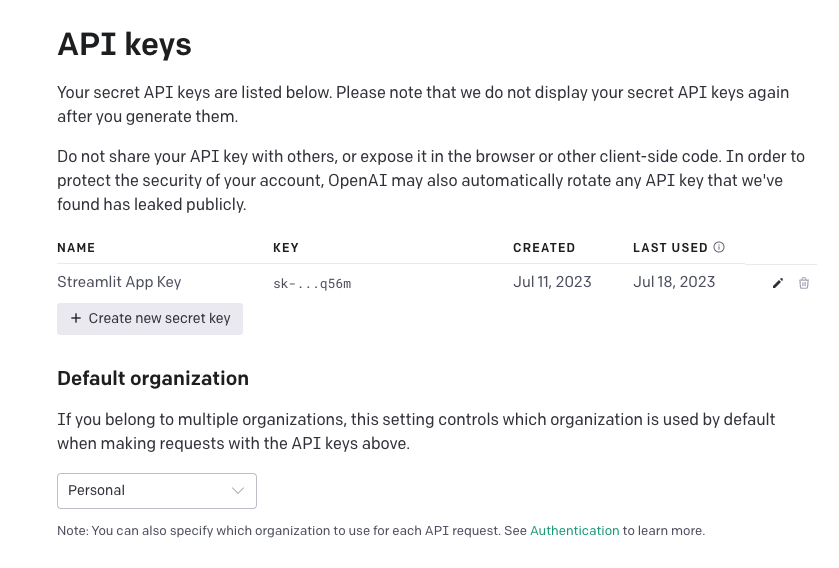
To create an API Key, login to Open AI and navigate to the API Keys Page on your account.
-
Create a new key by clicking the
Create new secret keybutton. -
Add the generated key to your environment variables or keep it in a safe spot for future use. This API Key is what we'll use to access the ChatGPT API.
- In your virtual env run
pip install openaiand import openai into your Streamlit Application python file
import openai
For this entire exercise, you can use the $5 in credits ChatGPT gives you when you first sign up. I still have a ton of credits in excess, so $5 should be more than enough.
An Aside on the ChatGPT Chat Completion Endpoint
The main mechanism we'll be using to interact with ChatGPT is the Chat Completion API Endpoint. As you can probably guess, the Chat Completion Endpoint returns a Model Response for the given conversation. Here is a sample call to the Chat Completion API in Python which I'll use to describe the key parameters we'll be using from here on out.
# Example OpenAI Python library request
MODEL = "gpt-3.5-turbo"
response = openai.ChatCompletion.create(
    model=MODEL,
    messages=[
        {"role": "system", "content": "You are a helpful assistant."},
        {"role": "user", "content": "Knock knock."},
        {"role": "assistant", "content": "Who's there?"},
        {"role": "user", "content": "Orange."},
    ],
    temperature=0,
)
Model: ID of the model to use. The standard models to use are
gpt-4andgpt-3.5-turbo. As you see during this blog, I usegpt-3.5-turboas thegpt-4model isn't available for free tier users quite yet. For all available models, I'll point you to the OpenAI documentation.Messages: A list of messages comprising the conversation so far. Messages have a couple of required elements, namely the Role and the Content. The role captures the role of the message author and is
system,user,assistant, orfunction. The content captures the contents of the message. This is required for all messages and may be null for assistant messages with function calls.Temperature: What sampling temperature to use, between 0 and 2. Higher values like 0.8 will make the output more random, while lower values like 0.2 will make it more focused and deterministic.
For additional parameters in the Chat Completion API check out the OpenAI docs here.
Ideally, we want to be able to generate an SQL query to answer the question a business user asks about the data. We're going to use ChatGPT to do so. For the question How many customers signed up per day? let's see what the default query chatGPT comes up with. I ran this in the ChatGPT playground.
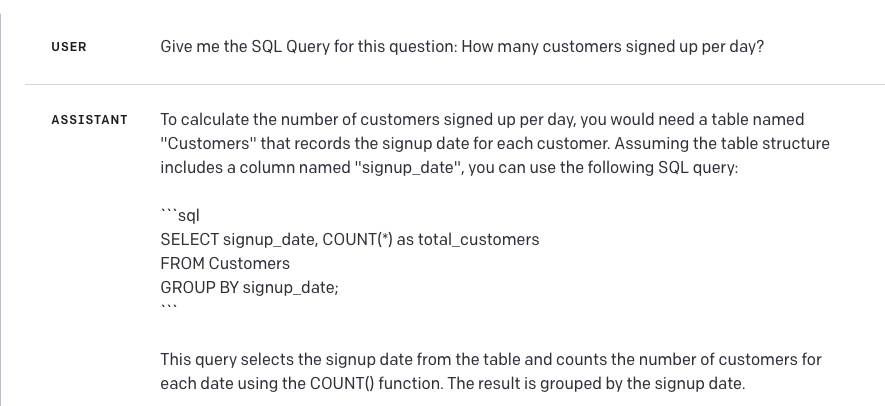
As we can see from the query returned, ChatGPT has extrapolated column names and the table we'll be running the query against. It also includes an explanation as well as the question we asked it. So here are our first challenges with ChatGPT:
-
How do we provide context to ChatGPT with our user input so it has the columns and other information for the tables we have to query against in Snowflake?
-
How do we ask ChatGPT to only give us the query without any of the additional text?
Challenge Number 2 is pretty easy. When we ask ChatGPT our question, all we need to add at the end is: Do not include the question in your response. Do not provide explanations.
Challenge Number 1 is a little bit more difficult. How do we provide context to ChatGPT? Ideally, ChatGPT could use in addition to our database, schema, and table names, the table's columns by name, and their descriptions. If we're building this application to be able to look at all of the databases we use for reporting, it could lead to a large amount of information being provided to ChatGPT for context alone. Since this is a small scale demonstration, I chose to create a YAML file for my tables.
table:
- name: customer_loyalty
  schema: raw_customer
  database: pkrishnan_streamlit_db
  description: Basic information about the customer
  columns:
    - name: customer_id
      description: Unique customer identifier.

    - name: first_name
      description: Customer's first name

    - name: last_name
      description: Customer's last name

    - name: city
      description: Customer's city of residence

    - name: country
      description: Customer's country of residence

    - name: postal_code
      description: Customer's residential postal code

    - name: preferred_language
      description: Customer's preferred language

    - name: gender
      description: Customer's gender

    - name: favourite_brand
      description: Customer's favourite brand

    - name: marital_status
      description: Customer's marital status

    - name: children_count
      description: Customer's number of children (if disclosed)

    - name: sign_up_date
      description: Customer's sign up date

    - name: birthday_date
      description: Customer's birthday

    - name: e_mail
      description: Customer's email

    - name: phone_number
      description: Customer's phone number
I've included only a single table here and put this file, named table_config.yaml in a config directory gpt_sql/config. Now to provide this context to ChatGPT, all you need to do is read the YAML file in Python and change your message to include the YAML file. We can go ahead and do this in Python after where we setup our Snowflake connection.
with open("gpt_sql/config/table_config.yml", "r") as file:
    db_config = yaml.safe_load(file)

with st.form(key="my_form"):
    text_input = st.text_input(label="Enter Question")
    summarize_check = st.checkbox("Summarize results?")
    graph_check = st.checkbox("Graph results?")
    submit_button = st.form_submit_button(label="Submit")

if submit_button:
    st.write("Text Input: ")
    st.write(text_input)

    con = snowflake.connector.connect(
        user=os.getenv("SNOWFLAKE_USER"),
        password=os.getenv("SNOWFLAKE_PASSWORD"),
        account=os.getenv("SNOWFLAKE_ACCOUNT"),
        role="SYSADMIN",
        warehouse="PK_DEV_WH",
        session_parameters={
            "QUERY_TAG": "pk_dev_streamlit_test",
        },
    )
    ### How many customers signed up per day?
    openai.api_key = os.getenv("OPEN_API_KEY")
    generate_query_message = [
        {
            "role": "user",
            "content": f"Given this database config:{db_config}, give me the SQL query for this question: {text_input} with the table_name in database.schema.table_name format. Do not include the question in your response. Do not provide explanations.",
        }
    ]
    query_completion = openai.ChatCompletion.create(
        model="gpt-3.5-turbo", messages=generate_query_message
    )

    query = query_completion.choices[0].message.content
    st.write("Generated Query: ")
    st.code(body=query, language="SQL")
Note the additional change I've made to the message in this code snippet. Since we're using Snowflake and I like having the fully qualified name for Snowflake resources, I'm also asking ChatGPT to format the table_name in database.schema.table_name format. The function st.code() is a Streamlit function which formats outputs into Code Blocks for which you can specify a language.
Please Note: You may notice that you are getting different queries every time you submit the same question and even sometimes queries which do not return meaninful results. Try setting a value for the temperature in the
openai.ChatCompletion.create()method's parameters. I highly encourage you to experiment with different values for the temperature at this stage to see how the temperature value affects the precision of the results you get back from ChatGPT.
We can now submit the query ChatGPT returns to Snowflake using cursor.execute(query) just as we did when we ran our query earlier.
cursor = con.cursor()
cursor.execute(query)
df = cursor.fetch_pandas_all()

st.write("Tabular Data Output: ")
st.dataframe(df)
Now that we've examined the logic for returning an SQL query from ChatGPT and subsequently retrieving the data from Snowflake, we've completed the bulk of our application. With our data displaying quite nicely in tabular format, a non-technical business user can easily dig into the numbers and analyze them.
Our Final Code
Here is the final code file for the streamlit application that we built today.
import streamlit as st
import snowflake.connector
import openai
import yaml
import time
import os

with open("gpt_sql/config/table_config.yml", "r") as file:
    db_config = yaml.safe_load(file)

with st.form(key="my_form"):
    text_input = st.text_input(label="Enter Question")
    submit_button = st.form_submit_button(label="Submit")

if submit_button:
    st.write("Text Input: ")
    st.write(text_input)

    con = snowflake.connector.connect(
        user=os.getenv("SNOWFLAKE_USER"),
        password=os.getenv("SNOWFLAKE_PASSWORD"),
        account=os.getenv("SNOWFLAKE_ACCOUNT"),
        role=os.getenv("SNOWFLAKE_ROLE"),
        warehouse=os.getenv("SNOWFLAKE_WAREHOUSE"),
        session_parameters={
            "QUERY_TAG": f"{os.getenv("SNOWFLAKE_QUERY_TAG")}",
        },
    )
    ### How many customers signed up per day?
    openai.api_key = os.getenv("OPEN_API_KEY")
    generate_query_message = [
        {
            "role": "user",
            "content": f"Given this database config:{db_config}, give me the SQL query for this question: {text_input} with the table_name in database.schema.table_name format. Do not include the question in your response. Do not provide explanations.",
        }
    ]
    query_completion = openai.ChatCompletion.create(
        model="gpt-3.5-turbo", messages=generate_query_message
    )

    query = query_completion.choices[0].message.content
    st.write("Generated Query: ")
    st.code(body=query, language="SQL")

    cursor = con.cursor()
    cursor.execute(query)
    df = cursor.fetch_pandas_all()

    st.write("Tabular Data Output: ")
    st.dataframe(df)
Conclusion
Thanks so much for taking the time to follow along in this quick exercise. As I mentioned in the beginning, this is one potential approach for integrating Generative AI with dashboards to democratize your data for less technical stakeholders. As we've seen, ChatGPT is a powerful technology which can be used in a variety of ways. This application is just one of many ways it can be used in the data and analytics space. I hope you've learned something and had some fun experimenting with a technology that is brimming with potential.
For more information on how Ippon Technologies can help your organization utilize Snowflake or Streamlit for all of your data needs, contact sales@ipponusa.com.


Comments