
Published January 7, 2022
Introduction
This article walks through an ingestion strategy called "Iterative Range Copy" to bulk load SQL tables using Azure Data Factory (ADF). The major benefits of this approach are avoiding server-side timeouts and controlling the size of batch copies.
This strategy only uses ADF native functions without requiring external services, tools, or code.
High-Level Overview
This strategy uses an ADF “Until” function that loops through a table at a specific row range at a time. The “Until” function is a special type of loop that continues to run until a condition is met.
Each iteration copies the rows from the given row range and writes them to a sink. For example, if you are copying 1,000 rows at a time from a table, the first iteration would copy rows from indexes 1 - 1,000, then the second iteration would copy rows 1,001 - 2,000, and so on.
Since the row range is set to a size of 1,000, the “Until” function will stop after a set of results returning less than 1,000 rows has been processed. This means there are no more rows in the source table to copy.
This approach works well for tables that have a unique and incrementing integer column for the primary key.
The example in this article uses a small table, but there are results provided at the end from a larger production workload on tables with hundreds of millions of records.
Implementation
-
Open ADF studio.
-
Ensure you have 'source' and 'sink' datasets defined. I am using a MySQL table (via Amazon Aurora) called "MySqlTable" that points to adf_main.users for the source and a Parquet file in Azure Blob Storage called "ParquetOutput" for the sink.
Refer to Figure 2 for a sample of adf_main.users (mock data generated from mockaroo.com).
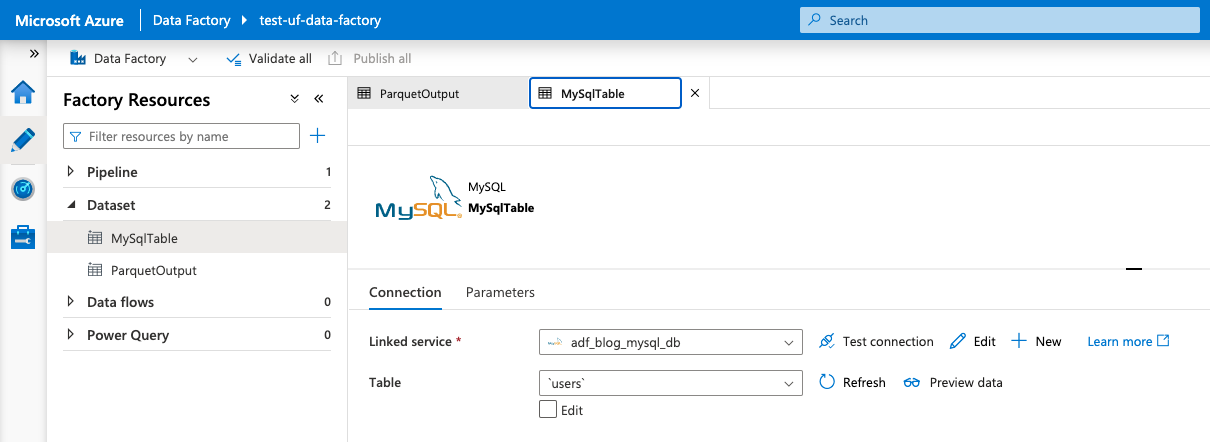
Figure 1: Screenshot of Datasets
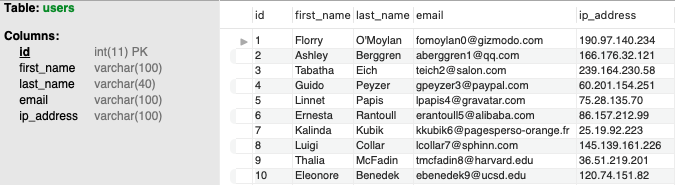
Figure 2: First Ten Rows and Metadata of adf_main.users
- Create a new pipeline.
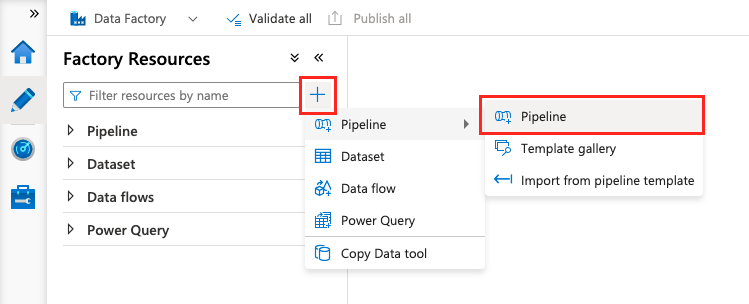
Figure 3: Creating a Pipeline in the ADF Studio
- Add an "Until" function.
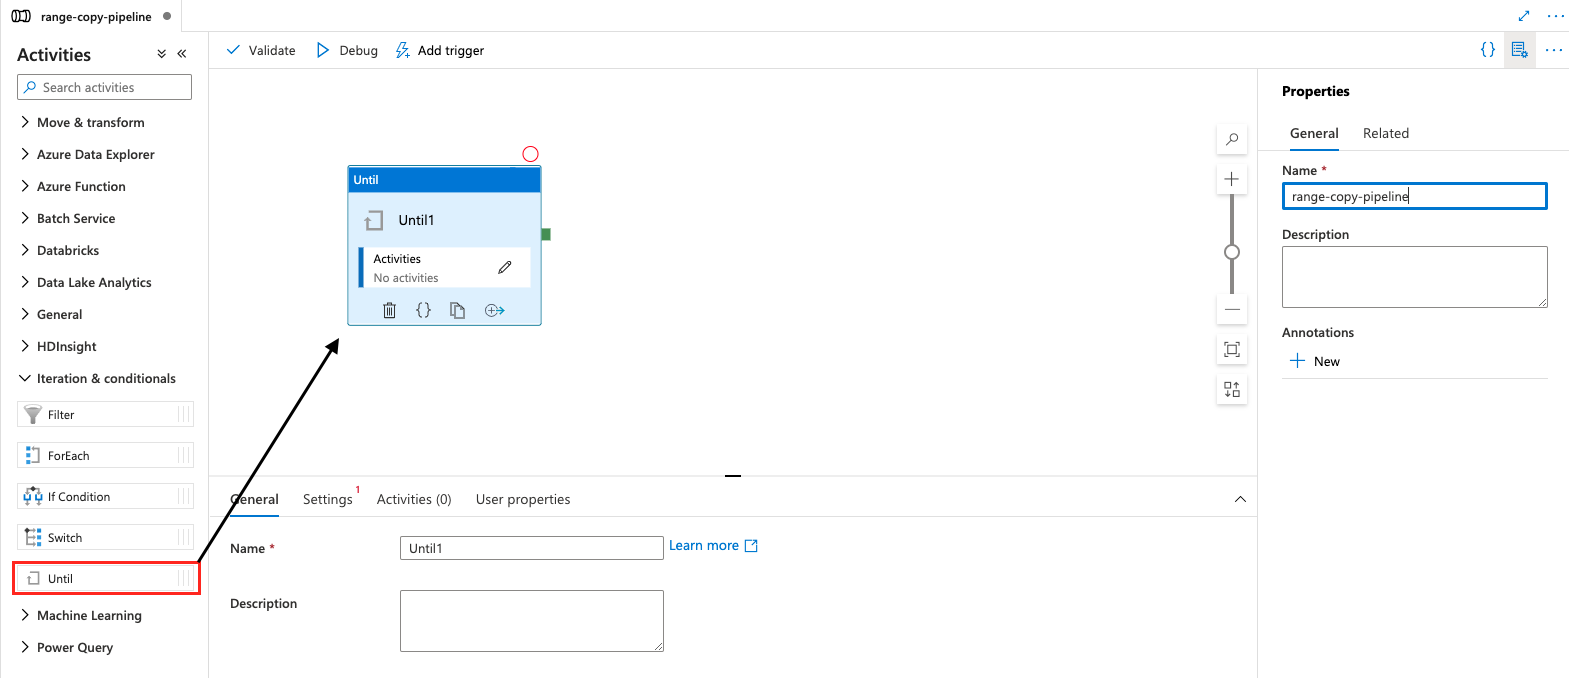
Figure 4: Adding an "Until" Function
- Initialize the limit and offset variables. These will be used within the "Until" function to keep track of the current index while copying the data chunk by chunk.
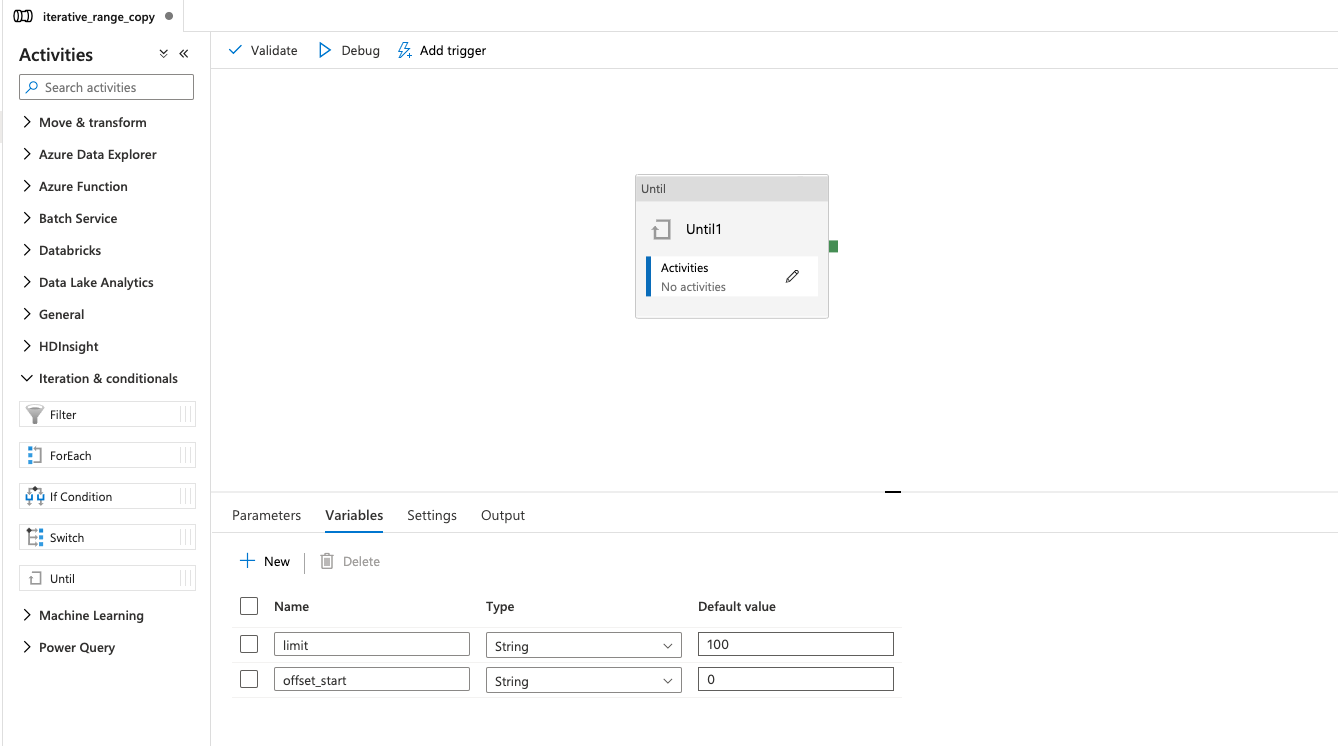
Figure 5: Initializing the limit and offset variables
-
Click the pencil icon in the "Activities" box. This area will be used to run tasks within the "Until" function.
-
Create a "Copy data" activity (under the "Move & Transform" dropdown).
-
Select the source dataset (MySqlTable for my example).
-
Select the sink dataset (Not pictured, but ParquetOutput for my example).
-
Under the "Source" tab, choose the "Query" option next to "Use query."
-
Enter a SQL query to select the range of data using the limit and offset variables created in step 5.
Note -- this is for a MySQL database and the SQL query will likely change for a different source SQL database.
Here is what I am using in this example:
select
    *
from adf_main.users
where id > @{variables('offset_start')}
limit @{variables('limit')}
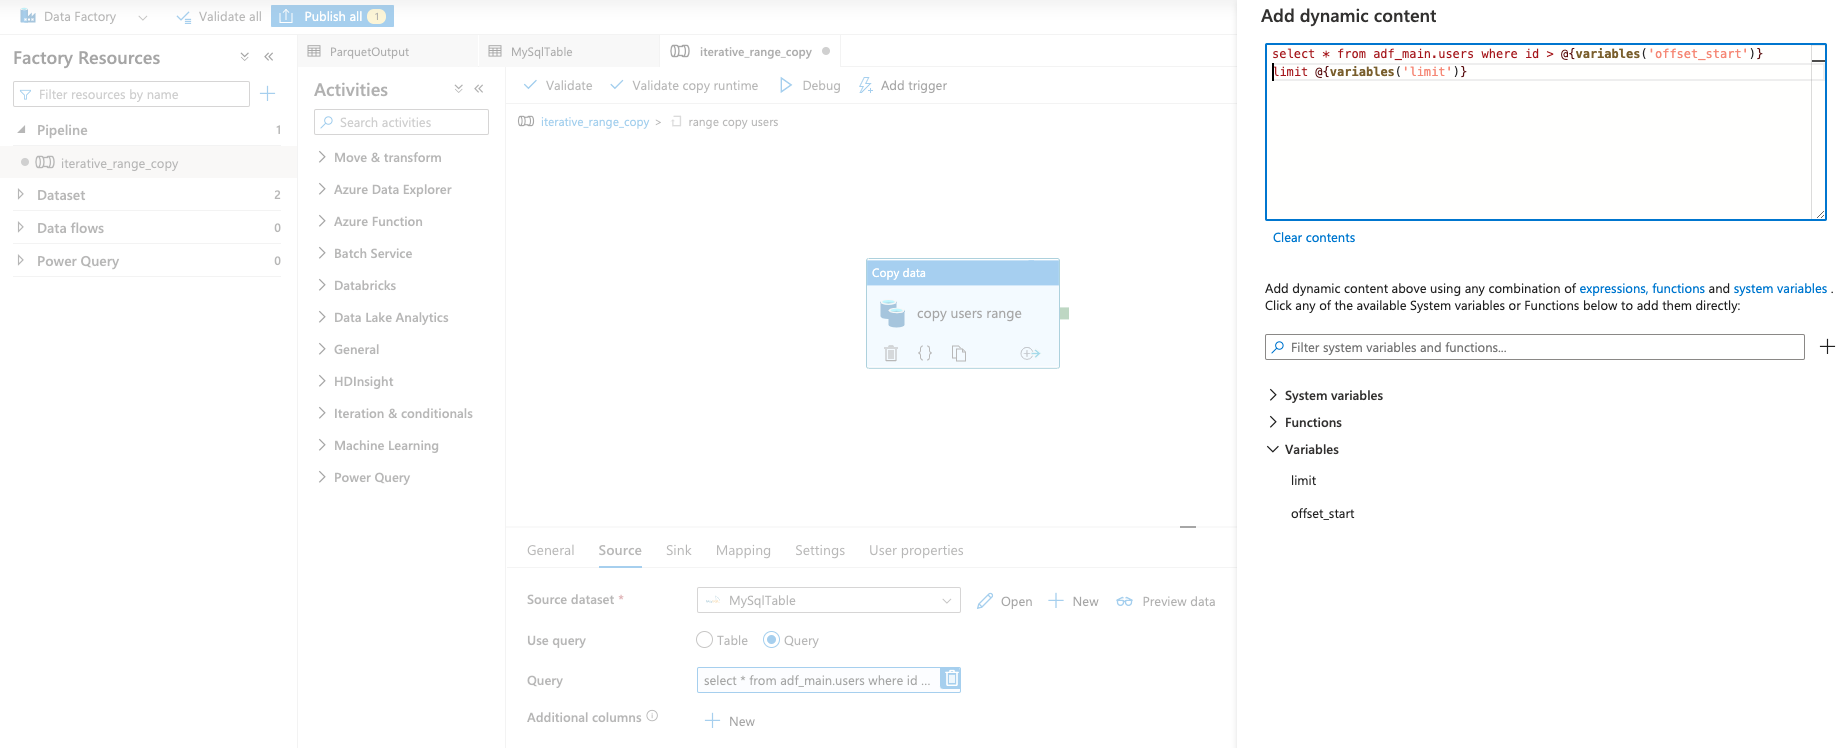
Figure 6: Adding a Recurring "Copy data" Activity
-
Create a "Lookup" activity.
-
Select the same source as before, as well as the "Query" option.
-
Add a SQL statement that retrives the last ID from the set of results.
Here is what I am using in Figure 7:
select
    max(t.id) as last_id
from (
    select
        id
    from adf_main.users
    where id > @{variables('offset_start')}
    limit @{variables('limit')}
) as t;
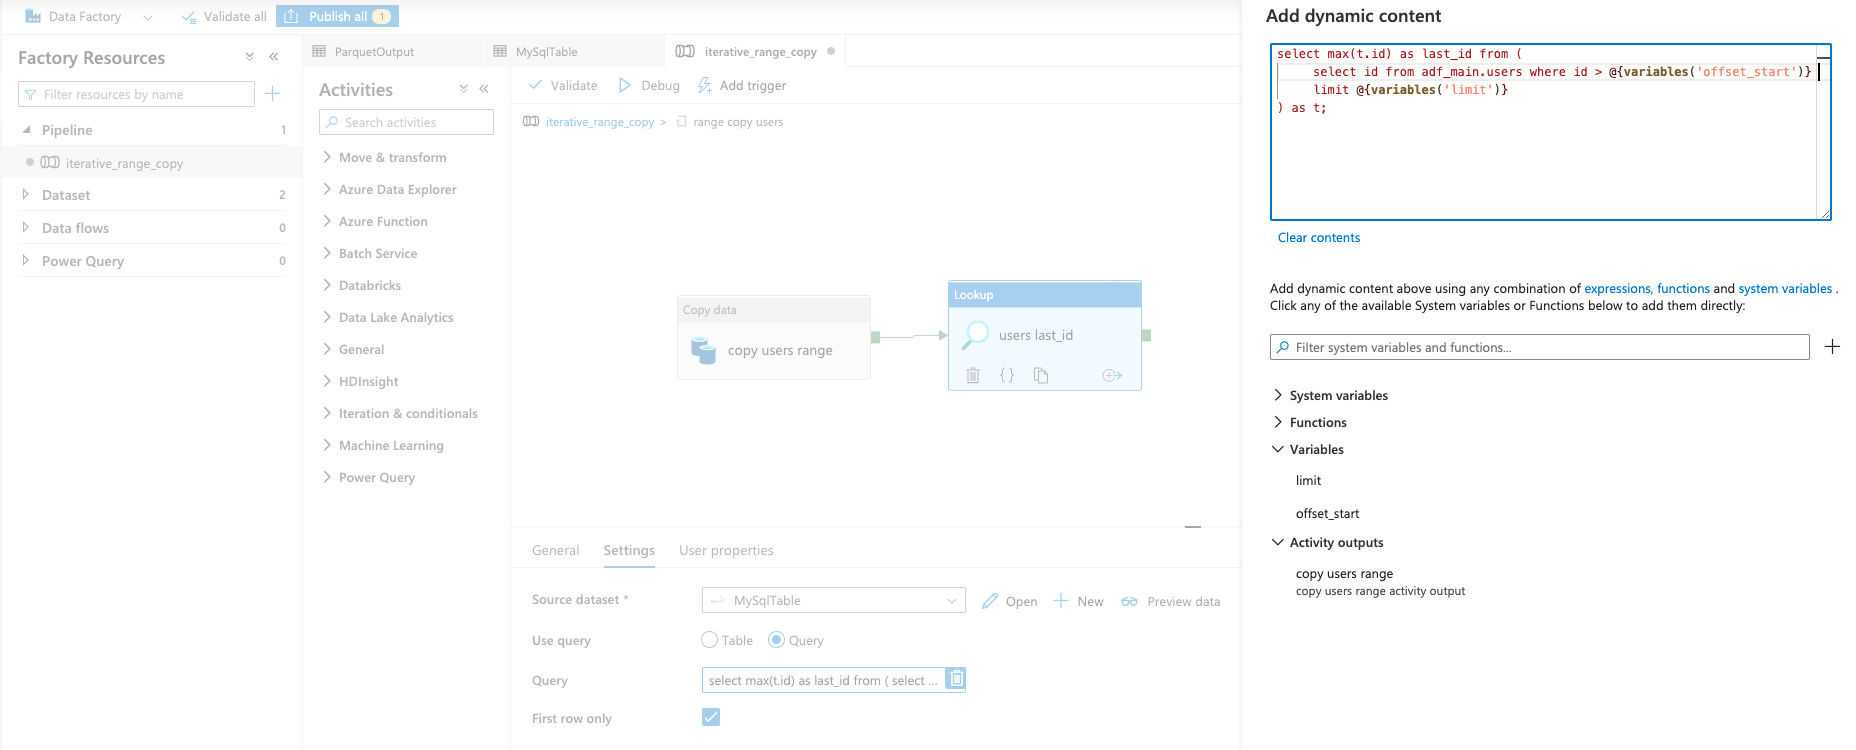
Figure 7: A Lookup Activity to Retrieve the Last ID from the Results
- Add a "Set variable" activity to update the "offset_start" variable to the last seen ID. This allows the next set of results to pick up from where the previous left off.
Here is the value used in Figure 8:
@string(activity('users last_id').output.firstRow.last_id)
This is taking the output from the "Lookup" activity and setting it directly to the "offset_start" variable.
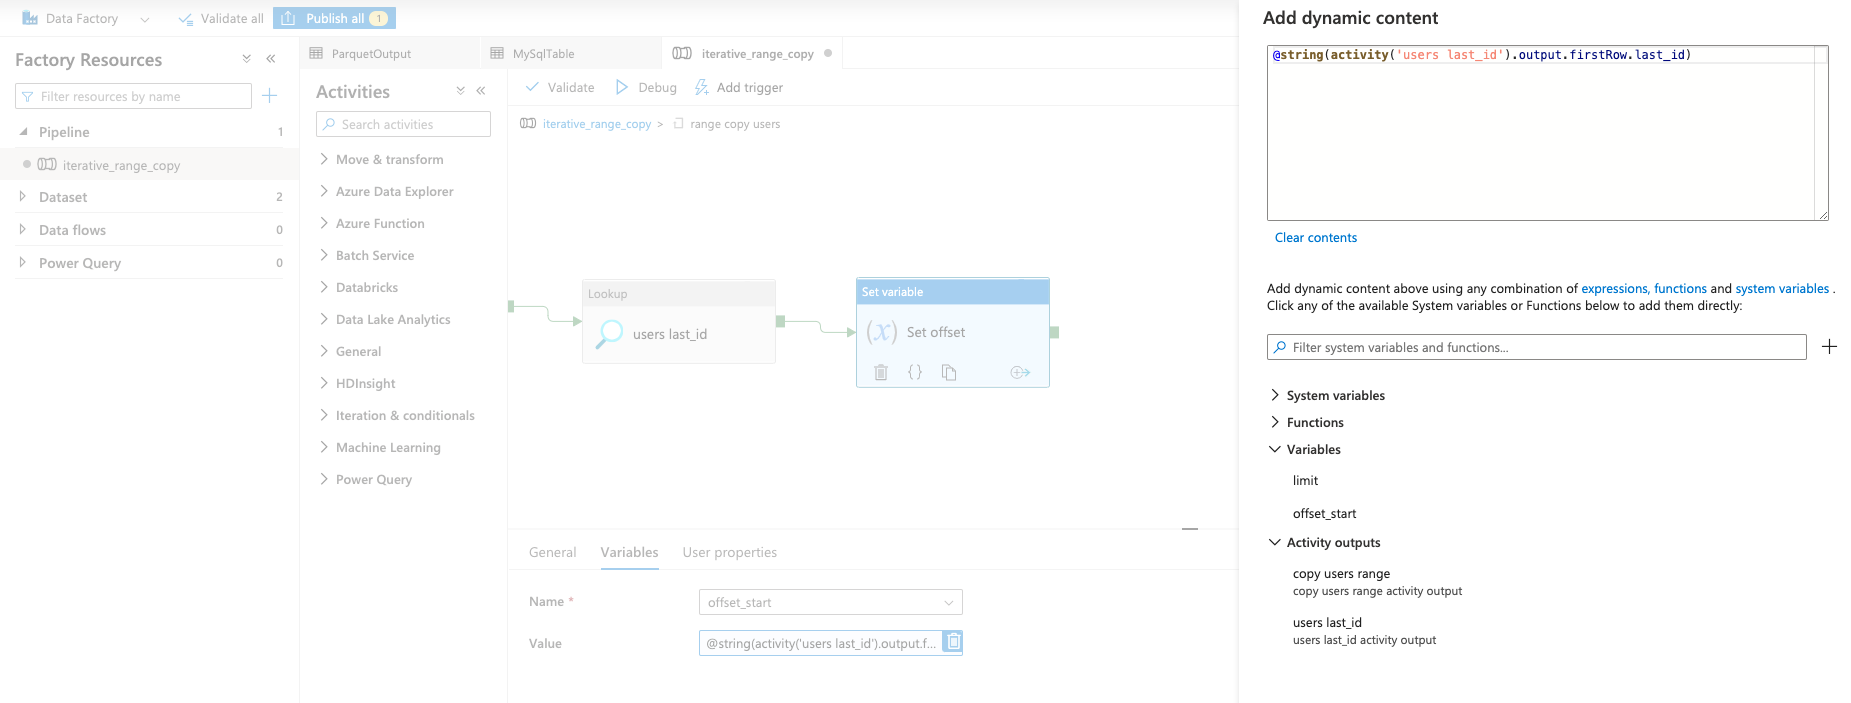
Figure 8: "Set variable" Activity to Update the offset_start variable
- Move back out into the "Until" function and set the end condition.
This is the value in Figure 9:
@less(activity('copy users range').output.rowsCopied, 100)
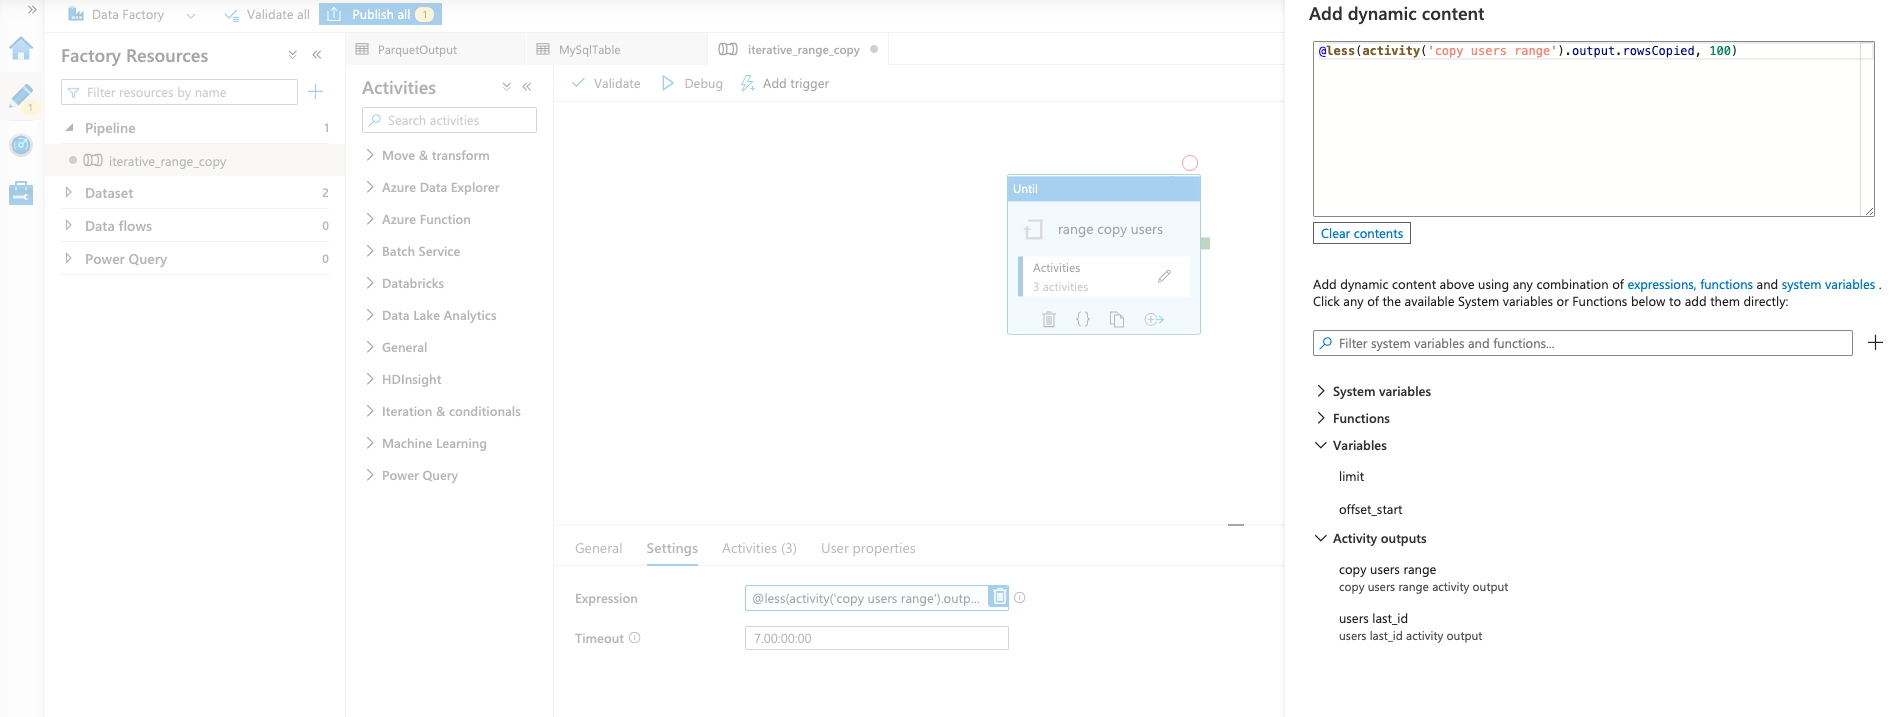
Figure 9: Setting the End Condition for the "Until" Function
This end condition tests to see whether the output of the inner "Copy data" activity is less than the limit that was set in the beginning.
If it is not, then that means there is more data to copy and the offset will increment.
Otherwise, the "Until" function will end.
Results and Performance
This is the result in Azure Storage of copying the adf_main.users table by 100 records at a time.
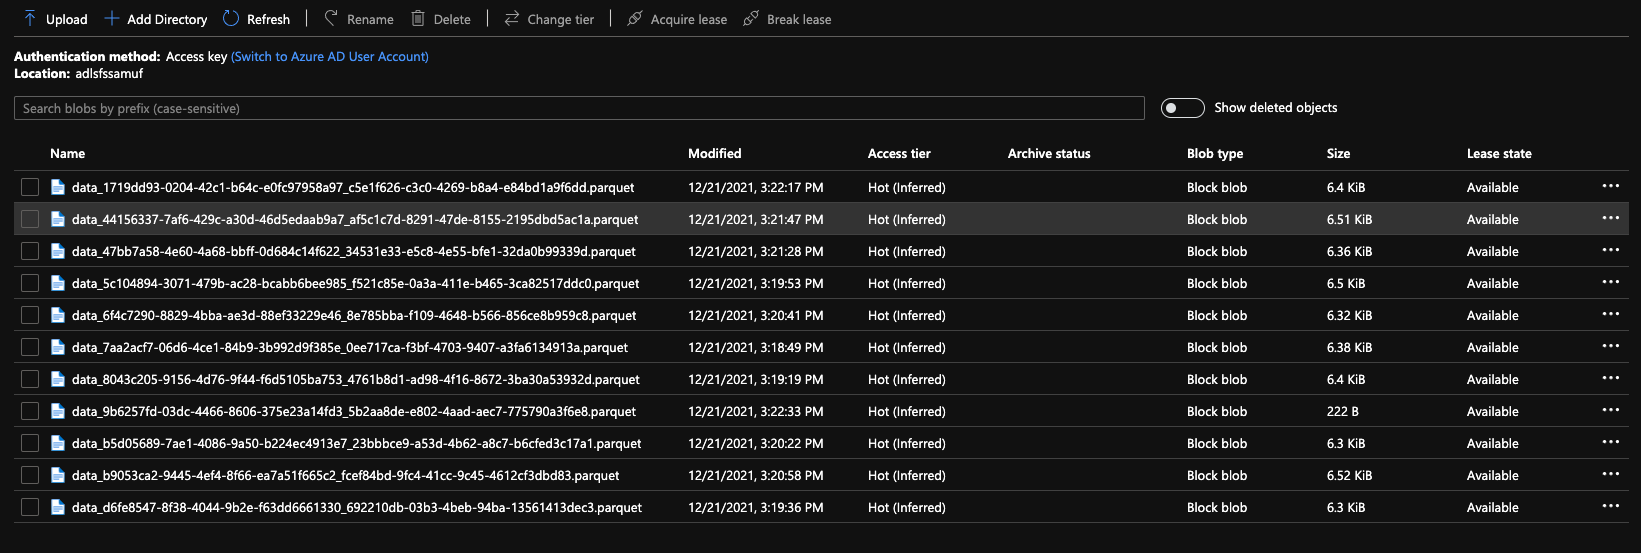
Figure 10: Azure Storage Output from the ADF Iterative Range Copy
The Parquet file format was chosen since it is a good format for Data Lake storage and easily consumed for downstream transformations by Spark and Data Factory data flows.
Despite the fact that each iterative copy results in its own Parquet file, this entire directory can be treated as a single file.
Here is a table of results that contains performance per copy iteration (not the full duration of copying the table) for the workload in this article's example, as well as the aforementioned production workload on hundreds of millions of records:

Table 1: Results from Sample and Production Workloads
Conclusion
This article has detailed a method to help avoid server-side timeouts in Azure Data Factory when copying from relational SQL data sources.
Performance for every copy iteration is predictable so long as the table has an incrementing integer primary key column that is being leveraged for range copying.
Consider implementing an Iterative Range Copy solution for workloads on tables that have hundreds of millions of rows and update semi-regularly.


Comments