

In this post, I will explain a bit about Non-Fungible Tokens (NFTs) and walk through an implementation of the ERC-721 standard in Ethereum. If you're looking for a non-technical intro to blockchain, check out my friend Johnny Dollar's explanation, and follow up with a more in-depth explanation from Andreas Antonopoulos. If you want to ramp up on developing software on Ethereum with Solidity and Truffle, read Tyler Haden's posts on Solidity and Truffle.
What are Tokens?
Most people think of blockchains as cryptocurrencies, but open, distributed ledgers are a great way to track many kinds of assets. Think of tokens as poker chips that can be traded in a marketplace without hauling the physical assets around. When you hold digital tokens, you have cryptographic security and 24/7 access to exchanges to buy/sell. Unlike poker chips, blockchain tokens do not require you to trust "the house". Vires in numeris!
Tokens on the Ethereum Blockchain
When discussing token standards on the Ethereum network, usually the first thing that comes to mind is ERC-20, the fungible token standard. ERC-20 is fungible because every token is the same as every other token. This is why so many startups were using ERC-20 tokens to kick start their projects during the ICO craze; they were (mostly) tokenizing their business ventures, products, or services and selling pieces of the value.
Side note: "Fungibility" is often touted as a desirable trait in assets, but it's more complicated than it seems to create truly fungible assets. Gold is one of the best examples, because it can be smelted and reshaped with only weight and purity as variables, but what about modern money? Are all US Dollar bills the same? Almost; there are those pesky serial numbers which can be used to track bad actors like bank robbers. Are Bitcoins fungible? Same problem as USD, each and every Bitcoin transaction has a unique ID and can be traced back to its origin. If you require near-perfect fungibility, use Monero.
The advent of ERC-20 opened a Pandora's Box of differing requirements for tokens. Check Ethereum's site for an exhaustive list. For this post, I'm focusing on ERC-721: non-fungible tokens.
Why Non-Fungible Tokens?
There are many assets one could "digitize", or at least create a tradable digital proxy, which are unique in some respect. Event tickets often have a particular seat associated with each ticket; real estate parcels have unique location and characteristics; virtual items in online games are often unique (sometimes terminally unique); art and music are particularly good use cases, because uniqueness is part of their intrinsic value.
When you purchase a painting or sculpture, there are usually documents or other artifacts to assure you of their provenance and authenticity. ERC-721 attempts to provide these assurances by associating the digital token with digital metadata. Let's dig in and see how that works under the covers.
ERC-721
Since Ethereum is a smart contract platform, token implementations are interfaces which define functions that must be implemented. Like ERC-20, your implementation of these functions defines the behavior of tokens minted from the contract during transactions.
The Interface
The following will look familiar to anyone who has worked with ERC-20 tokens, with the addition of _tokenId to track the provenance of each unique token:
interface ERC721 {

    event Transfer(address indexed _from, address indexed _to, uint256 indexed _tokenId);
    event Approval(address indexed _owner, address indexed _approved, uint256 indexed _tokenId);
    event ApprovalForAll(address indexed _owner, address indexed _operator, bool _approved);

    function balanceOf(address _owner) external view returns (uint256);
    function ownerOf(uint256 _tokenId) external view returns (address);
    function safeTransferFrom(address _from, address _to, uint256 _tokenId, bytes data) external payable;
    function safeTransferFrom(address _from, address _to, uint256 _tokenId) external payable;
    function transferFrom(address _from, address _to, uint256 _tokenId) external payable;
    function approve(address _approved, uint256 _tokenId) external payable;
    function setApprovalForAll(address _operator, bool _approved) external;
    function getApproved(uint256 _tokenId) external view returns (address);
    function isApprovedForAll(address _owner, address _operator) external view returns (bool);
}
Also important in NFTs is the optional metadata interface:
interface ERC721Metadata /* is ERC721 */ {

    function name() external view returns (string _name);
    function symbol() external view returns (string _symbol);
    function tokenURI(uint256 _tokenId) external view returns (string);
}
The key to minting NFTs for marketplaces like OpenSea and Rarebits is the tokenURI used here. This allows the inclusion of metadata which references the source of truth for a digital art asset. Let's dig in to our use case and explore how metadata drives NFT markets.
The Use Case
As is often the case in emerging technologies, the most prevalent use cases for non-fungible tokens emerging to date are in art and gaming. I was approached by my pal Johnny Dollar for help implementing and deploying an NFT contract. Johnny wanted to provide digital artists with an open source solution for minting NFTs for digital art. Thus the Artist Liberation Front was born!

The goal of ALF is to make it easy for artists to mint non-fungible tokens without paying fees using open source software. The user interface isn't anything fancy; I'm no UI designer. It's just simple, and it works. There are many features we'd like to add as we get feedback from artists using the tool.
Implementing ERC-721
All source code included here can be found at the ALF Github repo unless otherwise specified.
Metadata
I began by researching the example code at OpenSea, one of the most popular marketplaces for NFT digital collectibles.
This is the metadata standard from OpenSea:
{
  "description": "Friendly OpenSea Creature that enjoys long swims in the ocean.",
  "external_url": "https://openseacreatures.io/3",
  "image": "https://storage.googleapis.com/opensea-prod.appspot.com/puffs/3.png",
  "name": "Dave Starbelly",
  "attributes": []
}
The following is example metadata from one of our ALF tokens:
{
  "description": "Artists' Liberation Front Fist",
  "external_url": "https://artistunleashed.app/static/media/logo.9a99eea9.png",
  "image": "https://ipfs.infura.io/ipfs/QmPiYzMQbSpUsKC2b6CHEUHWFqFHjX9bHSu6YVpiopzvTW",
  "name": "ALF",
  "attributes": [
  {
      "trait_type": "Artist Name",
      "value": "Johnny Dollar"
    },
    {
      "trait_type": "Series",
      "value": "Post Pop"
    },
    {
      "trait_type": "Edition",
      "value": "Artist Proof"
    },
    {
      "trait_type": "Original Media",
      "value": "Digital"
    },
    {
      "trait_type": "dimension",
      "value": "128px x 128px"
    }]
}
Note our addition of new attributes; these are traits often associated with physical works of art. As standards evolve in the NFT space, I hope the most relevant types of metadata will emerge and be widely adopted and used by NFT marketplaces and galleries.
Contract Code
The following is for those familiar with Solidity and Truffle.
The ALF contract was originally based on the OpenSea Creatures demo project. I upgraded some dependencies and code to take advantage of fixes and features in OpenZeppelin-Solidity 2.x.
Let's go through the basic implementation of TradeableERC721Token step-by-step:
contract OwnableDelegateProxy {}

contract ProxyRegistry {
    mapping(address => OwnableDelegateProxy) public proxies;
}
OwnableDelegateProxy and ProxyRegistry are used to whitelist our contract with OpenSea's proxy registry for trading on their market.
/**
 * @title TradeableERC721Token
 * TradeableERC721Token - ERC721 contract that whitelists a trading address, and has minting functionality.
 */

contract TradeableERC721Token is ERC721MetadataMintable, ERC721Pausable, ERC721Enumerable, Ownable {
Yes, that is a lot of interfaces! No worries, the good folks at OpenZeppelin implemented most of what we need. Here's what they do for us:
ERC721MetadataMintablegives us themintWithTokenURIfunctionality to associate our metadataERC721Pausableallows us to pause our contract if something goes wrong. TAKE NOTE that this not only pauses minting new tokens, but also transfer of existing tokens!ERC721Enumerablehelps us track total supply and maps token IDs to owner addressesOwnablegives us the ability to restrict some contract functions to the contract owner (address it was deployed from)
    constructor(string _name, string _symbol, address _proxyRegistryAddress) public ERC721Metadata(_name, _symbol) {
        proxyRegistryAddress = _proxyRegistryAddress;
    }
In the constructor we initialize our token contract metadata and set our proxy registry address. We will use the proxy registry later to verify who is permitted to list a token on the owner's behalf.
/**
 * Override isApprovedForAll to whitelist user's OpenSea proxy accounts to enable gas-less listings.
 */
function isApprovedForAll(
    address owner,
    address operator
) public view returns (bool)
{
    // Whitelist OpenSea proxy contract for easy trading.
    ProxyRegistry proxyRegistry = ProxyRegistry(proxyRegistryAddress);
    if (proxyRegistry.proxies(owner) == operator) {
        return true;
    }

    return super.isApprovedForAll(owner, operator);
}
This is where that proxy registry address comes in, allowing a user's token to be listed and traded on OpenSea's NFT collectible marketplace.
function mint(
    address _to,
    string _tokenURI) public returns(bool) {
    return mintWithTokenURI(_to, _getNextTokenId(), _tokenURI);
}
The mint function allows our minter to pass in the address they're minting to and the token URI that resolves to the metadata file for this token.
/**
  * @dev calculates the next token ID based on totalSupply
  * @return uint256 for the next token ID
  */
function _getNextTokenId() private view returns (uint256) {
    return totalSupply().add(1);
}
Here we're ensuring our token ID is unique, and reflects the order in which it was created.
Now that we made the baseline contract, our actual token contract is just a one-liner constructor!
contract ArtistsLiberationFront is TradeableERC721Token {
    constructor(address _proxyRegistryAddress) public TradeableERC721Token("ArtistsUnleashed", "ALF", _proxyRegistryAddress) {}
}
We pass in the OpenSea token registry addresses (Rinkeby and Mainnet) in our Truffle migration script:
const ArtistsLiberationFront = artifacts.require("./ArtistsLiberationFront.sol");

module.exports = function(deployer, network) {
  // OpenSea proxy registry addresses for rinkeby and mainnet.
  let proxyRegistryAddress = "";
  if (network === 'rinkeby') {
    proxyRegistryAddress = "0xf57b2c51ded3a29e6891aba85459d600256cf317";
  } else if (network === 'live') {
    proxyRegistryAddress = "0xa5409ec958c83c3f309868babaca7c86dcb077c1";
  }

  deployer.deploy(ArtistsLiberationFront, proxyRegistryAddress, {gas: 5000000});
};
User Interface Code
Smart contracts are awesome, but hard to use without some kind of user interface. I'm not very proficient in modern Javascript frameworks, so I did some research and chose React.js as my UI framework. React has a lot of community support, easy quickstart apps, and isn't too hard on the eyes.
There is still a lot of code, so I'm only going to highlight the most critical parts. You can browse the rest in the ALF Github repo.
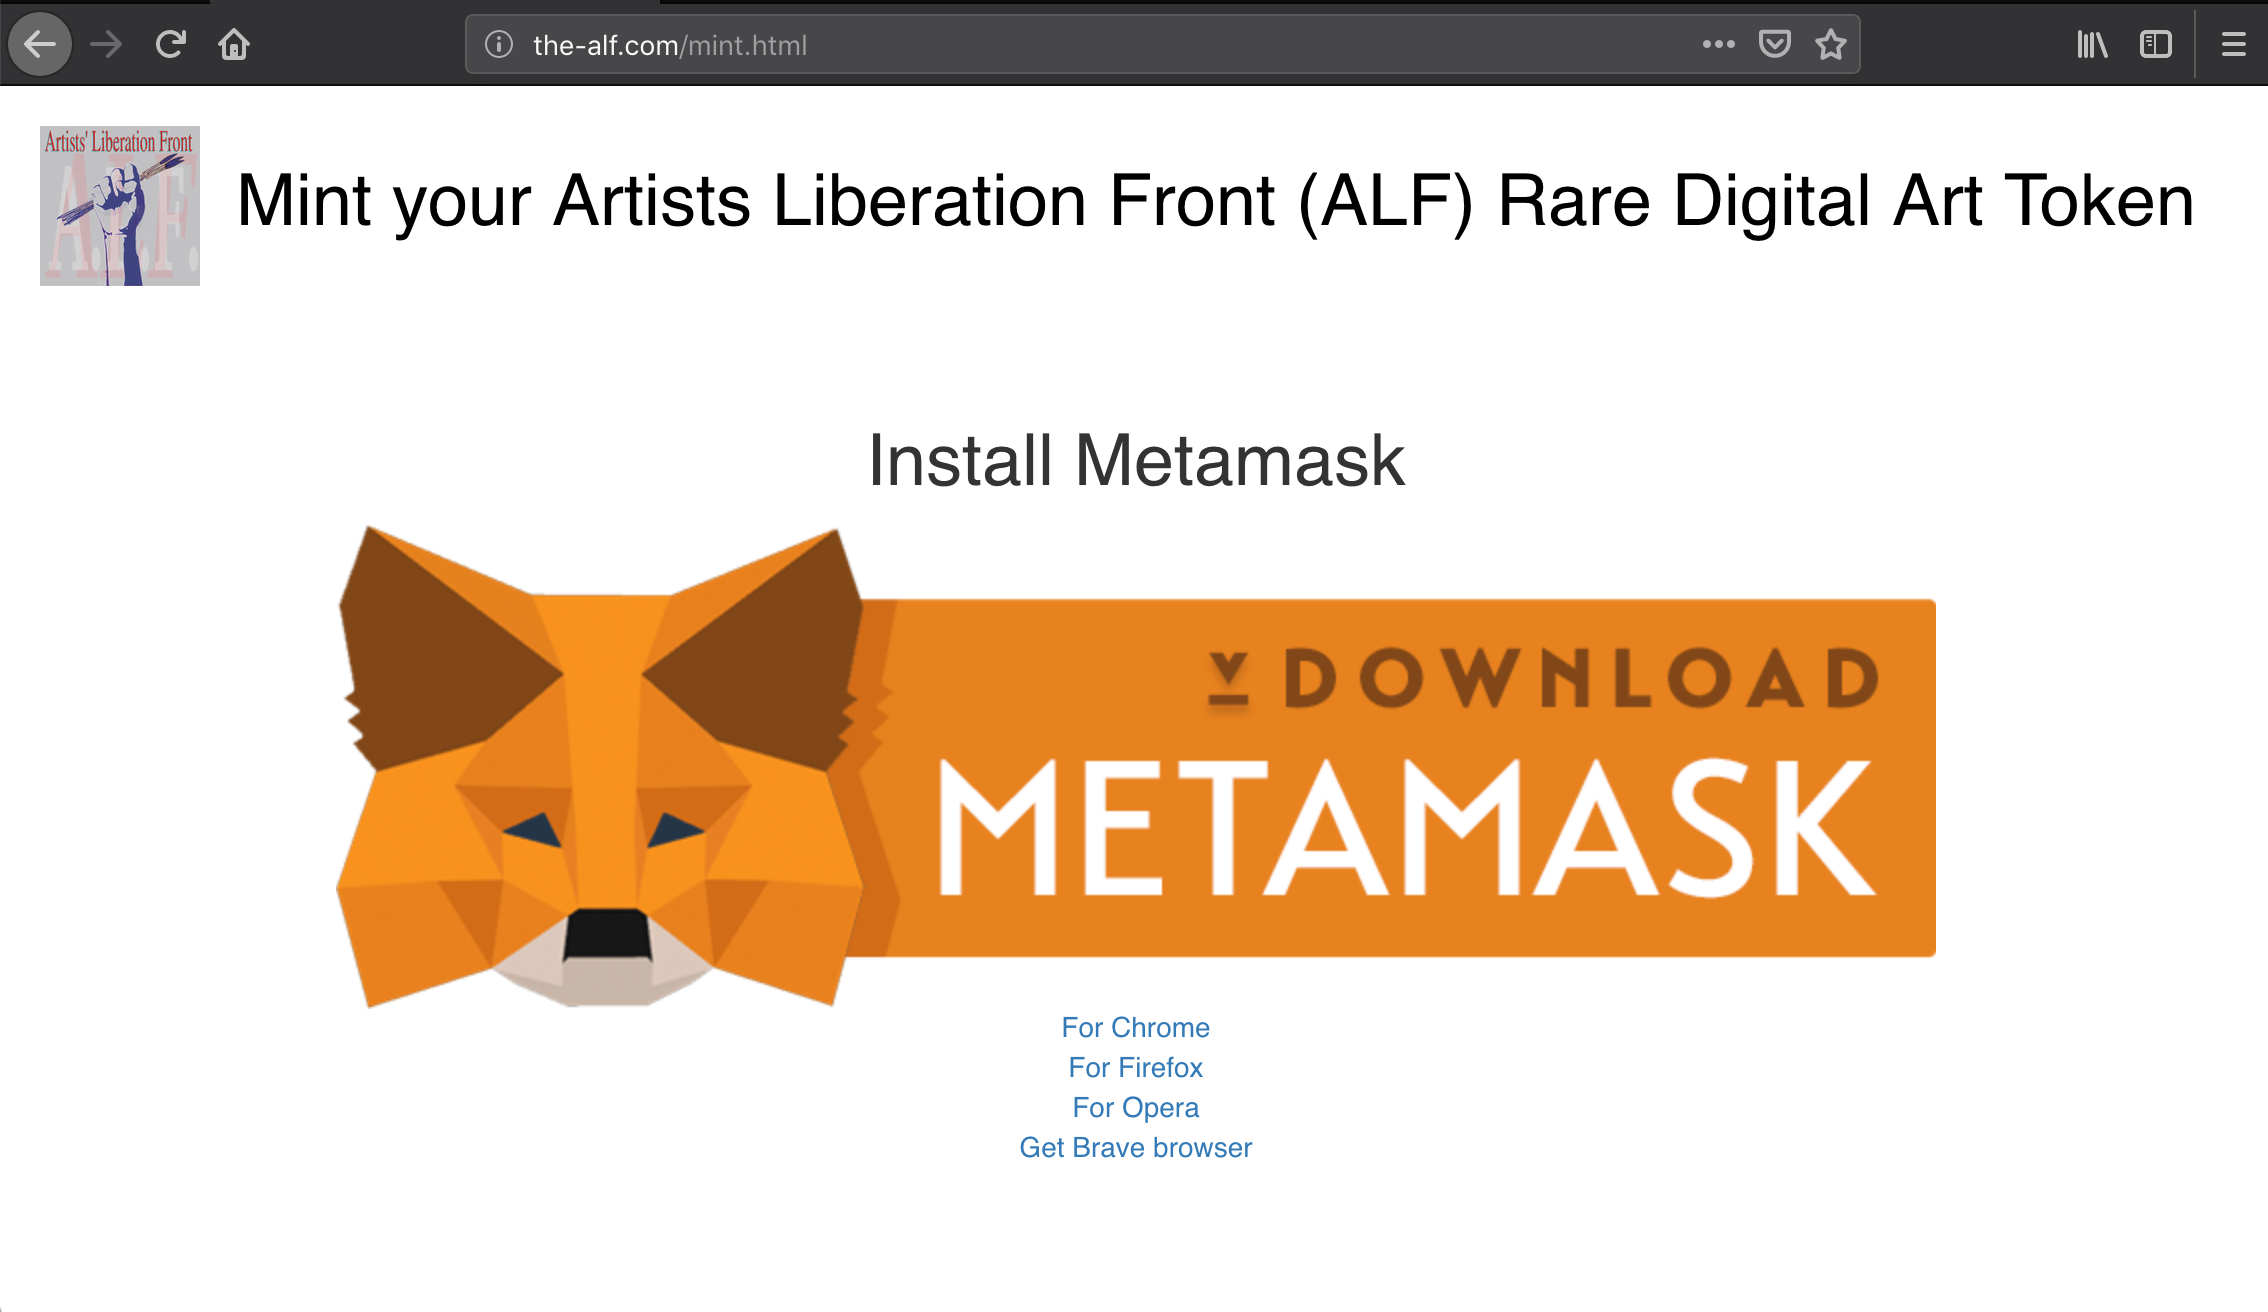
Users entering the application without MetaMask installed and enabled will see the following:
React state is initialized in the constructor and tracks values related to the web3 network, the state of the current token being minted, and the actions passed to components:
constructor(props) {
    super(props);

    this.state = {
        selectedTab: 'Home',
        tabs: [
            {linkTo: 'Home', label: 'Home', component: Home},
            {linkTo: 'Token', label: 'Token', component: Token},
            {linkTo: 'Image', label: 'Image', component: Image},
            {linkTo: 'Metadata', label: 'Metadata', component: Metadata}
        ],
        web3ctx: {
            networkId: '',
            networkName: '',
            etherscanUrl: '',
            activeWallet: '',
            lastBlockNumber: '',
            currentBalance: '',
            tokenAddress: '',
            ipfsGateway: 'https://ipfs.infura.io/ipfs/'
        },
        myToken: {
            address: '',
            abi: tokenContract.abi,
            imageBuffer: '',
            ipfsImageHash: '',
            ipfsImageUrl: '',
            metadataBuffer: metadata,
            ipfsMetadataHash: '',
            ipfsMetadataUrl: '',
            recipientAddress: '',
            txHash: '',
            txReceipt: '',
            blockNumber: '',
            gasUsed: ''
        },
        actions: {
            captureFile: this.captureFile.bind(this),
            handleInputChange: this.handleInputChange.bind(this),
            handleMetadataChange: this.handleMetadataChange.bind(this),
            handleAbiChange: this.handleAbiChange.bind(this),
            addIpfs: this.addIpfs.bind(this),
            mintToken: this.mintToken.bind(this),
            addMinter: this.addMinter.bind(this)
        }
    };
}
Ths code that checks for MetaMask is pretty straightforward:
// web3.js
import Web3 from 'web3';

const web3 = (window.web3 ? new Web3(window.web3.currentProvider) : null);

export default web3;
The main app checks web3 state and shows a page with MetaMask links (not shown):
// App.js render()
if (!web3 || typeof web3 == 'undefined' || web3.version.network === 'loading') {
    return (
        <GetMetamask/>
    );
}
The React event componentDidMount triggers web3 state initialization, and is fired if the user changes their web3 network in MetaMask:
// constants used to build etherscan links
const web3networks = {
    1: {
        name: 'main',
        etherscanUrl: 'https://etherscan.io/tx/'
    },
    3: {
        name: 'ropsten',
        etherscanUrl: 'https://ropsten.etherscan.io/tx/'
    },
    4: {
        name: 'rinkeby',
        etherscanUrl: 'https://rinkeby.etherscan.io/tx/'
    },
    42: {
        name: 'kovan',
        etherscanUrl: 'https://kovan.etherscan.io/tx/'
    }
};

componentDidMount() {
    this.checkNetwork();
}

checkNetwork = async () => {

    // first update the values that can change while connected
    let myContext = this.state.web3ctx;
    let accounts = await web3.eth.getAccounts();
    myContext.activeWallet = accounts[0];
    myContext.lastBlockNumber = await web3.eth.getBlockNumber();
    myContext.currentBalance = await web3.eth.getBalance(accounts[0]);

    await web3.eth.net.getId((err, netId) => {
        console.log(err, netId);

        if (netId && this.state.web3ctx.networkId !== netId) {
            // we're on a new network, look for deployed contract
            console.log('refreshing settings for network ' + netId);

            myContext.networkId = netId;
            myContext.networkName = (web3networks[netId] ? web3networks[netId].name : 'unknown');
            myContext.etherscanUrl = (web3networks[netId] ? web3networks[netId].etherscanUrl : 'unknown');

            if (tokenContract.networks[netId]) {
                // attempt to load contract address deployed on this network
                let newAddress = (tokenContract.networks[netId].address ? tokenContract.networks[netId].address : '');

                console.log('Using contract at address \'' + newAddress + '\'');
                myContext.tokenAddress = newAddress;

            } else {
                console.log('No contract deployed on network ' + netId);
                myContext.tokenAddress = '';
            }
        }
    });

    await this.setState({web3ctx: {...myContext}});
};
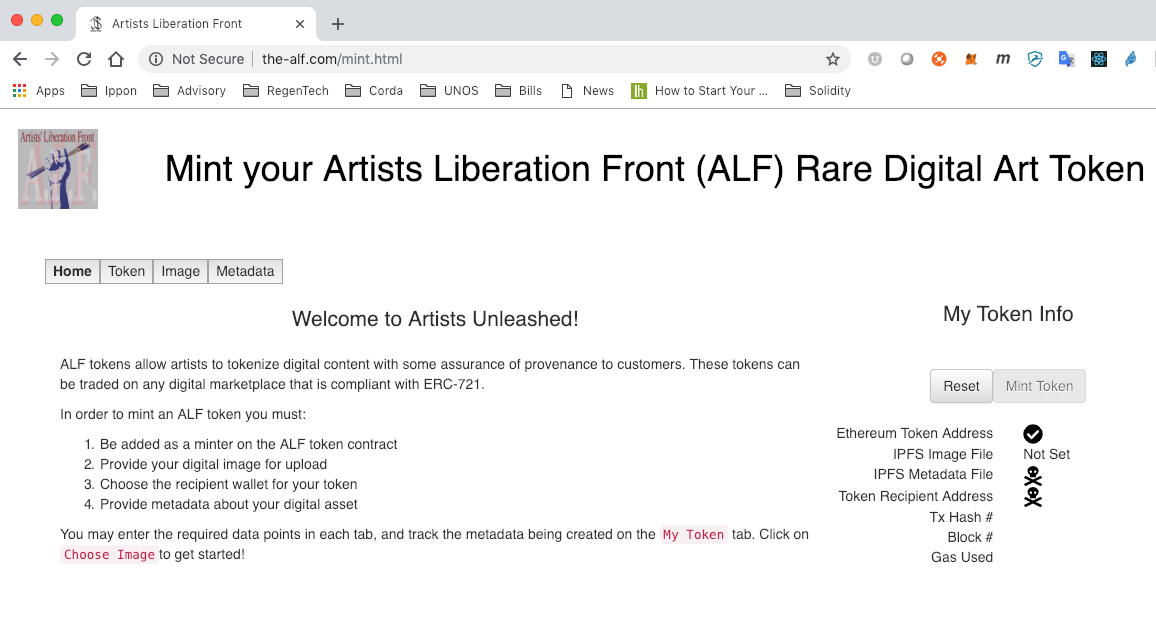
Once you get MetaMask installed and authenticated to a wallet, you should see the start page:
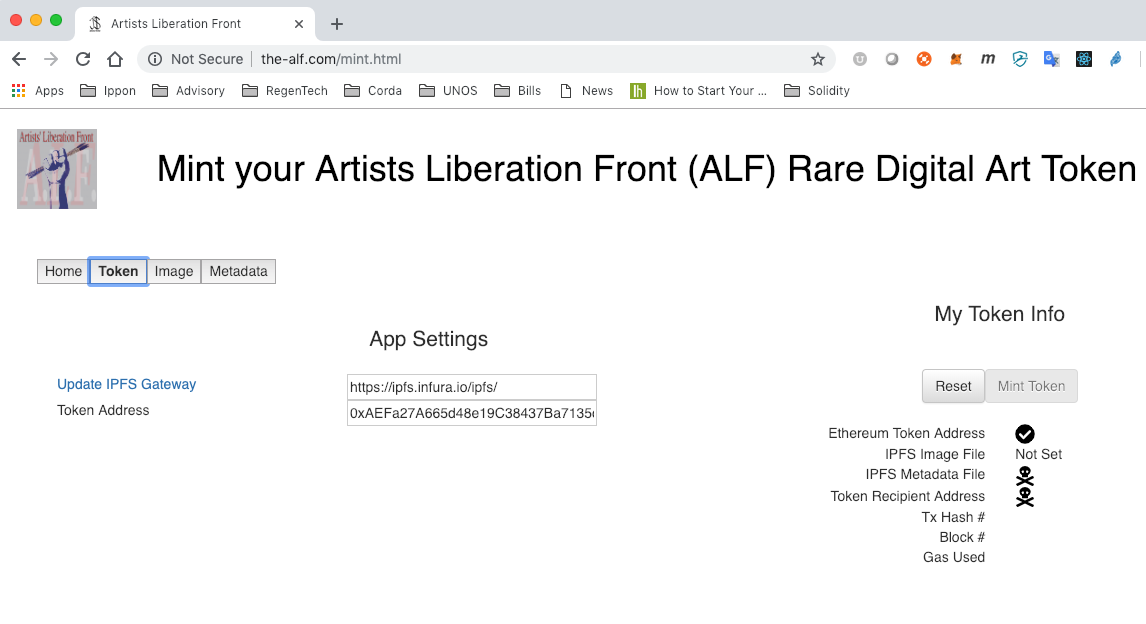
The Token tab exposes settings used for the IPFS gateway and token contract. We're storing the unique image on the Interplanetary File System (IPFS) because the blockchain is not efficient for (or in some cases capable of) storing large binary files. You can read more about IPFS on their site.
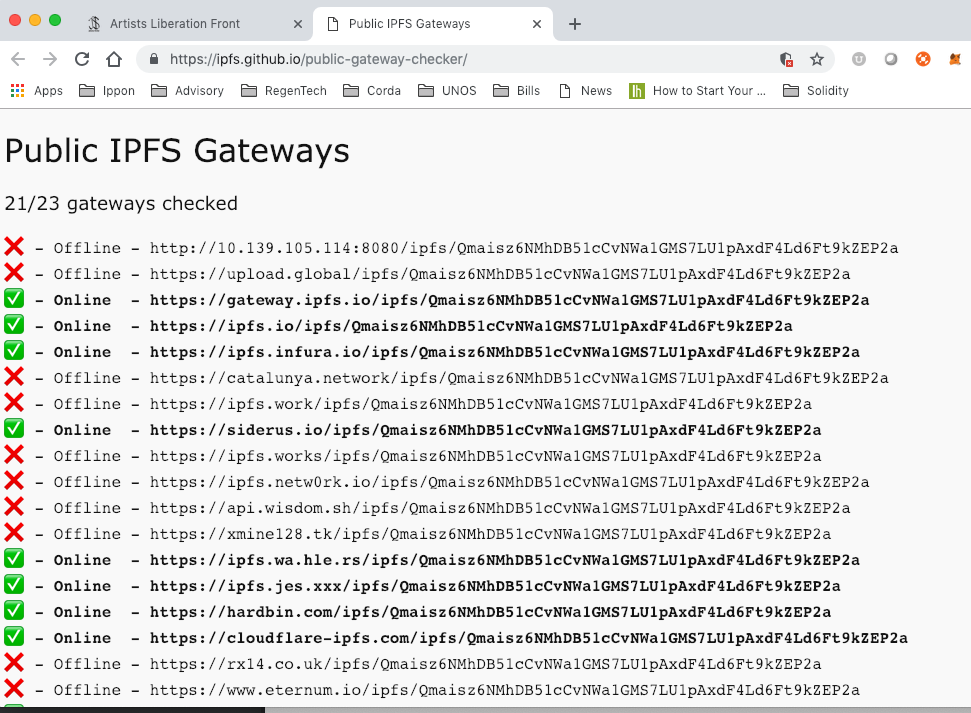
Although IPFS is distributed, you can't access IPFS unless you're running a node, so we're pointing to IPFS Gateways to upload and access our files (more on this later). Since I've never heard of a website with 100% uptime, we encourage our users to verify the selected gateway is up:
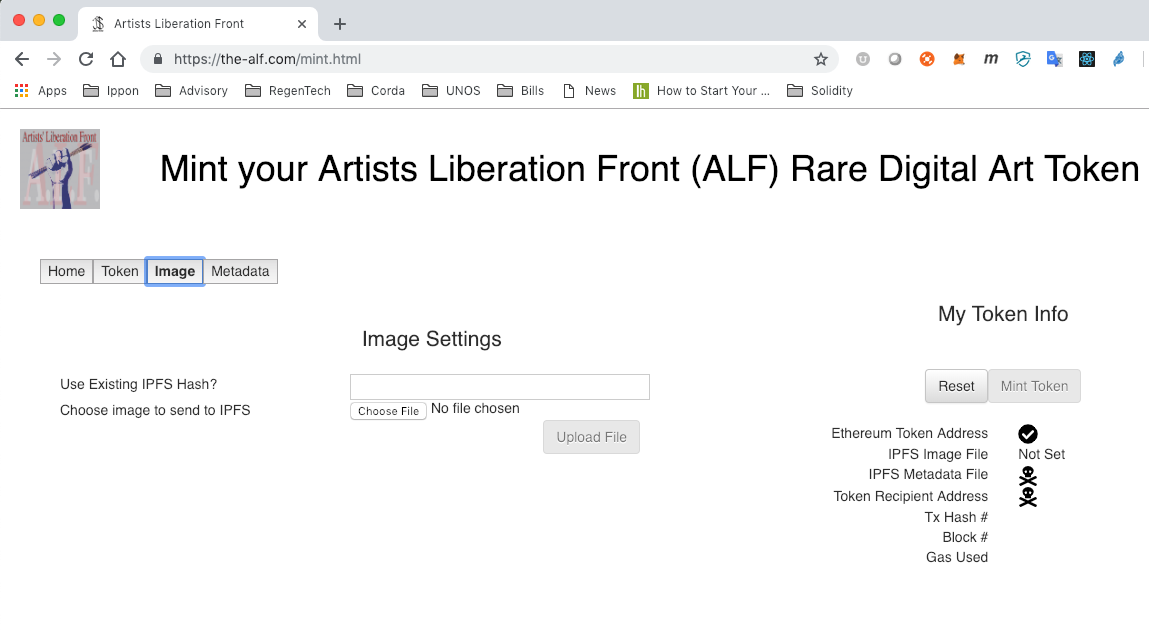
Now we get to the fun part: uploading our image and metadata to IPFS! Click the Choose File button for file picker dialog. Once you've chosen a file, the Upload File button is enabled.
Here's the code that pushes the uploaded image to our IPFS gateway:
await ipfs.add(this.state.myToken.imageBuffer, (err, ipfsHash) => {
    console.log('IPFS hash: ' + ipfsHash + ', error: ' + err);

    let myMetadata = JSON.parse(JSON.stringify(this.state.myToken.metadataBuffer));
    myMetadata.image = this.state.web3ctx.ipfsGateway + ipfsHash[0].hash;

    this.setState({
        myToken: {
            ...this.state.myToken,
            ipfsImageHash: ipfsHash[0].hash,
            ipfsImageUrl: myMetadata.image,
            metadataBuffer: myMetadata,
            imageBuffer: ''
        },
        selectedTab: 'Metadata'
    });
})
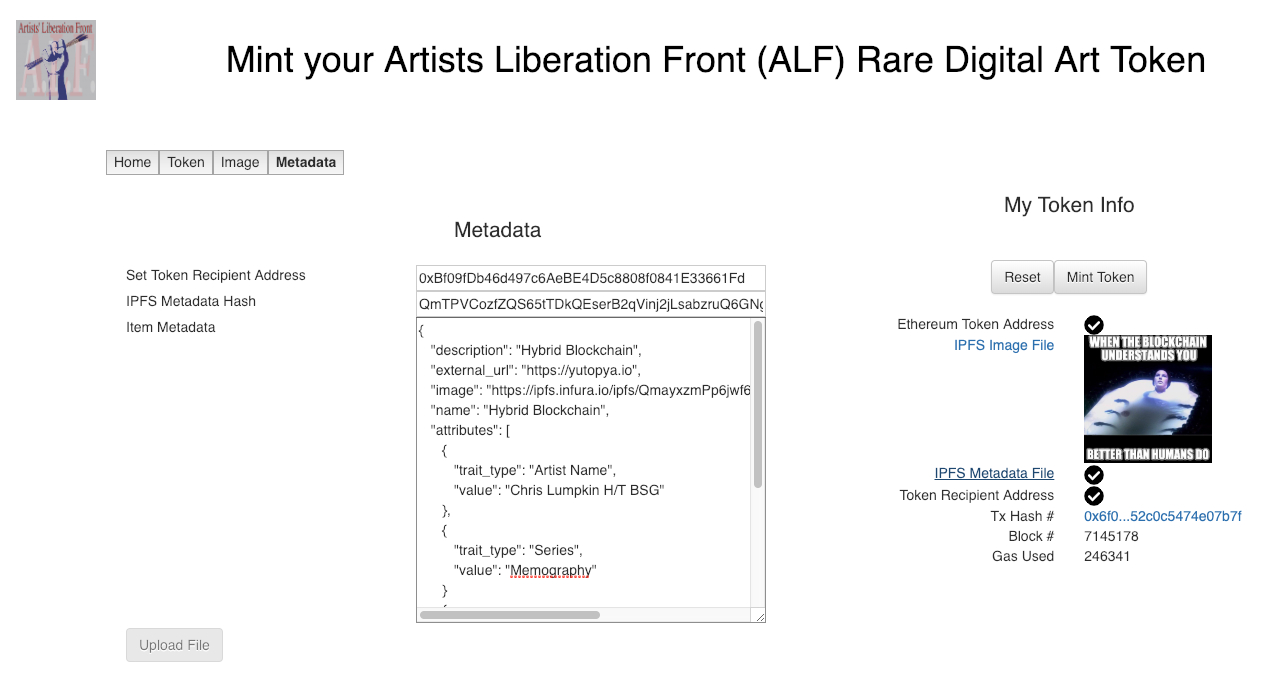
After you've uploaded your file to IPFS, you should land on the Metadata tab with your IPFS file URI pre-filled in the metadata JSON input field:

Note in above that the IPFS image is displayed in the status block on the right. One of the great features of IPFS is that you cannot upload duplicate images, because every image is located using the hash of the file, and guess what happens if you hash the same file more than once? That's right folks, you get the same hash.
One annoying thing about this UI right now is that all the input fields update React state onChange, so you'll probably want to copy the metadata JSON to your favorite text editor (or any editor that doesn't lose focus every time you enter a character). Improving this is on my to-do list. :)
Now we just need to tweak and upload the metadata (also to IPFS) and set the token recipient (I'm minting to my own wallet in this case). Here's what the page looks like when we've uploaded our metadata file and we're ready to mint our token:
Here's the code that calls the mint function in our contract (compacted for brevity):
this.setState({
    myToken: {
        ...this.state.myToken,
        blockNumber: 'waiting..',
        gasUsed: 'waiting...'
    }
});

// bring in user's metamask account address
const accounts = await web3.eth.getAccounts();
const myTokenInstance = new web3.eth.Contract(
    this.state.myToken.abi,
    this.state.web3ctx.tokenAddress
);

console.log('Sending from Metamask account: ' + accounts[0] + ' to token address '
    + myTokenInstance.options.address);

// see, this https://web3js.readthedocs.io/en/1.0/web3-eth-contract.html#methods-mymethod-send
await myTokenInstance.methods.mint(this.state.myToken.recipientAddress, this.state.myToken.ipfsMetadataUrl).send({
    from: accounts[0]
}, (error, txHash) => {
    console.log('txHash: ' + txHash + ', error: ' + error);

    this.setState({
        myToken: {
            ...this.state.myToken,
            txHash: txHash
        }
    });
});

// get Transaction Receipt in console on click
// See: https://web3js.readthedocs.io/en/1.0/web3-eth.html#gettransactionreceipt
await web3.eth.getTransactionReceipt(this.state.myToken.txHash, (err, txReceipt) => {
    if (txReceipt) {
        this.setState({
            myToken: {
                ...this.state.myToken,
                txReceipt: txReceipt
            }
        });
    }
});
Note the await modifiers; Ethereum transactions are not real-time, so these are async calls.
Caveat #13,427: you must have been added as a minter for this token using the addMinter function!
Here's the code for adding a minter to our token (though not currently exposed on ALF):
// grab user's metamask account address
const accounts = await web3.eth.getAccounts();
const myTokenInstance = new web3.eth.Contract(
    JSON.parse(this.state.myToken.abi),
    this.state.web3ctx.tokenAddress
);

console.log('Adding minter address ' + minterAddress + ' as minter for token address '
    + myTokenInstance.options.address);

// see, this https://web3js.readthedocs.io/en/1.0/web3-eth-contract.html#methods-mymethod-send
await myTokenInstance.methods.addMinter(minterAddress).send({
    from: accounts[0]
}, (error, txHash) => {
    console.log('txHash = ' + txHash + '; Error = ' + error);
});
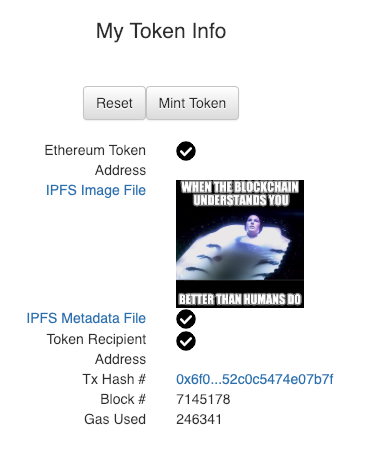
Once we've minted our token, the status block provides a link to our transaction record on https://etherscan.io and shows the tx hash, block number, and gas used:
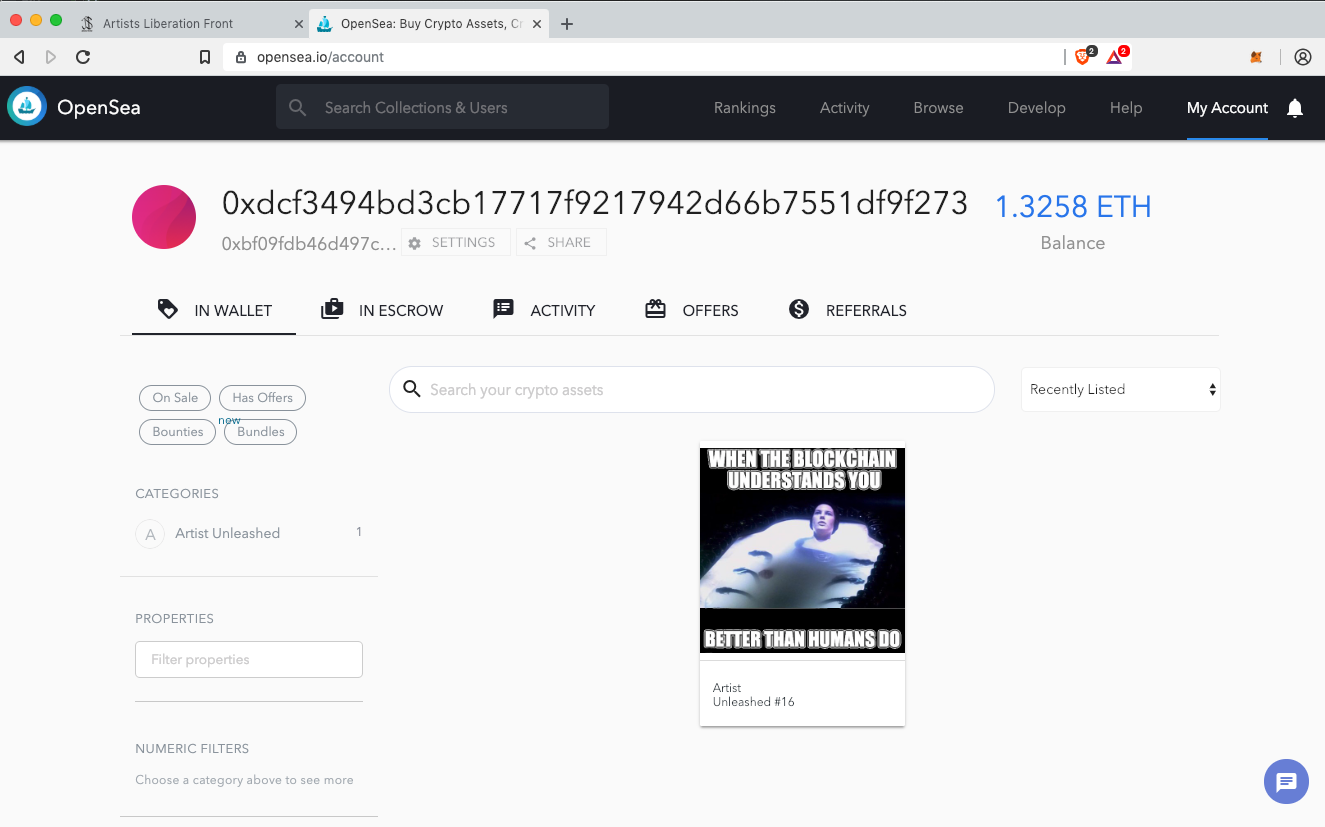
I waited a few minutes for my transaction to be mined on Ethereum, then I headed to https://opensea.io/account and my shiny new ERC-721 token had appeared!
Conclusion
Non-fungible tokens present some interesting opportunities in tokenization; fungibility isn't for everything.
By the same token...

...not everything needs to be tokenized. It's fun to work with the pioneers from the art and gaming worlds and explore how this technology can be applied to both digital and physical assets.
I find it a bit inconsistent that we're minting tokens on a distributed ledger using a distributed file system, yet we're using old school centralized DNS to reference our metadata and images via IPFS gateways.
This could be remedied with an oracle (not that Oracle!) on the blockchain to locate the metadata and image files. If this was implemented, then perhaps the organizations involved with NFTs would agree to a new standard where the IPFS hash of the metadata is stored in the token, rather than the URI, and similarly, the IPFS hash of the image is stored in the metadata. This way, we could at least hedge our reliance on a single DNS domain by allowing the oracle to determine which IPFS gateway is appropriate at the time the image is requested.
If you're interested in minting ALF tokens, join the ALF Telegram channel and send us your Ethereum wallet address!


Comments