

Hello my fellow hipsters, let me introduce to you a use case from my experience: storing attachments in a database.
This use case matches real situations met in some companies. I wrote this article because some years ago, I faced storage problematics in a tiny web app; one of the stories was to deal with upload/download files such as .CSV or .XLS.
The application, in this case a monolith, was deployed on a VM without external access, with only 10 users and about 20 files generated per year. As you can guess, no need to pull the big guns. Now that I'm aware of existence of JHipster bootstrapper, I would have realised it in a few days, and I will describe the steps to achieve it easily.
Storing files as a Blob in databases doesn't seem to be the approach you would follow with a large amount of calls and writes, and you will probably go for a cloud solution such as Amazon S3 or Minio. But in our case, we will focus on a simple architecture with no extra components for file storage in reusing the existing database.
The second question could have been wondering between file system or database storage. Both have pros and cons: using a file system ensures better performance and makes the migration easier, but you have more security issues and you need to handle the file's lifecycle. Using a database is more secure and avoids orphan files, nevertheless backups are a little bit cumbersome and files should be converted to Blobs.
I will now show you how to quickly build a simple application that can efficiently store binaries. As previously mentioned, we use JHipster to bootstrap the application. The JHipster Domain Language (JDL) helps you design (kind of UML editor) our entities.
Furthermore it provides a way to run our application as if you were in production mode thanks to a docker-compose file generated for you.
To achieve this use case, we will generate a JHipster application, bring some modifications to the generated code to tune the Hibernate behavior with attachments, and update Angular components to manage file upload through multipart forms.
Use case: Car technical documentation
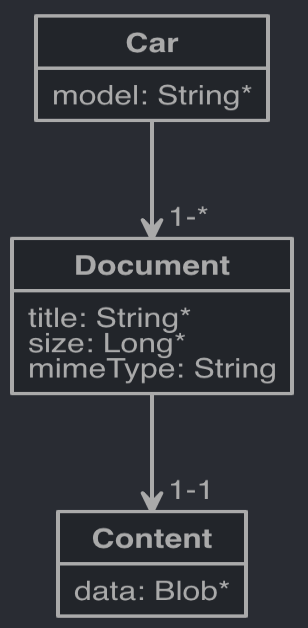
Our client, a car builder, wants us to do a simple application to manage all the car documents his company produces. For the purpose of the article, we simplify the use case and imagine that a car is only defined by its name, a document with some metadata and content. A car can have one or many documents, a document can only have one content.
We want to retrieve cars with their document list, but we want the content to be only retrieved on demand when downloading them.
Prepare the application
Generate the application with JHipster Online
JHipster Online is a JHipster generator as a service. You can bootstrap your application without installing the JHipster generator locally. You can also link it with your GitHub/GitLab account and let JHipster Online initialize a new Git repository for you.
Go to https://start.jhipster.tech/#/generate-application and fill out your application and repository name.
Generate your application by clicking on the « Generate on GitHub » button. After a short moment, the application will be created and uploaded to your new repository. Congratulations!
Generate the entities with the JDL studio
The JHipster Domain Language will allow us to generate our repositories, entities, REST resources and all the related tests. We just have to define our model and how entities work before importing them into our application.
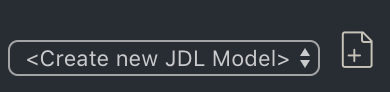
For this article we will use a simple JDL. Copy/paste it into JDL studio and select « create new JDL model » in the list then click on the save button:
entity Car {
  model String required
}

entity Document {
  title String required
  size Long required
  mimeType String
}

entity Content {
  data Blob required
}

relationship OneToOne {
  Document{content} to Content{document(id) required}
}

relationship OneToMany {
  Car{document} to Document{car(id) required}
}
Apply the JDL model to the application
In the manage JDL view (https://start.jhipster.tech/#/design-entities), select your model then click on the apply button.

In the next page, you will have to select your repository on which you want to apply the JDL model.
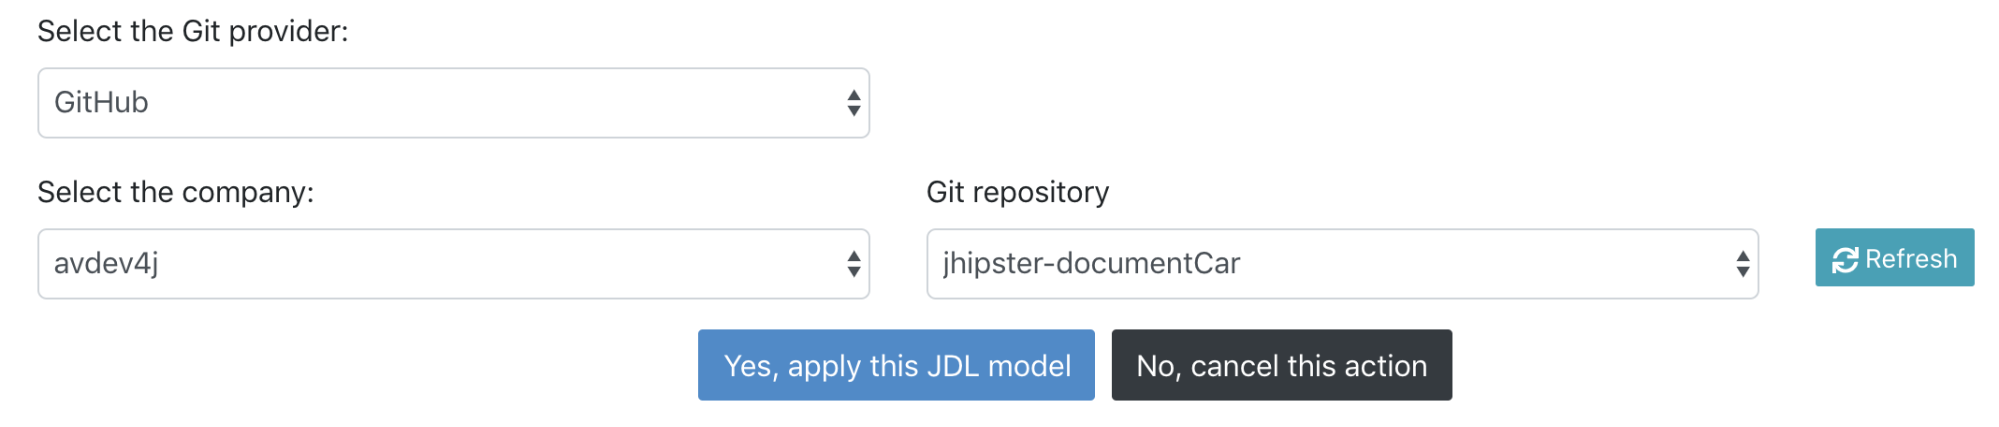
Applying the JDL model will create a Pull Request on your repository. Merge it and clone the project on your computer.
Customize the application
To fulfill our client use case, we have to customize the application. Both the backend and the frontend have to be modified to handle documents through the car creation process, and the content has to be retrieved only on demand to optimize memory usage and improve performance.
Backend
Modify Car and Document entities
Entities come from JHipster with some Hibernate configuration. We just have to update it according to our performance goal.
By default, @OneToMany associations are LAZY in Hibernate. This means that our documents are retrieved only with an explicit call like car.getDocuments(). By setting the relationship as EAGER, we are asking hibernate to retrieve the documents every time we retrieve a car. As explained at the beginning of this article, we always want to display cars and documents together. We are also adding cascade = cascadeType.ALL to propagate changes from Car to Document entities. Creating, updating or deleting a car will impact all related Documents.
Car.java
@OneToMany(mappedBy = "car", cascade = CascadeType.ALL, fetch = FetchType.EAGER)
@Cache(usage = CacheConcurrencyStrategy.NONSTRICT_READ_WRITE)
private Set<Document> documents = new HashSet<>();
By default, @OneToOne relations are EAGER. We don't want to retrieve content everytime we retrieve a document. Why? Simply because the Content entity handles a Blob that we should load only when needed, for performance issues of course. So we have to set the relation as LAZY. We also add a Jackson annotation, @JsonIgnore to prevent a possible lazy loading during deserialization. As above, adopt a cascadeType.ALL strategy.
Document.java
@OneToOne(fetch = FetchType.LAZY, cascade = CascadeType.ALL)
@JoinColumn(unique = true)
@JsonIgnore
private Content content;
In the same entity, we also add two new methods addContent() and retrieveContent(). They are wrapper methods to ensure that the Content entity is only handled by the Document one. The Document becomes the only way to access the byte array field and we also can remove Content accessors since they become useless.
public void addContent(byte[] data) {
    Content content = new Content();
    content.setData(data);
    content.setDataContentType("not-used"); // the field is generated by JHipster but redundant in our case, we can delete it later
    this.content = content;
}
public byte[] retrieveContent(){
    return content.getData();
}
Add a multipart endpoint to save a Car with documents
Add a new class mapper in service/mapper to map MultiPartFiles to Document entities. We can see that we call addContent() to map multipart file binaries to our Content entity.
DocumentMapper.java
package io.github.jhipster.application.service.mapper;

import java.io.IOException;
import java.util.List;
import java.util.Set;
import java.util.stream.Collectors;

import org.slf4j.Logger;
import org.slf4j.LoggerFactory;
import org.springframework.stereotype.Service;
import org.springframework.web.multipart.MultipartFile;

import io.github.jhipster.application.domain.Document;

@Service
public class DocumentMapper {
   private final Logger log = LoggerFactory.getLogger(DocumentMapper.class);
   public Set<Document> multiPartFilesToDocuments(List<MultipartFile> files){
       return files.stream()
           .map((this::multiPartFileToDocument))
           .collect(Collectors.toSet());
   }

   public Document multiPartFileToDocument(MultipartFile file) {
       Document document = new Document();
       document.setTitle(file.getOriginalFilename());
       document.setSize(file.getSize());
       document.setMimeType(file.getContentType());
       try {
           document.addContent(file.getBytes());
       } catch (IOException e) {
           log.error(e.getMessage());
       }

       return document;
   }
}
In the web.rest folder, JHipster has generated a CarResource.java file. Open it and add a new method createCar() - POST /v2/cars. It will be useful for sending our future form with one call.
CarResource.java
private final DocumentMapper documentMapper;

public CarResource(CarRepository carRepository, DocumentMapper documentMapper) {
   this.carRepository = carRepository;
   this.documentMapper = documentMapper;
}
[...]

@PostMapping("/v2/cars")
@Timed
public ResponseEntity<Car> createCar(@Valid @RequestPart Car car, @RequestPart List<MultipartFile> files) throws URISyntaxException, IOException {
   log.debug("REST request to save Car : {}", car);
   if (car.getId() != null) {
       throw new BadRequestAlertException("A new car cannot already have an ID", ENTITY_NAME, "idexists");
   }

   Set<Document> documents = documentMapper.multiPartFilesToDocuments(files);
   documents.forEach(car::addDocument);

   Car result = carRepository.save(car);
   return ResponseEntity.created(new URI("/api/cars/" + result.getId()))
       .headers(HeaderUtil.createEntityCreationAlert(ENTITY_NAME, result.getId().toString()))
       .body(result);
}
Fix the CarResourceIntTest.java file by adding the DocumentMapper in the constructor.
CarResourceIntTest.java
   @Autowired
   private DocumentMapper documentMapper;
   [...]
   @Before
   public void setup() {
       MockitoAnnotations.initMocks(this);
       final CarResource carResource = new CarResource(carRepository, documentMapper);
   [...]

   }
Add code to download the content document
We can add a new car and its documents and retrieve the car list with their documents, but how do we download the content?
As we did above, the Content entity has a lazy fetching strategy, so we have to force the fetch by adding a new method in the Document repository. To do this, we are using @EntityGraph from Spring Data JPA. To learn more about this: Boost the performance of your spring data jpa application.
DocumentRepository.java
@EntityGraph(attributePaths = "content")
Optional<Document> findOneById(Long id);
In the web.rest.errors package, add a new exception to handle when a document is not found.
DocumentNotFoundException.java
package io.github.jhipster.application.web.rest.errors;

import org.zalando.problem.AbstractThrowableProblem;
import org.zalando.problem.Status;

public class DocumentNotFoundException extends AbstractThrowableProblem {

   private static final long serialVersionUID = 1L;
   public DocumentNotFoundException() {
       super(null, "Document not found", Status.NOT_FOUND);
   }
}
We said that the Content entity is hidden for other elements than Document, so add a new endpoint in the Document resource to download the content.
DocumentResource.java
@GetMapping("/documents/{id}/$content")
@Timed
public ResponseEntity<byte[]> getDocumentContent(@PathVariable Long id) {
   Document document = documentRepository.findOneById(id)
       .orElseThrow(DocumentNotFoundException::new);

   return ResponseEntity.ok()
       .contentType(MediaType.parseMediaType(document.getMimeType()))
       .header(HttpHeaders.CONTENT_DISPOSITION, "attachment; filename=\"" + document.getTitle() + "\"")
       .body(document.retrieveContent());
}
Frontend
When we imported the JDL model, JHipster also created the Angular code to have all the CRUD actions for each entity. All entities can be found in the webapp/app/entities folder.
Because we want the car to handle documents, we will add uploading and downloading features in the related views.
Install dependencies
We have to add the file-saver library. File-saver will easily allow us to save our documents to the file system. Open a terminal in your project folder and type:
npm install file-saver --save
npm install @types/file-saver --save-dev
Add file upload when creating a new car
In the service, add a new method to call the multipart car endpoint.
car.service.ts
public resourceUrlV2 = SERVER_API_URL + 'api/v2/cars';

[...]

createV2(car: ICar, files: FileList): Observable<EntityResponseType> {
   const carMultipartFormParam = 'car';
   const filesMultipartFormParam = 'files';
   const formData: FormData = new FormData();
   const carAsJsonBlob: Blob = new Blob([JSON.stringify(car)], {type: 'application/json'});

   formData.append(carMultipartFormParam, carAsJsonBlob);
   for (let i = 0; i < files.length; i++) {
       formData.append(filesMultipartFormParam, files.item(i));
   }

   return this.http.post<ICar>(this.resourceUrlV2, formData, { observe: 'response' });
}
In the update view, add a new multiple upload field in the car create/update form.
car-update.component.html
<div class="form-group">
   <label class="form-control-label" for="field_model">Model</label>
   [...]
   <input type="file" (change)="handleFileInput($event.target.files)" id="documents" multiple/>
</div>
In the controller, modify the save method to call the createV2() method when saving a new car.
car-update.component.ts
files: FileList;

constructor(private carService: CarService, private activatedRoute: ActivatedRoute) {}
[...]

handleFileInput(files: FileList) {
   this.files = files;
}

save() {
   this.isSaving = true;
   if (this.car.id !== undefined) {
       this.subscribeToSaveResponse(this.carService.update(this.car));
   } else {
       this.subscribeToSaveResponse(this.carService.createV2(this.car, this.files));
   }
}
Then update the test class by adding FileList and spy the right method.
car-update.component.spec.ts
it(
   'Should call create service on save for new entity',
   fakeAsync(() => {
       // GIVEN
       const entity = new Car();
       const files = {} as FileList;
       spyOn(service, 'createV2').and.returnValue(of(new HttpResponse({ body: entity })));
       comp.car = entity;
       comp.files = files;
       // WHEN
       comp.save();
       tick(); // simulate async

       // THEN
       expect(service.createV2).toHaveBeenCalledWith(entity, files);
       expect(comp.isSaving).toEqual(false);
   })
);
Add file download when reading a car
In the Document service, add a new method to download the content.
document.service.ts
export class DocumentService {
   [...]
   download(id: number): Observable<Blob> {
       return this.http.get(`${this.resourceUrl}/${id}/$content`, { responseType: 'blob' });
   }
}
In the car-detail view, add a link for each document and add a click event to download it.
car-detail.component.html
<div *ngIf="car">
   [...]
   <dl class="row-md jh-entity-details" *ngFor="let document of car.documents">
       <dt>
           <span>
               <a (click)="downloadDocument(document)"></a>
           </span>
       </dt>
   </dl>
   [...]
</div>
Finally add a downloadDocument() method in the car-detail controller and use the FileSave library.
car-detail.component.ts
import * as FileSaver from 'file-saver';

export class CarDetailComponent implements OnInit {
   car: ICar;

   constructor(private activatedRoute: ActivatedRoute,
               private documentService: DocumentService) {
   }
   [...]
   downloadDocument(document: IDocument) {
       this.documentService.download(document.id).subscribe(file => {
           FileSaver.saveAs(file, document.title);
       });
   }
}
Start the application
JHipster provides all you need to start our application. According to the README.md file, generated in your project folder, you have to open a terminal and type:
./mvnw
After a moment our application is running:
----------------------------------------------------------
        Application 'documentCar' is running! Access URLs:
        Local:          http://localhost:8080/
        External:       http://192.168.43.52:8080/
        Profile(s):     [dev, swagger]
----------------------------------------------------------
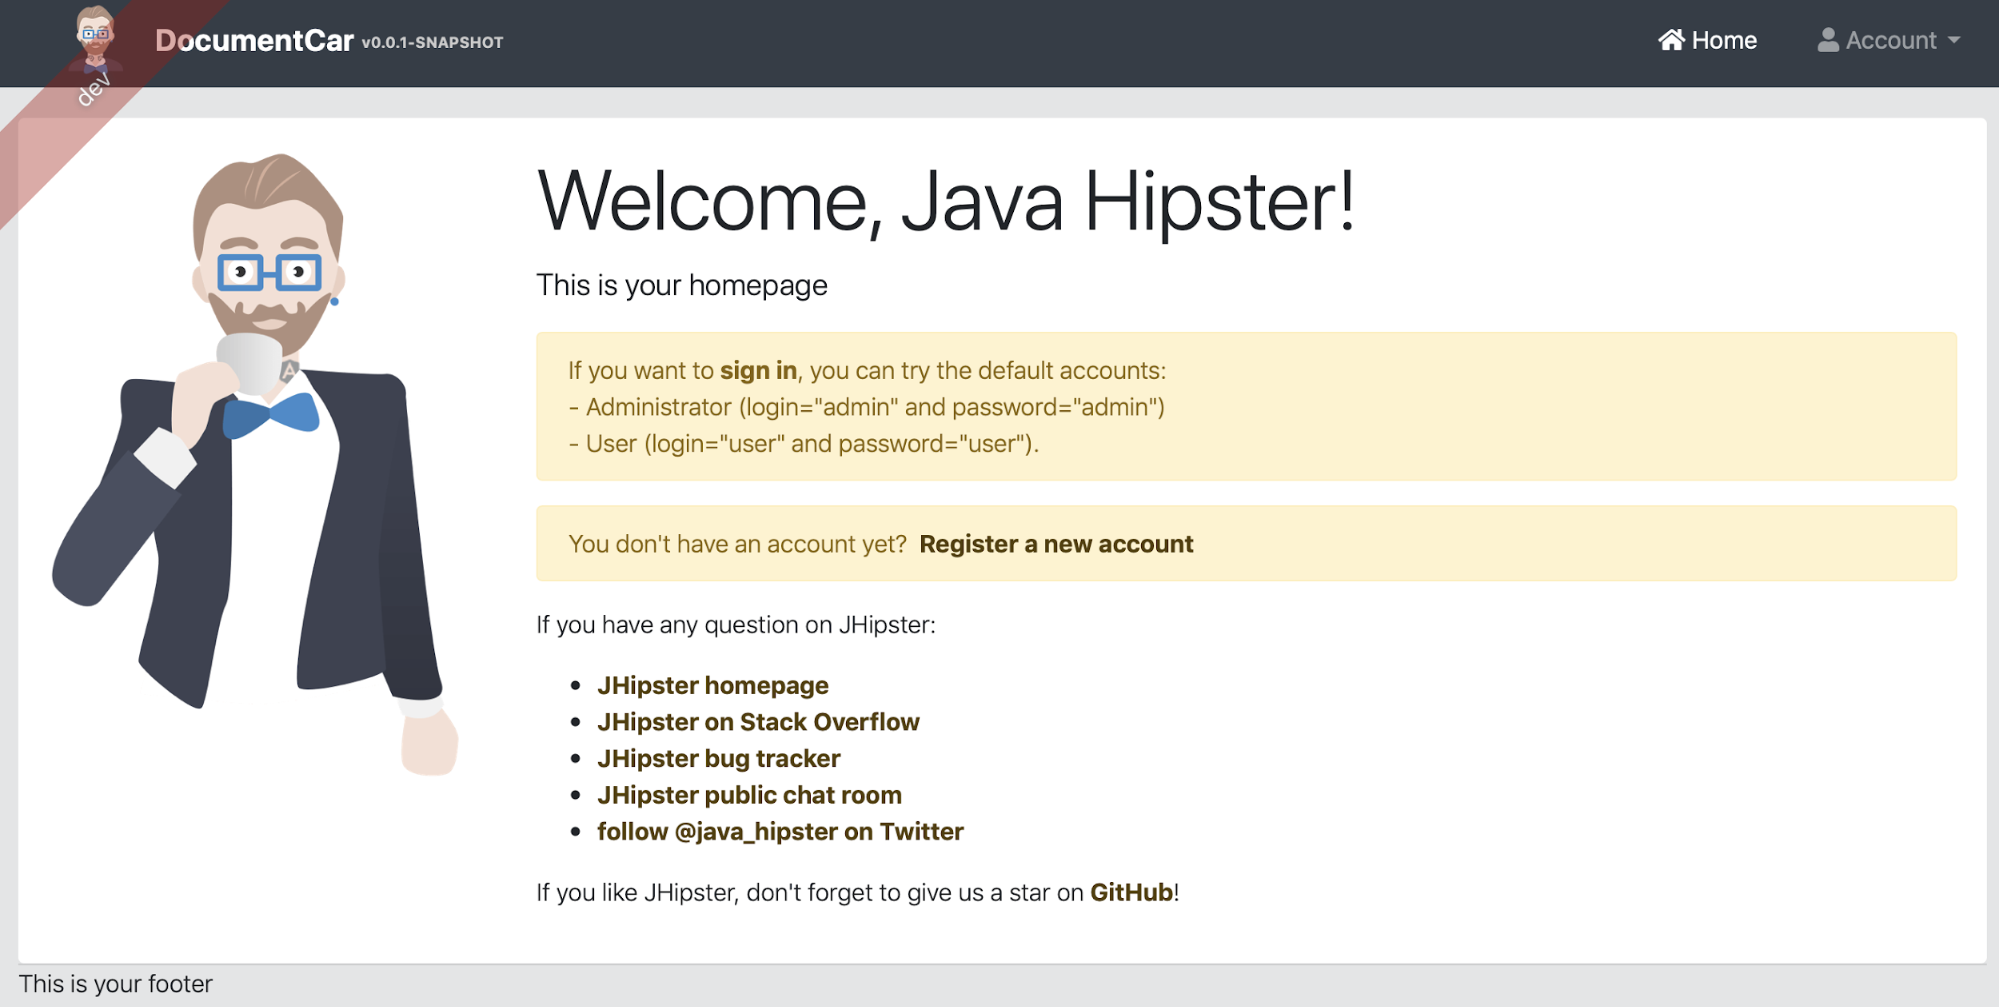
Congratulations, Hipster, your application is running!
Create a new car with documents
After logging into the application, you can access the menu "entities".
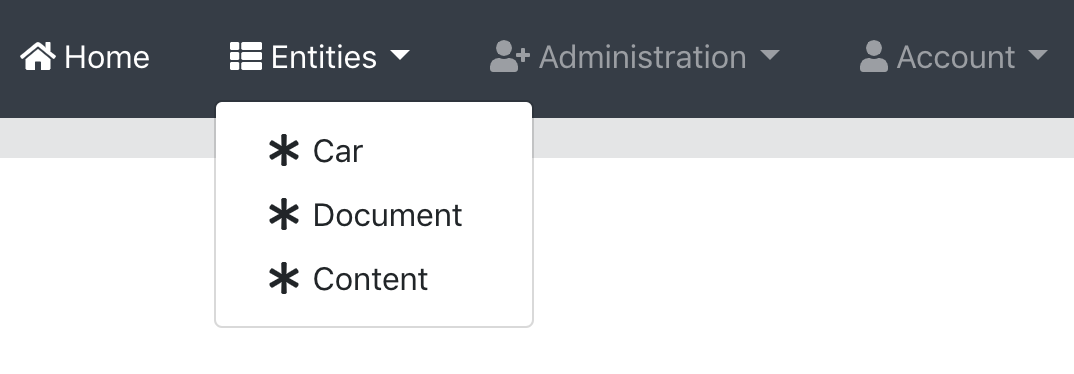
Click in the car menu to access all the cars where you can create, edit/view and of course delete a car. Because we want the car to be the only entry point to manage our documents, we will ignore Document and Content entities.

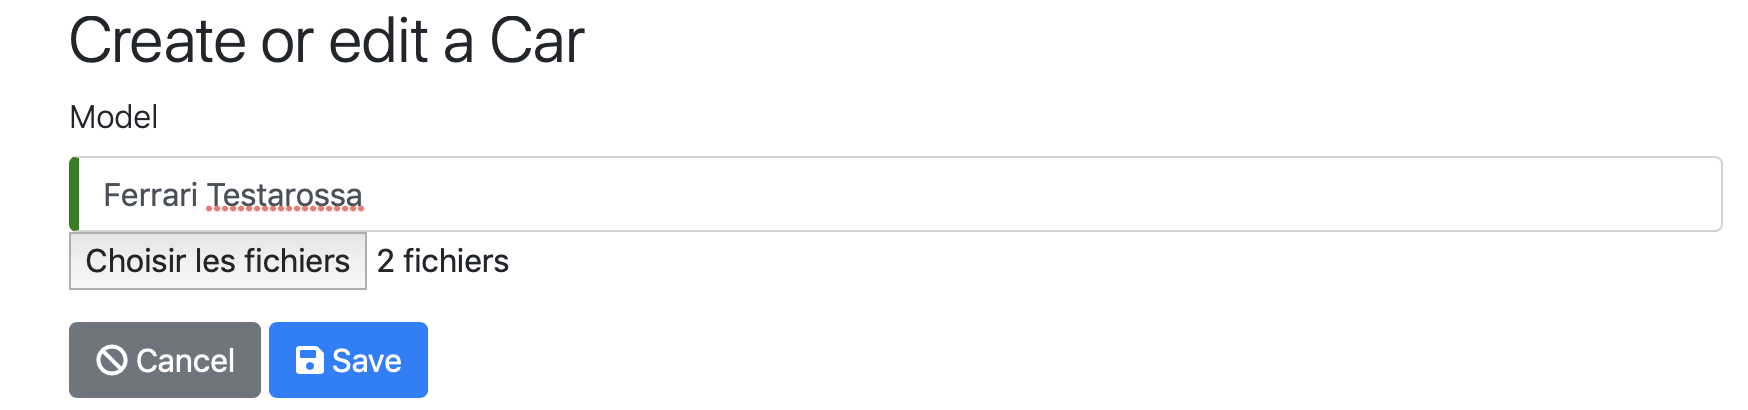
Then click on the "Create new Car button", fill in the form and save.
You will be redirected to the list where you can see the newly created car.

By clicking on the "View" button, we are able to validate all the acceptance criteria by looking at the SQL logs.
select car0_.id as id1_0_, car0_.model as model2_0_ from car car0_
select documents0_.car_id as car_id5_2_0_, documents0_.id as id1_2_0_, documents0_.id as id1_2_1_, documents0_.car_id as car_id5_2_1_, documents0_.content_id as content_6_2_1_, documents0_.mime_type as mime_typ2_2_1_, documents0_.jhi_size as jhi_size3_2_1_, documents0_.title as title4_2_1_ from document documents0_ where documents0_.car_id=?
As you can see, the Content table is not requested and we have not loaded the binaries as expected. If we do it twice, we can see that there are no more SQL logs because JHipster has already set a cache for us and all cars and documents are loaded from it.
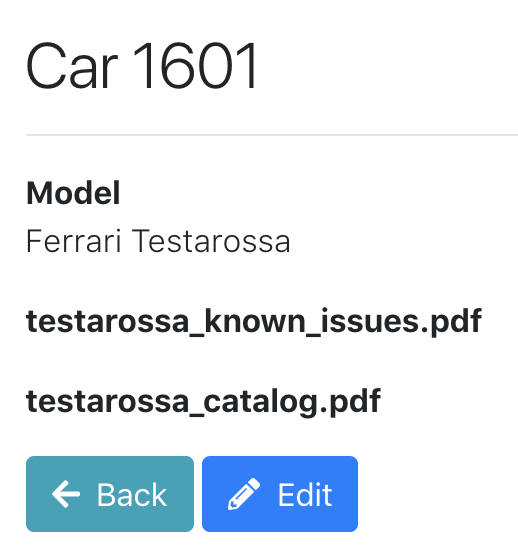
Download the content
When we clicked on the "View" button, we saw the car model and the documents. By clicking on the document name, we should be able to download them.
What about SQL logs now?
select document0_.id as id1_2_0_, content1_.id as id1_1_1_, document0_.car_id as car_id5_2_0_, document0_.content_id as content_6_2_0_, document0_.mime_type as mime_typ2_2_0_, document0_.jhi_size as jhi_size3_2_0_, document0_.title as title4_2_0_, content1_.data as data2_1_1_, content1_.data_content_type as data_con3_1_1_ from document document0_ left outer join content content1_ on document0_.content_id=content1_.id where document0_.id=?
Document and Content tables are requested as expected. The cache is not used here and the SQL request is sent for every call.
Run with Docker in production mode
JHipster will make this step easier than expected as the generated application already comes with Docker and Docker Compose configurations. Beware! To complete this step you need Docker running on your computer.
Shutdown your local application instance, open a terminal in the main application folder, and build a Docker image for the application.
./mvnw package -Pprod verify jib:dockerBuild
Then start the application with docker-compose.
docker-compose -f src/main/docker/app.yml up
And that's all, you can now play with your application by adding cars and documents, and of course downloading them.
Going Further
What to do next?
Learn more about performance tests with Gatling, end-to-end tests with Protractor or simply unit tests for both frontend and backend. All these kinds of tests are handled by JHipster and you can read more about it here: https://www.jhipster.tech/running-tests.
Clean up the unnecessary code (an important part of Content and Document) and tests related to that. We should also use DTOs instead of directly using entities in the Web Resource layer.
And by the way, you can set up your continuous integration with a JHipster sub-generator as explained here: https://www.jhipster.tech/setting-up-ci.
Conclusion
In this article, we have generated an application, a model, pushed them to a GitHub repository, generated all classes, configurations, unit tests etc. We also coded a little to fine tune the generated application to fulfill our customer's needs. Finally, we were able to run it in production mode with Docker and all the configuration brought by Jhipster.
JHipster brings us all the things we need to start our project quickly and run it in both development and production mode. Also the philosophy around JHipster is to bring to the developer the good practices and an efficient bootstrapped application, and this can be verified with this use case.
Now your application is production ready, take a break and drink coffee like a real hipster.
All feedback is appreciated, feel free to contribute to the JHipster project! Thank you for reading this article and, I hope to see you next time for a new adventure with JHipster!
Resources
JHipster: http://jhipster.tech
JHipster-online: https://start.jhipster.tech
FileSaver: https://www.npmjs.com/package/file-saver
My Document Car project on GitHub: https://github.com/avdev4j/document-car-mysql


Comments