
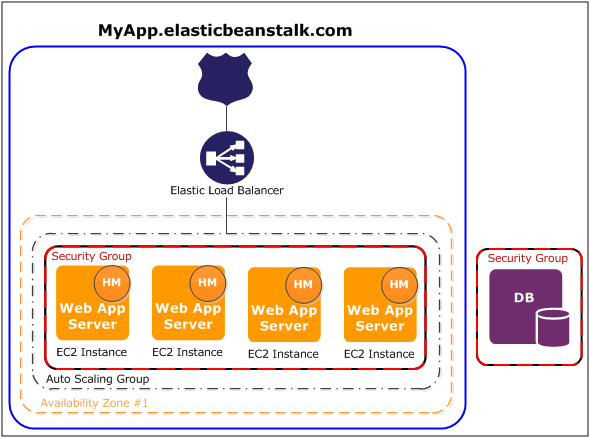
In this blog, I will focus on AWS and its orchestration service: Elastic Beanstalk. While specifics about the Elastic Beanstalk service can be read elsewhere, all that is important to note at this time is that it helps you create a production-ready infrastructure in the default architecture below:
App generation with JHipster
Fortunately, the newest versions of JHipster feature an Elastic Beanstalk sub-generator which will do most of the heavy-lifting for us. It does currently only support SQL databases (Oracle and Microsoft SQL Server excluded) so our JHipster app will be a basic monolith that uses React and PostgreSQL as a database. To avoid answering all the generator's questions manually, feel free to utilize the following .yo-rc.json with our proposed setup:
{
  "generator-jhipster": {
    "promptValues": {
      "packageName": "com.company",
      "nativeLanguage": "en"
    },
    "jhipsterVersion": "6.4.1",
    "applicationType": "monolith",
    "baseName": "jhipster",
    "packageName": "com.company",
    "packageFolder": "com/company",
    "serverPort": "8080",
    "authenticationType": "jwt",
    "cacheProvider": "ehcache",
    "enableHibernateCache": true,
    "websocket": false,
    "databaseType": "sql",
    "devDatabaseType": "h2Disk",
    "prodDatabaseType": "postgresql",
    "searchEngine": false,
    "messageBroker": false,
    "serviceDiscoveryType": false,
    "buildTool": "maven",
    "enableSwaggerCodegen": false,
    "embeddableLaunchScript": false,
    "useSass": true,
    "clientPackageManager": "npm",
    "clientFramework": "react",
    "clientTheme": "none",
    "clientThemeVariant": "",
    "testFrameworks": [],
    "jhiPrefix": "jhi",
    "entitySuffix": "",
    "dtoSuffix": "DTO",
    "otherModules": [],
    "enableTranslation": true,
    "nativeLanguage": "en",
    "languages": [
      "en"
    ],
    "blueprints": []
  }
}
Deployment to AWS with Elastic Beanstalk
First deployment
First, make sure that your AWS CLI is correctly configured and the account must have the AWSElasticBeanstalkFullAccess policy. If you use a named profile different than default, you just have to set the environment variable AWS_PROFILE with the correct profile.
The command jhipster aws will ask questions about the AWS deployment:
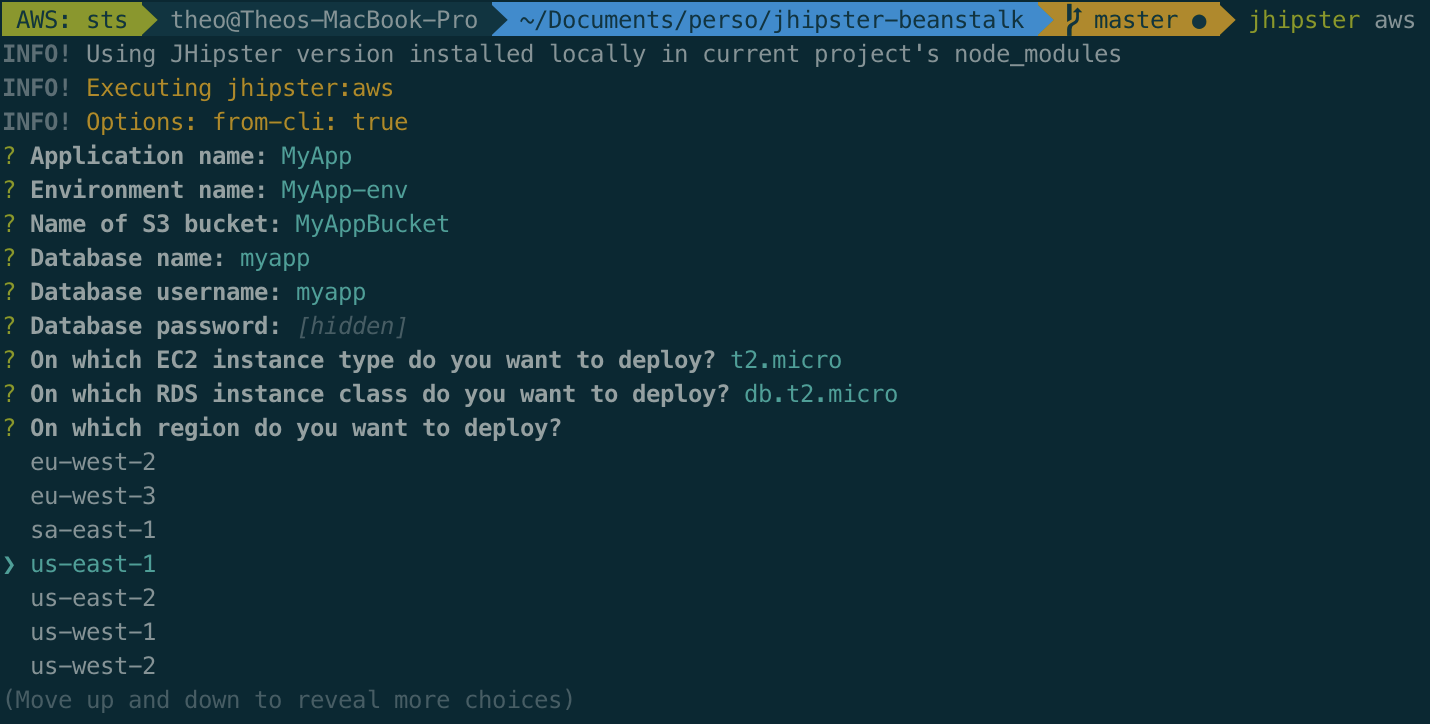
The AWS account used needs access to the S3 bucket since it will be used as a storage location for the application's Jars. The sub-generator will also create a RDS instance so make sure that the database credentials are correct and match the ones in application-prod.yml located in the root of your JHipster app. The application will always be packaged using the prod profile, which focuses on performance and scalability. Elastic Beanstalk requires a war and the sub-generator produces it with the command ./mvnw -ntp verify -DskipTests=true -B -Pwar,prod. I recommend running ./mvnw clean verify before in order to run the tests and make sure that everything is ready to go to production.
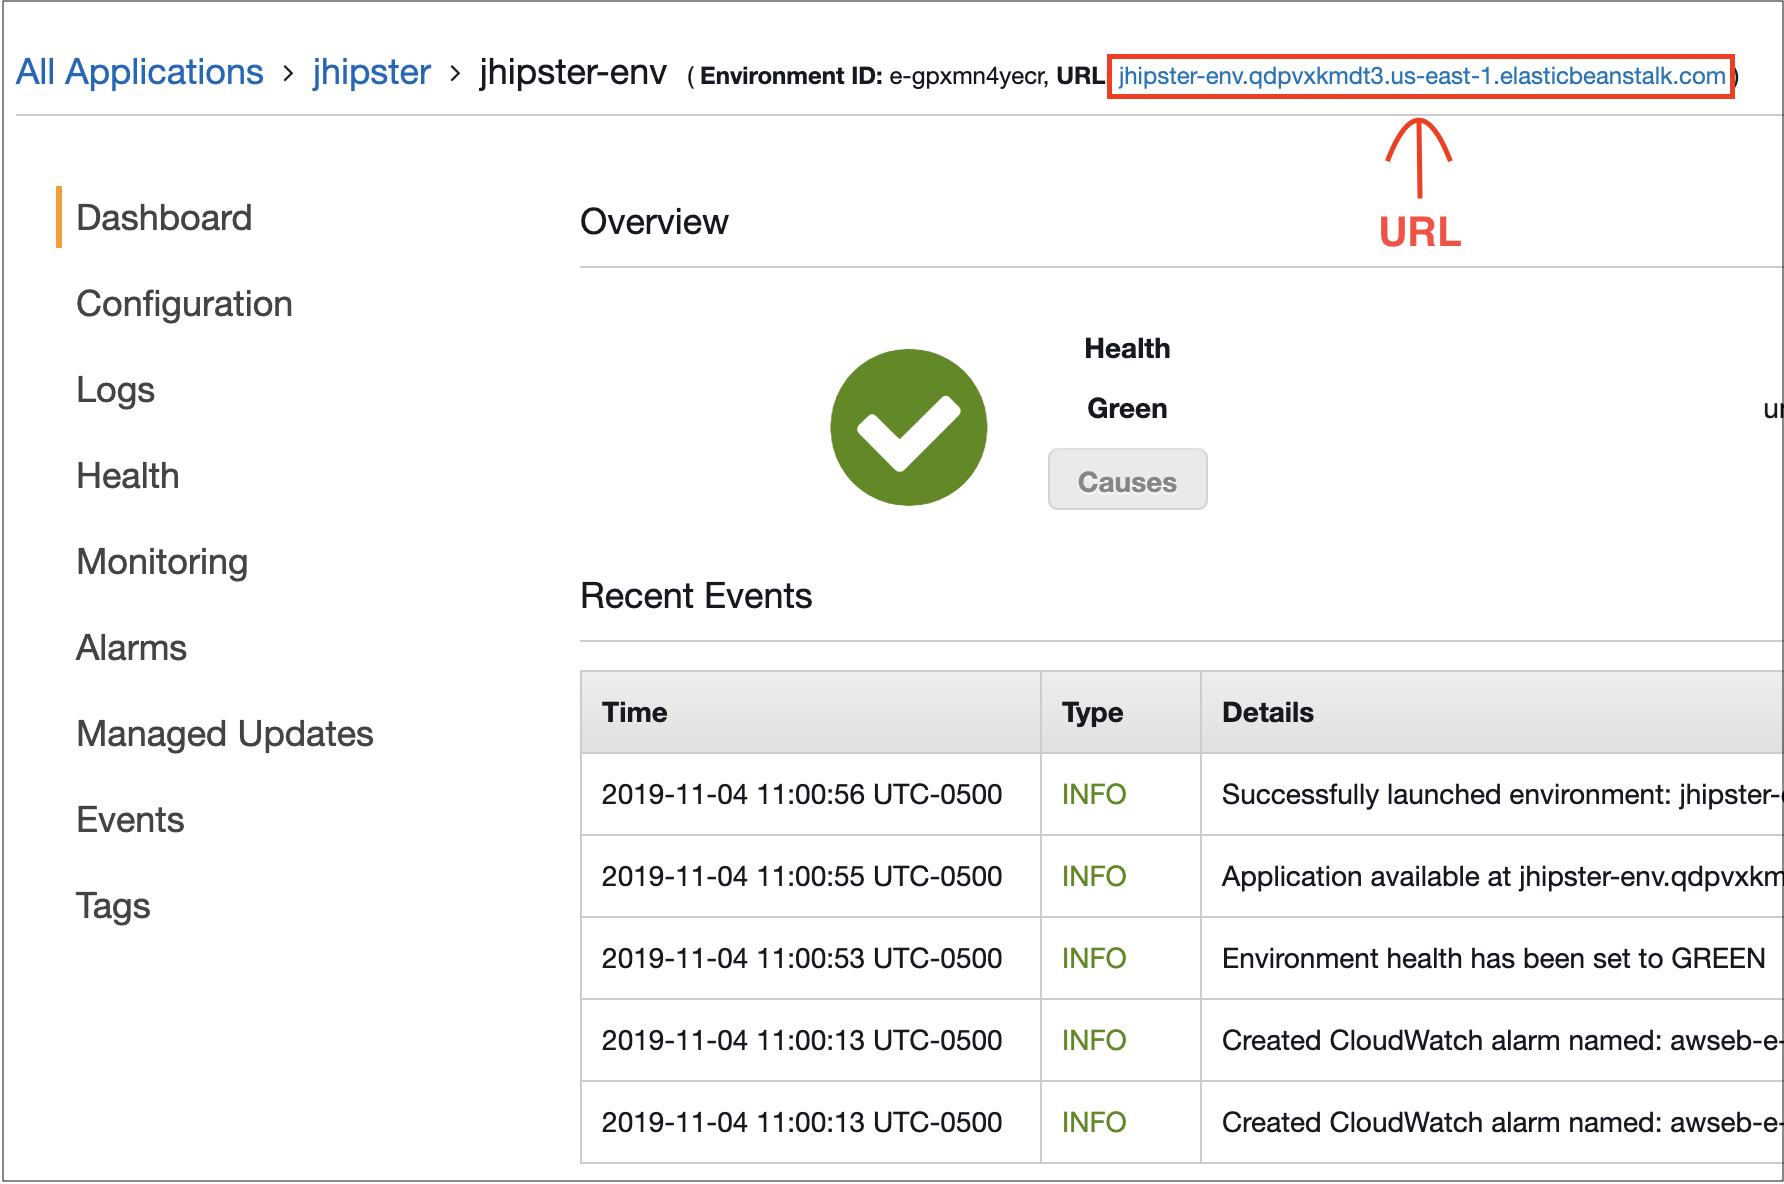
Once the Elastic Beanstalk application is created, navigate to the Elastic Beanstalk console to view the details of the application. Use the public URL to check that everything was correctly deployed and running.
If the deployment failed, the "Logs" tab on the left can be used to view all the logs of the application. For JHipster-specific issues, the logs from /var/log/tomcat8/catalina.out should be used to find out why the application did not start.
Application updates
Updating the application is pretty simple, it is done just by running jhipster aws again. The sub-generator knows that there is already a Beanstalk environment and will simply update the application's code with the new version. But remember, the sub-generator will package the application every time, which means that any local changes or features currently being tested will be included in the deployment. Also, the application will experience a small bit of downtime because it has to restart for the new version to be reflected (I explain how to avoid that later in this blog).
It is also possible to update the application by manually upload a war or choosing a version from the "Application versions" tab. That is very useful if for example you want to deploy a previous version.
Elastic Beanstalk Application Improvements
By default, your Elastic Beanstalk application uses a classic load balancer with auto-scaling up to 4 instances. The default configuration is enough for demo purposes, but if you expect heavier traffic update the configuration for more instances. Also, it might be a better idea to set the scaling trigger to the CPUUtilization metric instead of NetworkOut.
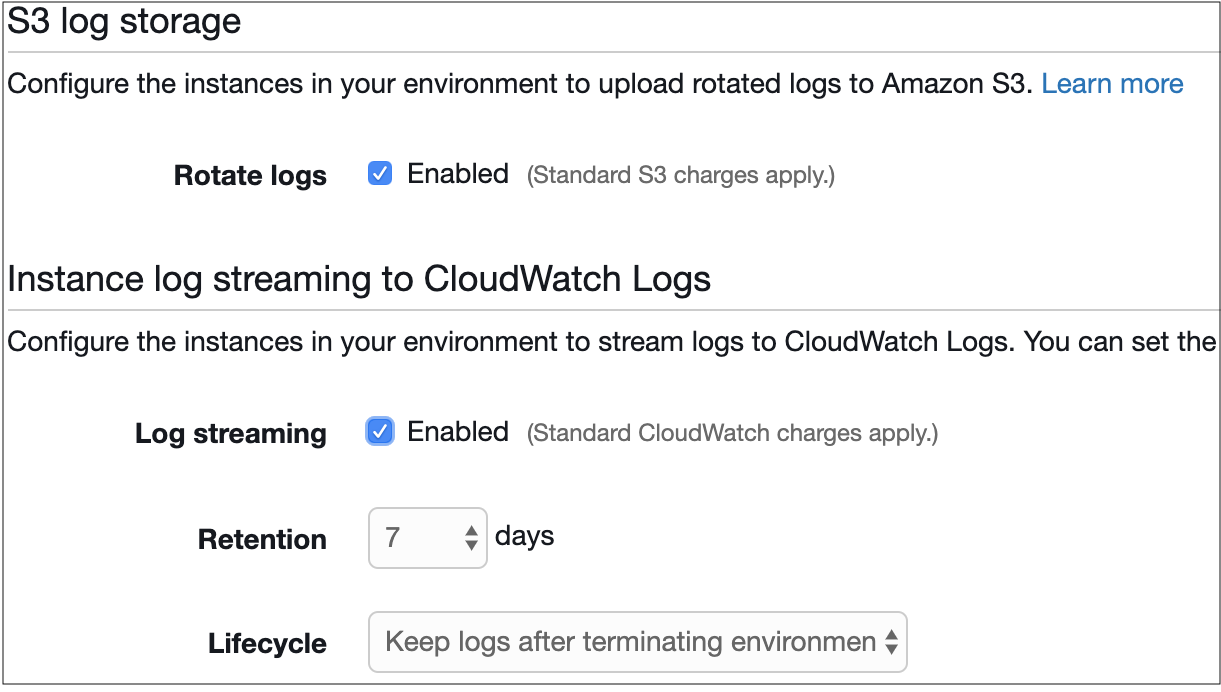
Another good practice is to enable S3 log storage or CloudWatch Logs in Configuration > Software of the Elastic Beanstalk console. It is always a good idea to have a strong log retention policy with a production application in order to track faulty/suspicious behavior.
The Rolling updates and deployments configuration should also be changed, especially if the application cannot have any interruptions and must remain highly available. More details can be found on the AWS documentation page.
Conclusion
Elastic Beanstalk saves you a lot of time and removes all the complexity of creating a production ready infrastructure from scratch. The JHipster AWS sub-generator is easy to use and will let you create your Elastic Beanstalk environment in few steps by using just one command: jhipster aws.
Here is an overview of which services Elastic Beanstalk and the JHipster sub-generator setup for you:
- A fleet of EC2s with Tomcat to run the JHipster application
- A classic load balancer to access the application
- An auto-scaling policy to handle high traffic
- A RDS instance
- A S3 bucket to store the application's artifact
Since the sub-generator uses a default Beanstalk configuration, I recommended tweaking it a little bit to fulfill your production requirements.


Comments